DENNIS ZOVKO — TECHNICAL PORTFOLIO
Clear thinking.
Capable hands.
Practical technical problem-solving shaped by broad experience, curiosity and a willingness to learn. Combining hands-on capability with emerging technology to find workable solutions.
CAPABILITY INDEX / 01—04
01
SOLVED
Field & technical
02
DESIGNED
Design & fabrication
03
FLOWN
Drone systems
04
ADAPTED
Digital & emerging technology
DIFFERENT TOOLS. ONE PRACTICAL APPROACH
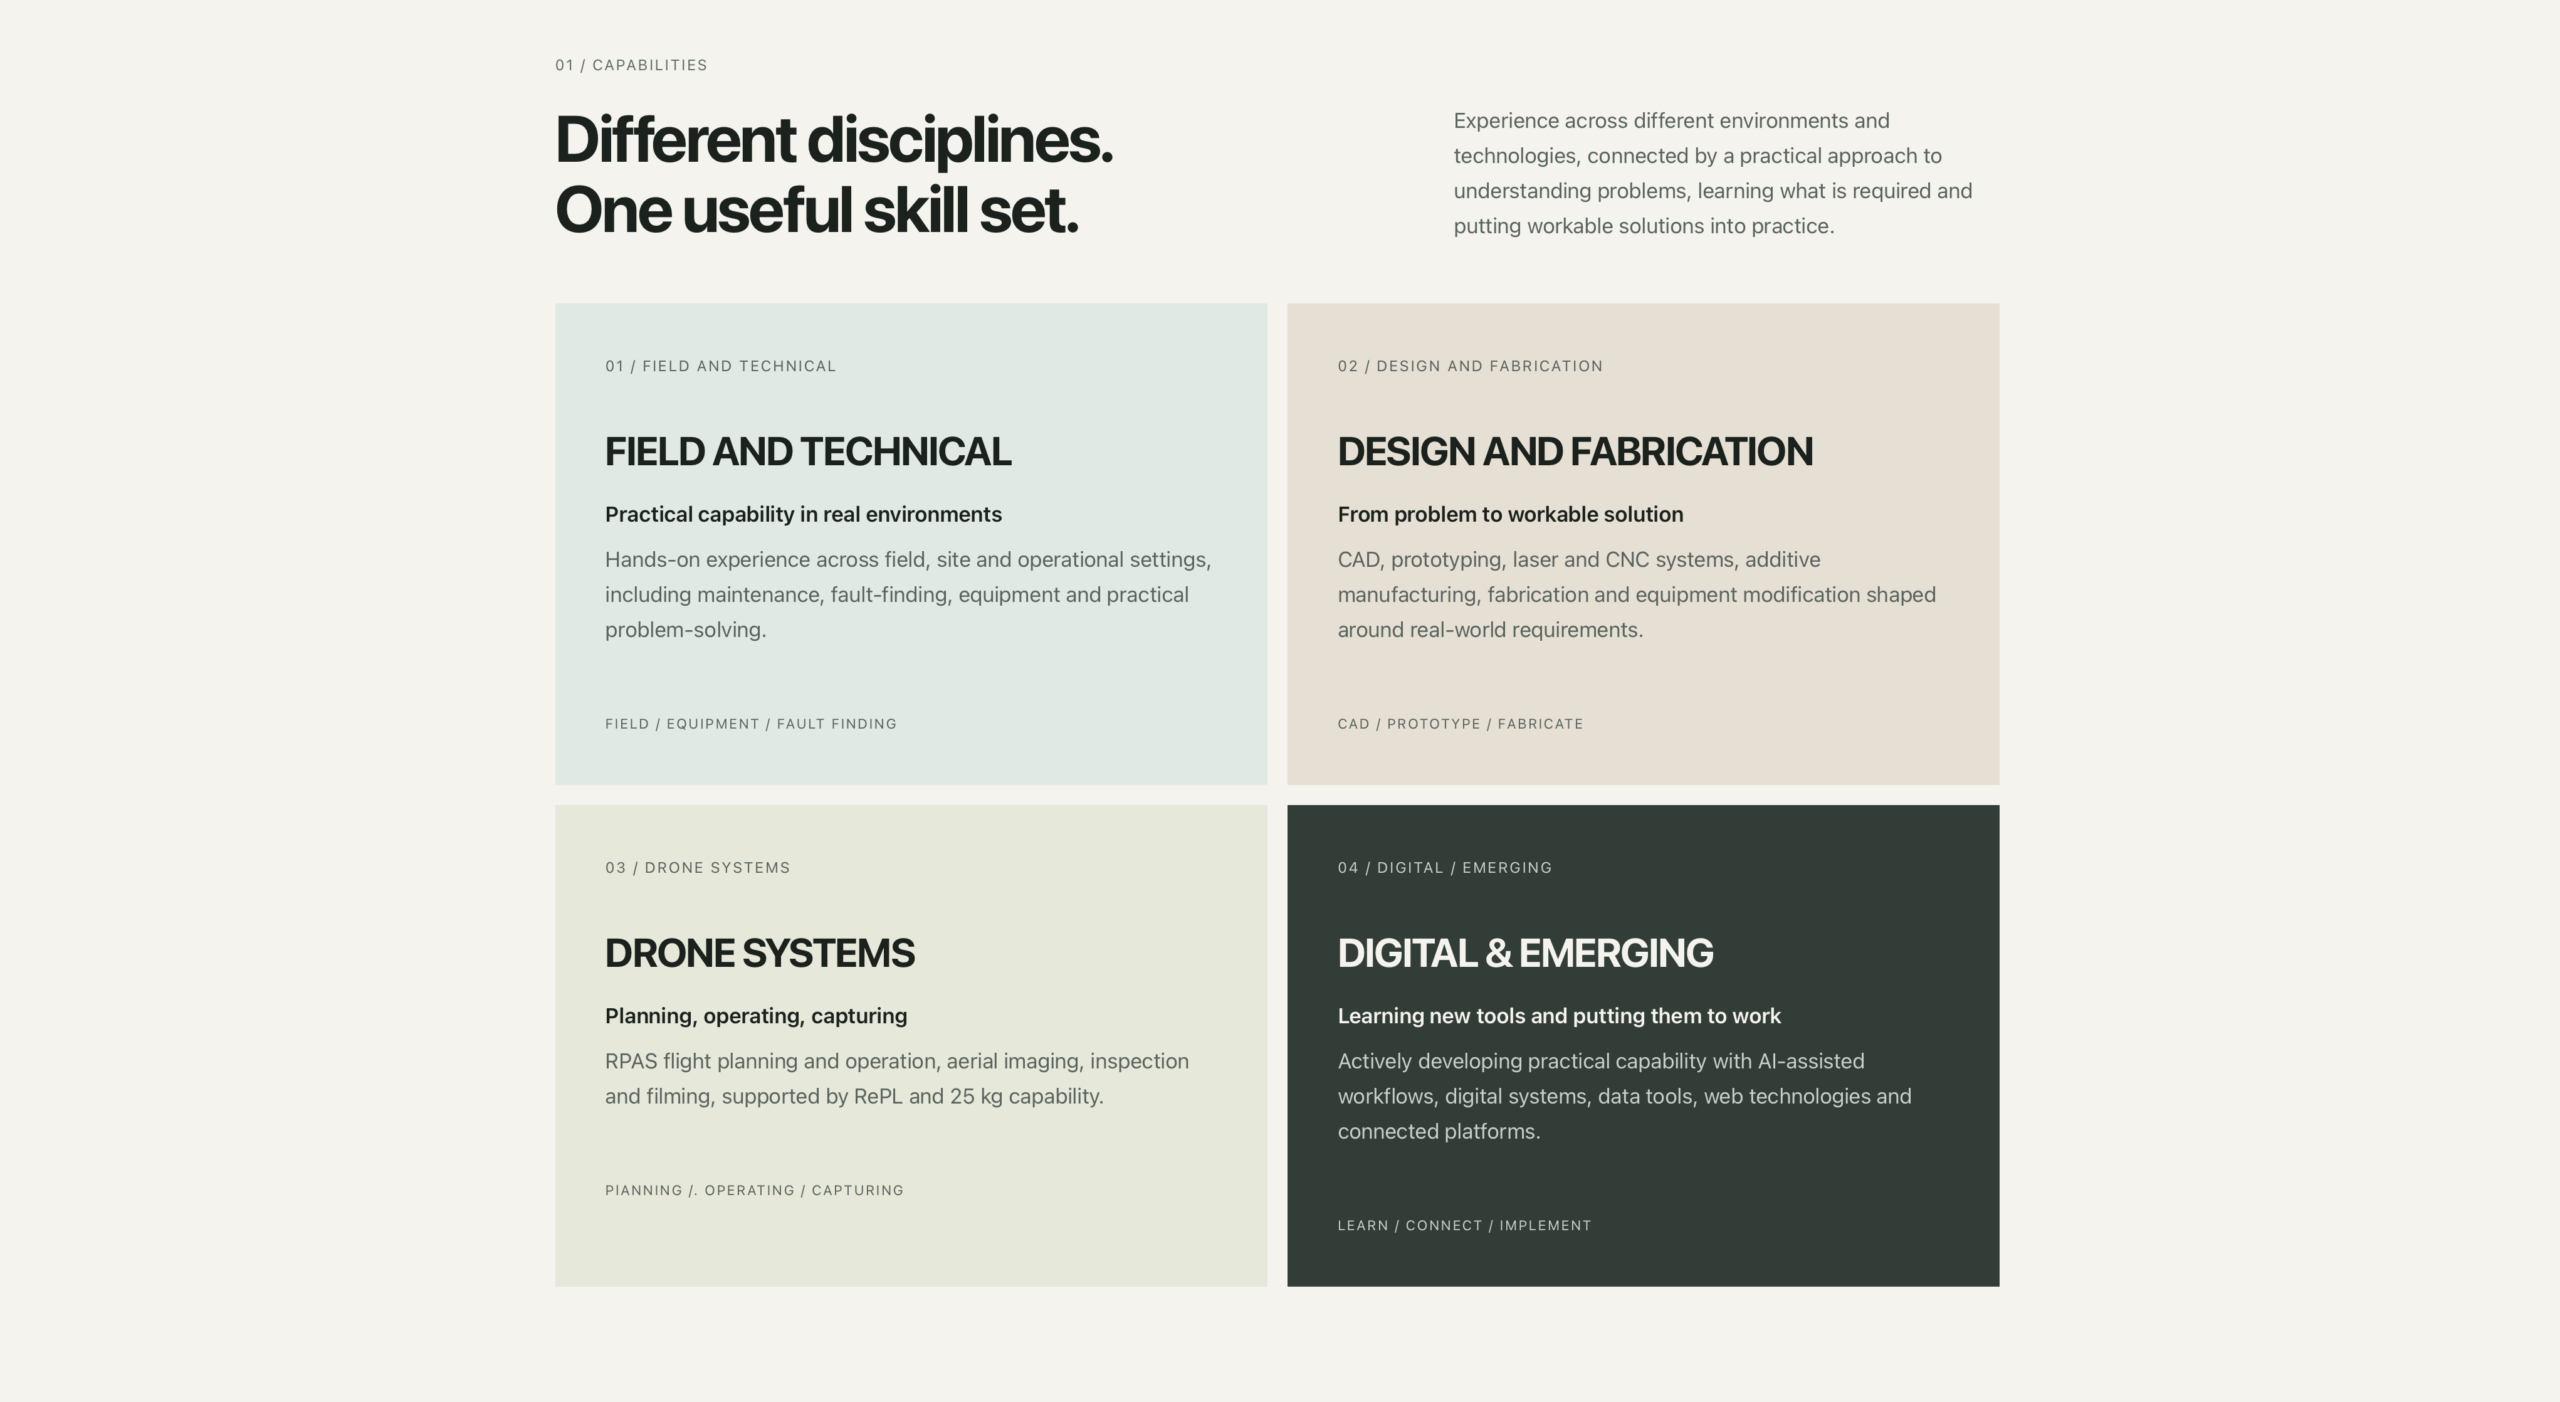
01 / CAPABILITIES
Different disciplines.
One useful skill set.
Experience across different environments and technologies, connected by a practical approach to understanding problems, learning what is required and putting workable solutions into practice.
01 / FIELD AND TECHNICAL
FIELD AND TECHNICAL
Practical capability in real environments
Hands-on experience across field, site and operational settings, including maintenance, fault-finding, equipment and practical problem-solving.
FIELD / EQUIPMENT / FAULT FINDING

02 / DESIGN AND FABRICATION
DESIGN AND FABRICATION
From problem to workable solution
CAD, prototyping, laser and CNC systems, additive manufacturing, fabrication and equipment modification shaped around real-world requirements.
CAD / PROTOTYPE / FABRICATE
03 / DRONE SYSTEMS
DRONE SYSTEMS
Planning, operating, capturing
RPAS flight planning and operation, aerial imaging, inspection and filming, supported by RePL and 25 kg capability.
PLANNING / OPERATING / CAPTURING
04 / DIGITAL / EMERGING
DIGITAL & EMERGING
Learning new tools and putting them to work
Actively developing practical capability with AI-assisted workflows, digital systems, data tools, web technologies and connected platforms.
LEARN / CONNECT / IMPLEMENT

INTERACTIVE EXPERIENCE / 01
EXPERIENCE ISN'T LINEAR.
EXPLORE THE CONNECTIONS.
Traditional résumés organise experience by job title and date. But skills and knowledge develop across different environments, often connecting in unexpected ways.
This interactive résumé offers another way to explore those connections, linking professional experience with the projects and practical work behind it.
03 / SELECTED WORK
Problems solved.
Things built.
A few examples of real-world work across different disciplines.
COMMERCIAL FIELD WORK / TECHNOLOGY + INSTALLATION
The finished installation is only the part people see.
For nearly three years, I was the sole field installer covering the Rockingham-to-Bunbury territory for RMG/Gush, completing more than 200 commercial technology assignments. The work involved coordinating directly with sites, interpreting technical documentation, installing and integrating equipment, troubleshooting problems in the field, testing systems and documenting each job through to completion.
200+
COMMERCIAL FIELD ASSIGNMENTS
NEARLY 3 YEARS
FIELD TECHNOLOGY EXPERIENCE
ROCKINGHAM → BUNBURY
FIELD TERRITORY
01 / THE FINISHED RESULT
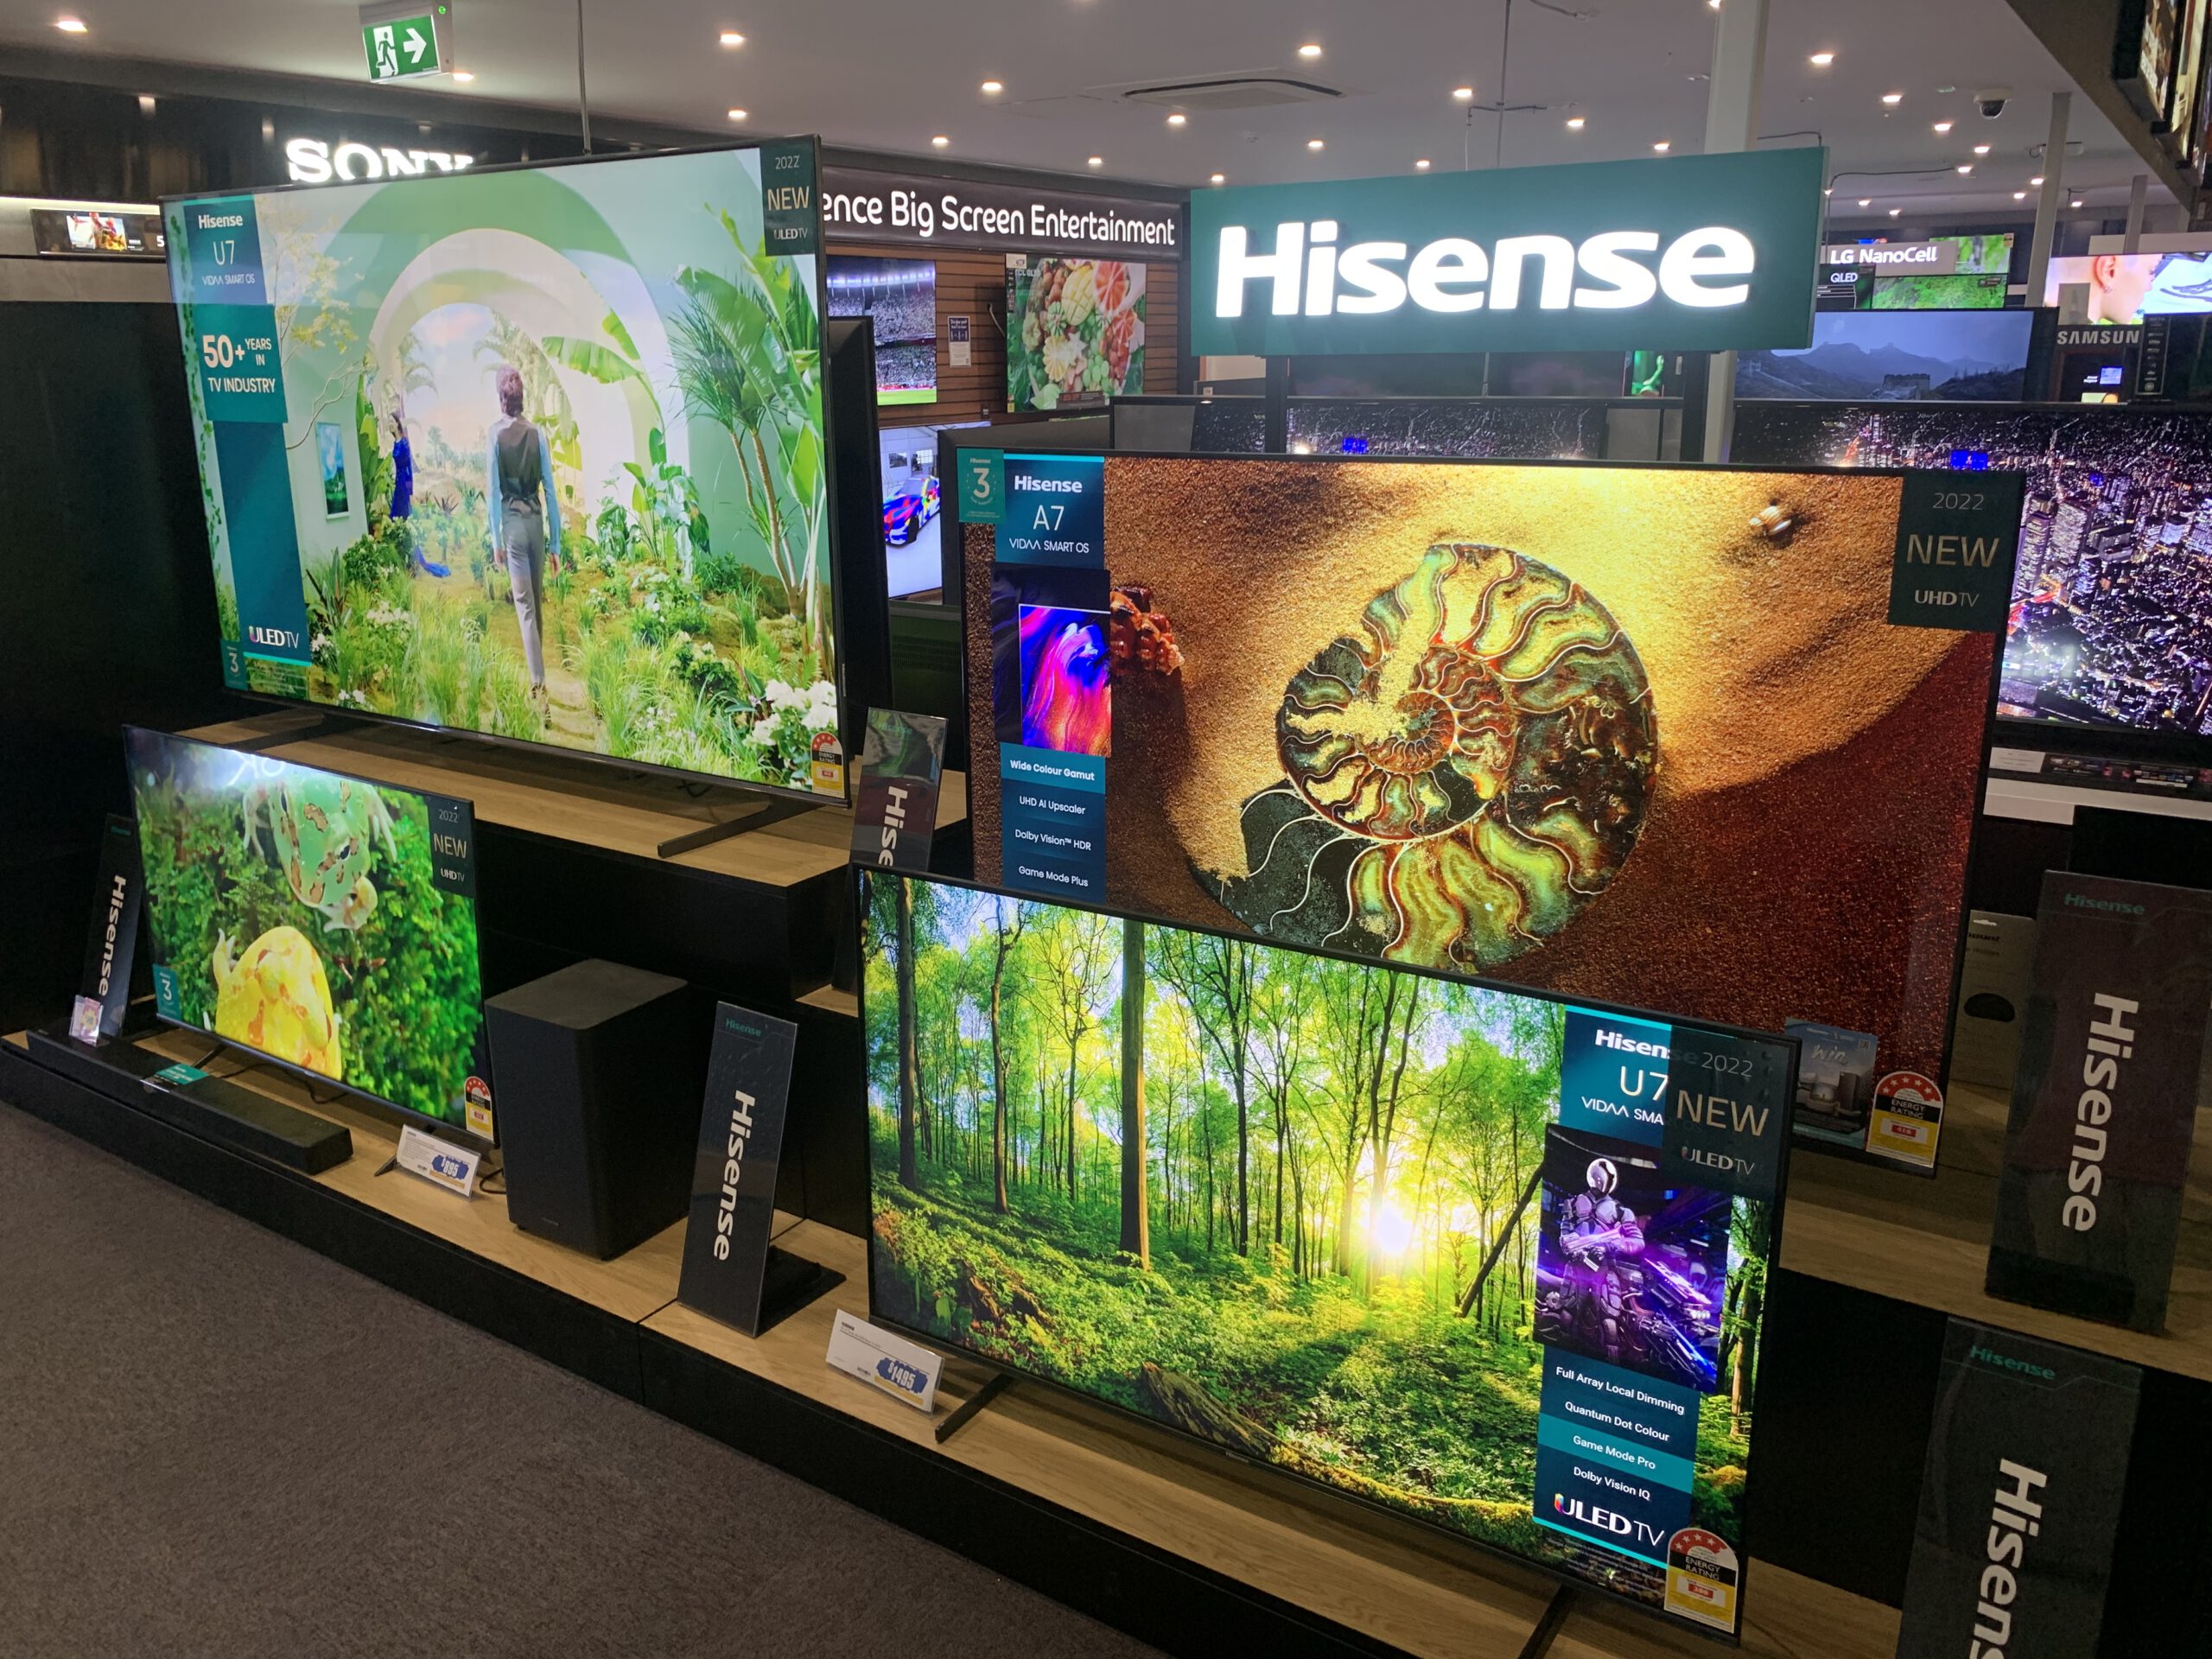
Click to enlarge
02 / THE REALITY ON SITE
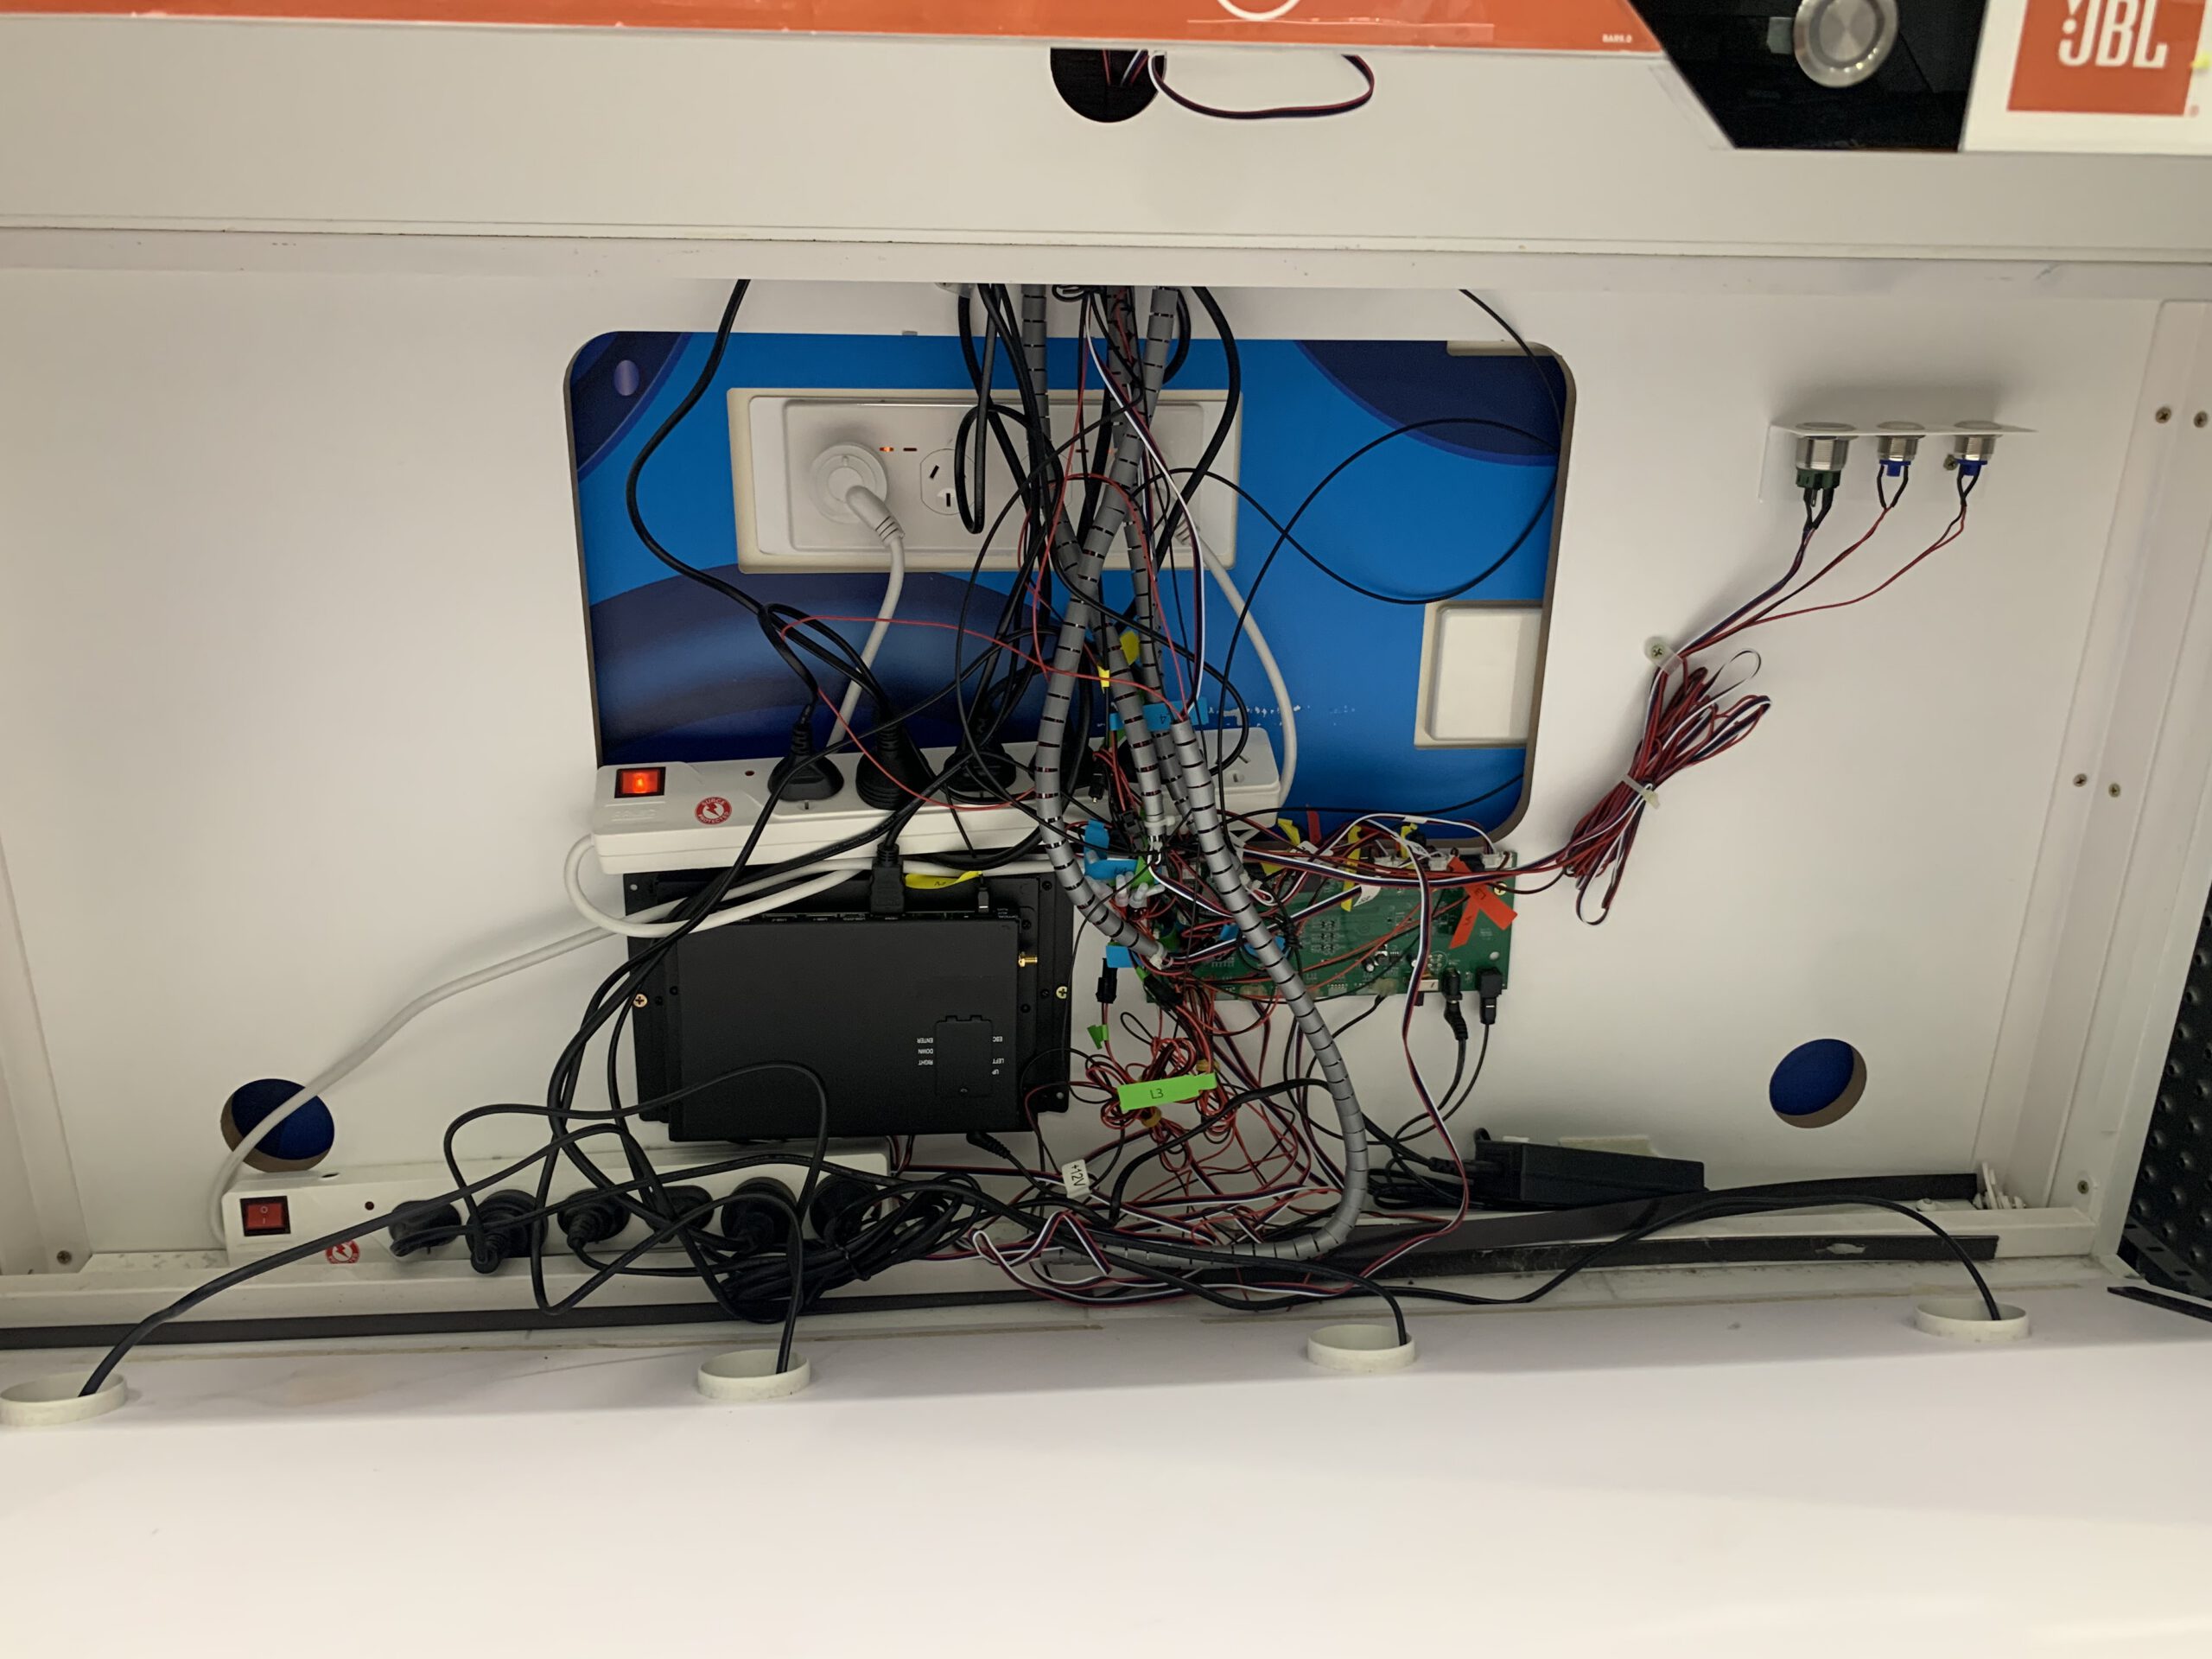
Click to enlarge
Existing wiring and electronic systems encountered on site. Understanding the configuration, tracing connections and resolving technical issues were all part of delivering the installation.
01 / RECEIVE + UNDERSTAND
Every installation begins long before arriving on site.
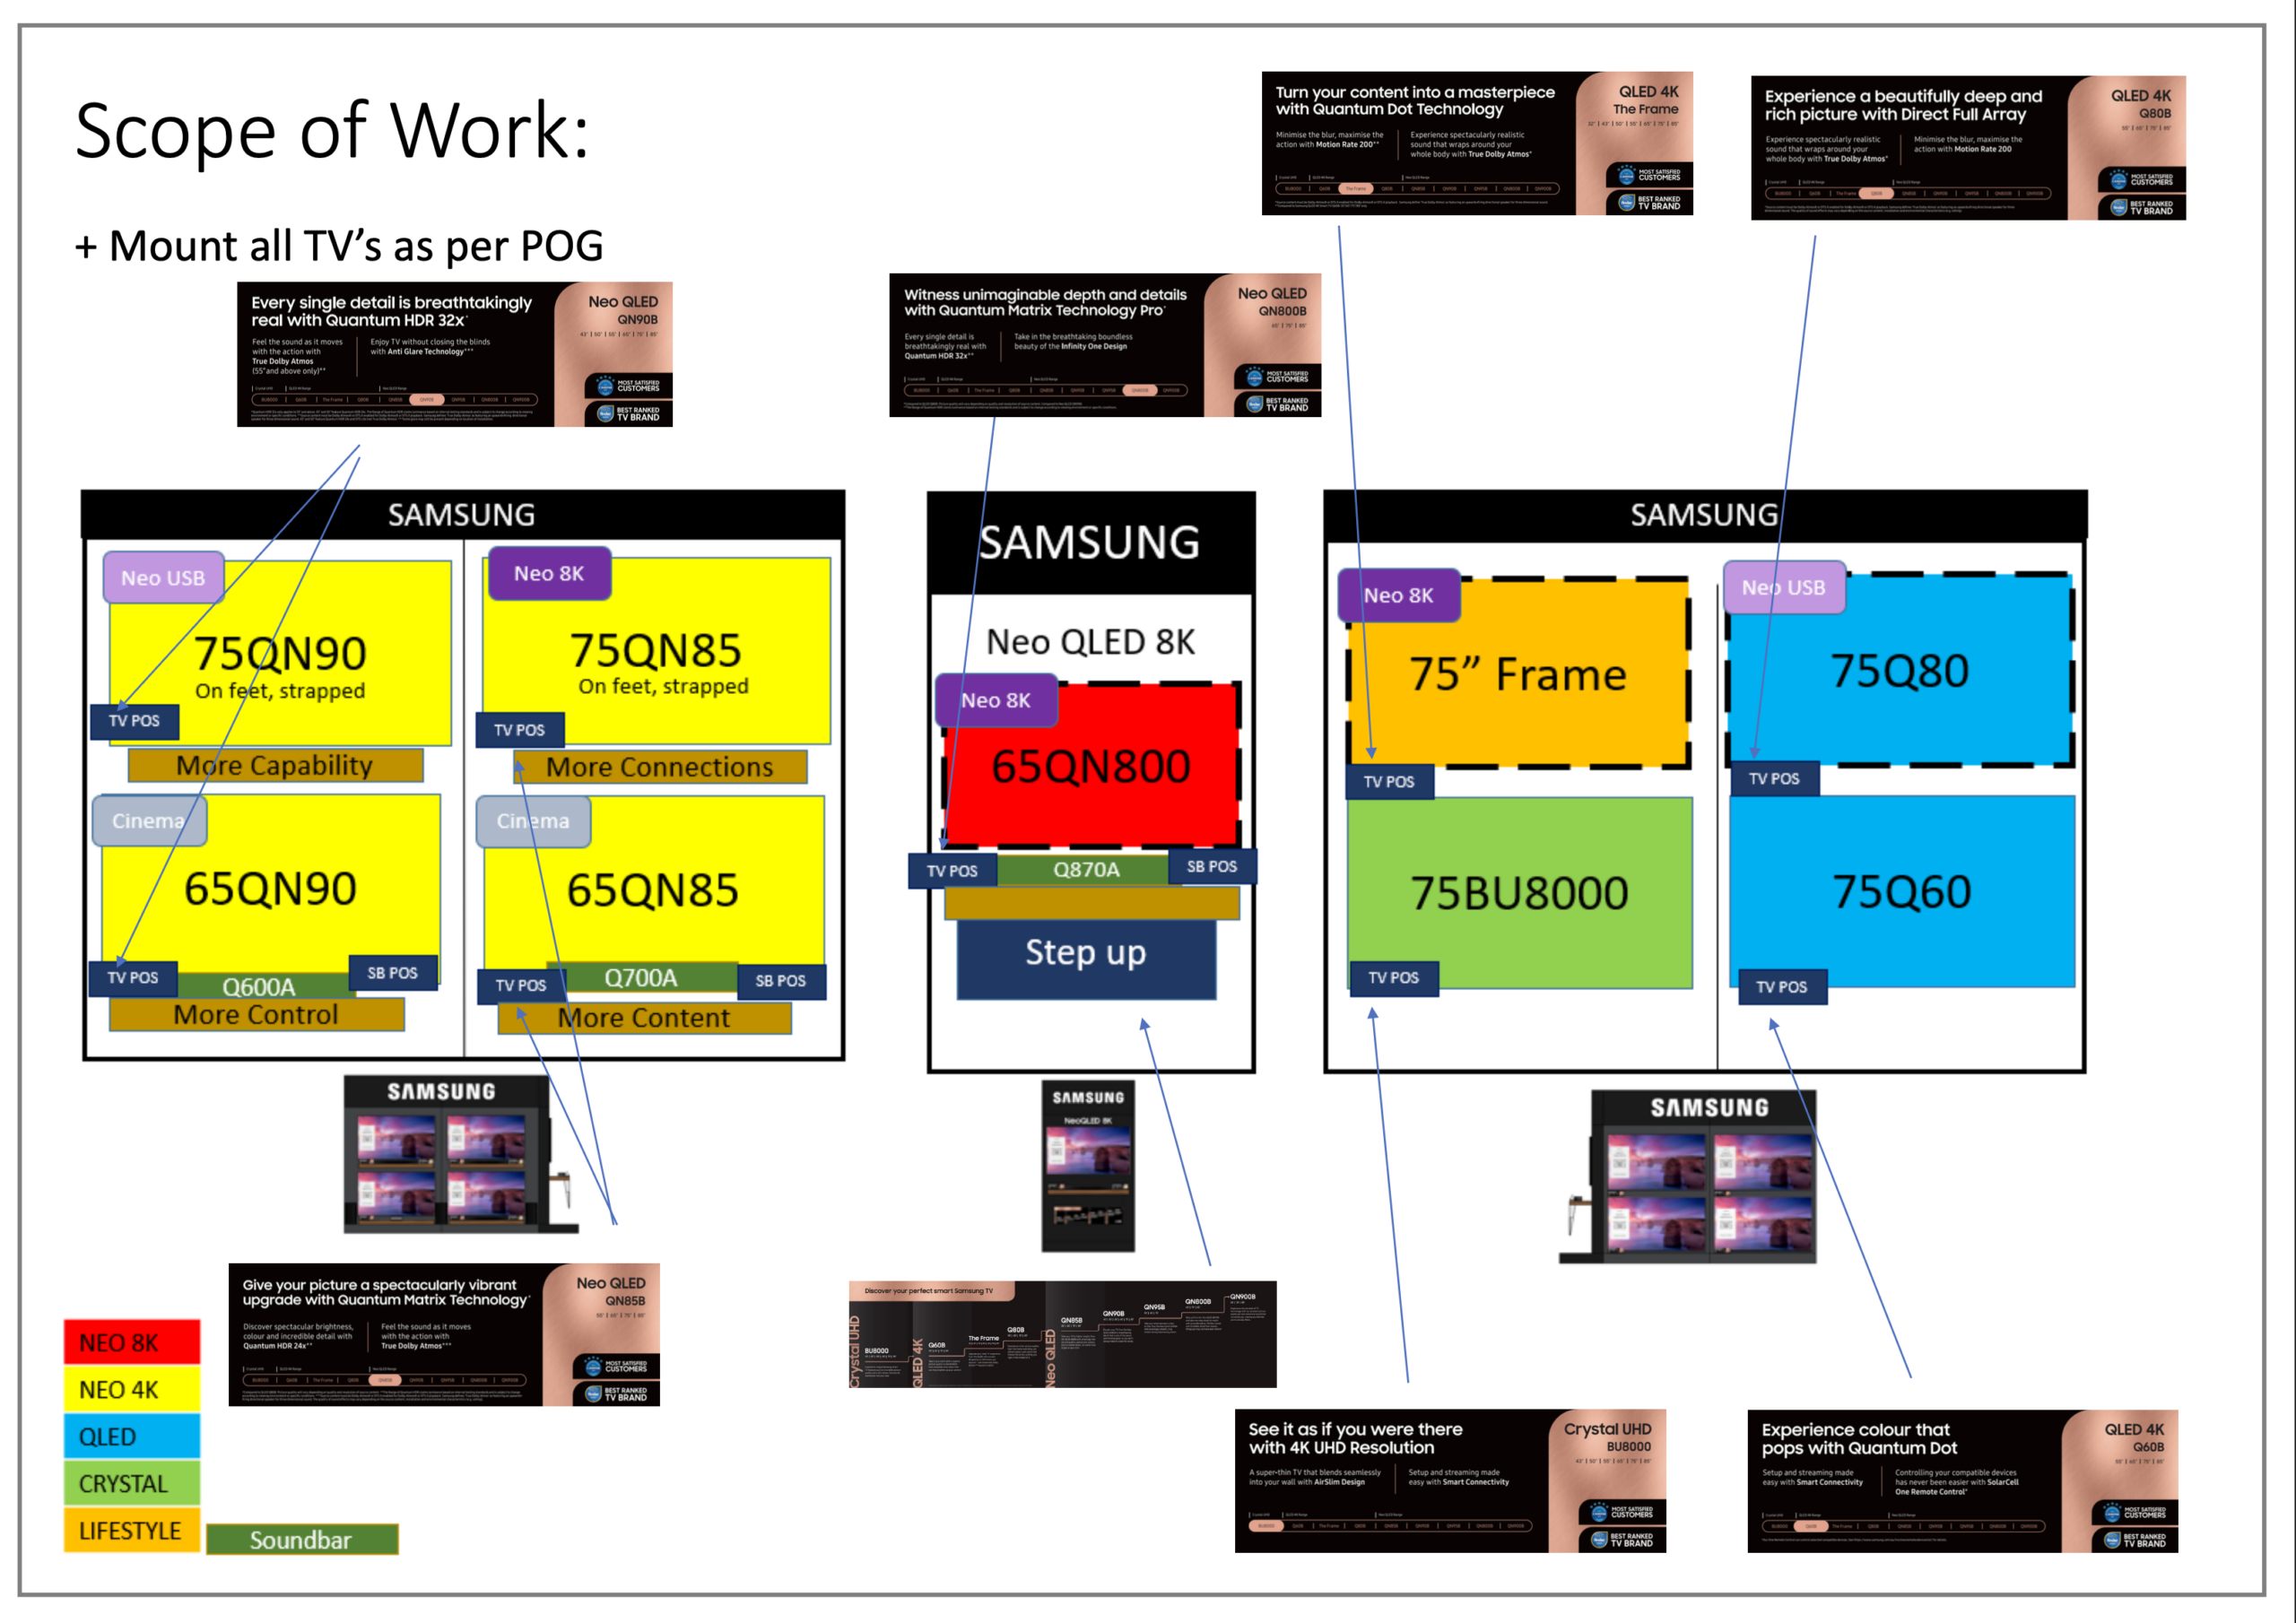
Each assignment began with a scope of work, completion window and technical documentation. I coordinated directly with store management, reviewed installation instructions, planograms and wiring diagrams, and established what equipment and site preparation were required. Once on site, I checked the documentation against the actual conditions before beginning work.
DOCUMENT 01 / INSTALLATION PLAN
Click to enlarge
THE DRAWING IS THE STARTING POINT.
NOT THE WHOLE STORY.
Technical plans establish what an installation should look like. But drawings don't always account for existing infrastructure, missing components, unexpected site conditions or equipment that doesn't match the documentation.
Working independently meant assessing what was actually there, identifying problems and finding practical solutions — often without immediate technical support.
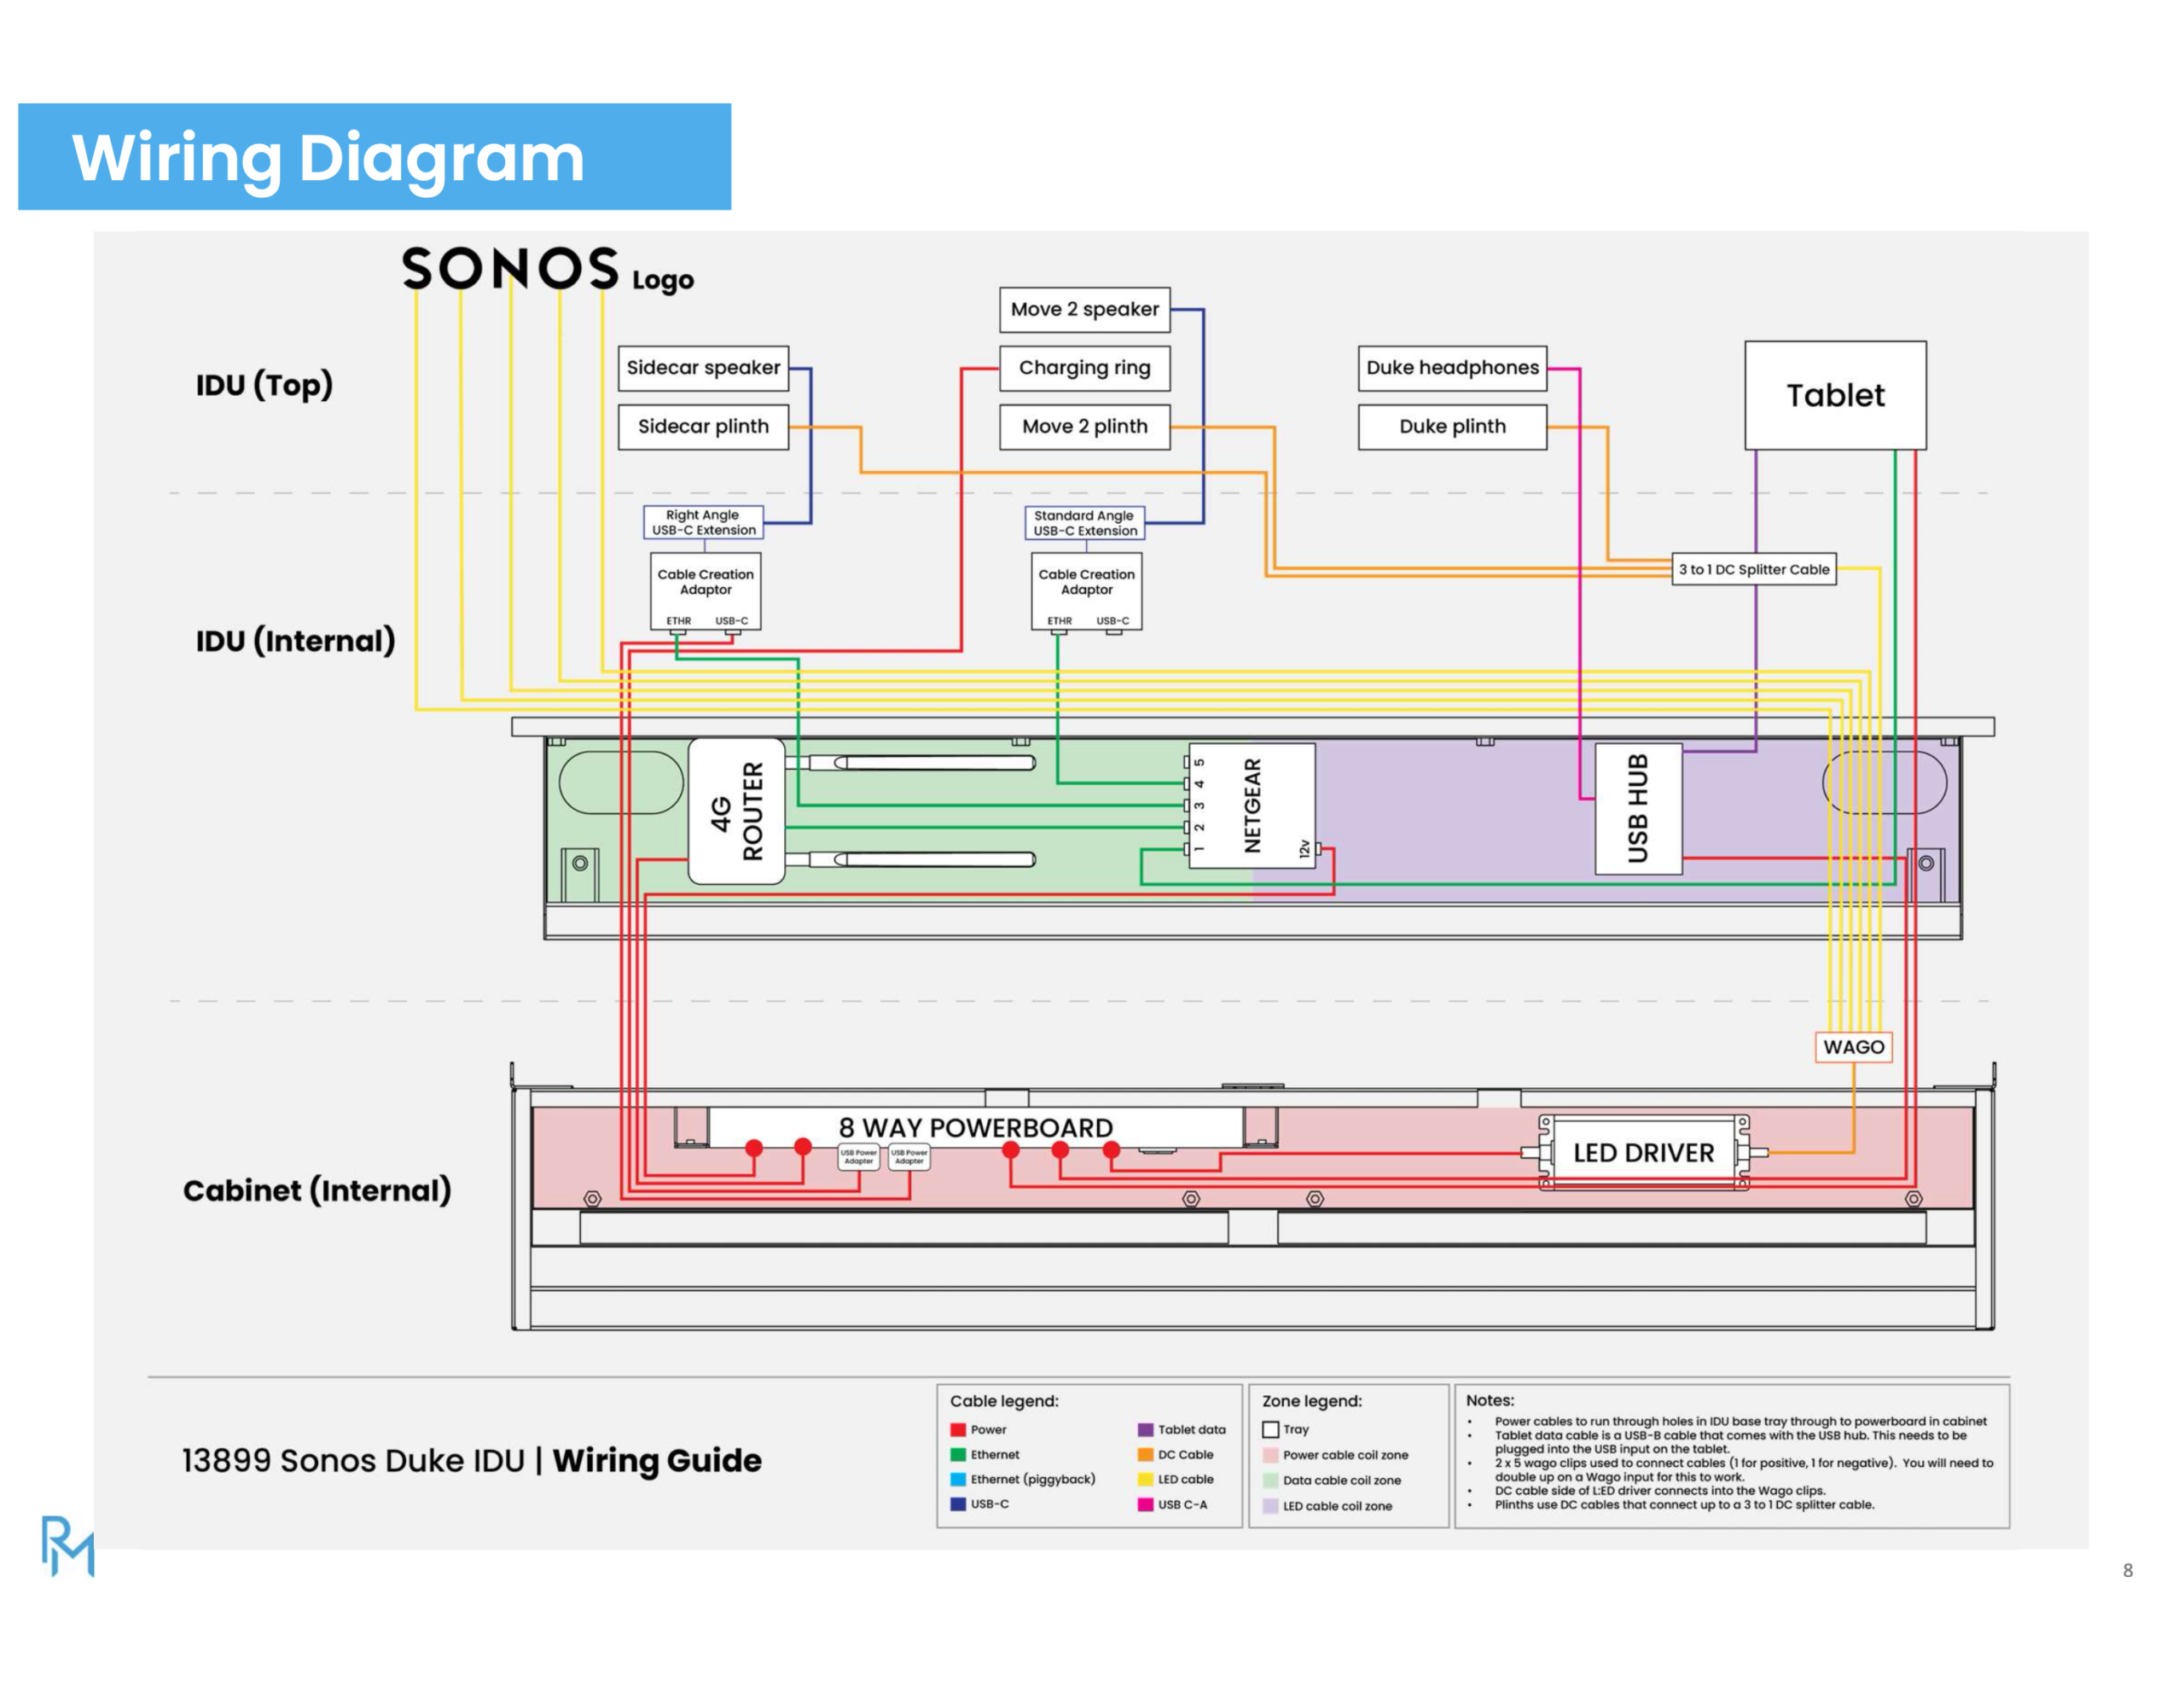
DOCUMENT 02 / SYSTEM CONNECTIONS
Click to enlarge
DOCUMENT 03 / SITE INSTRUCTIONS
Click to enlarge
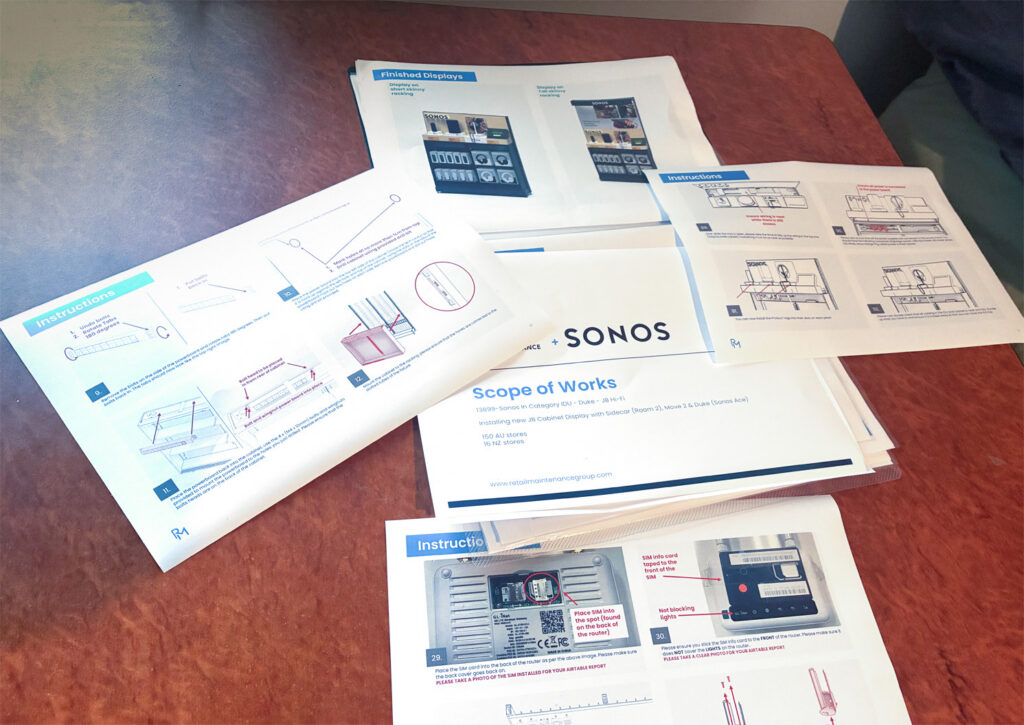
OLD SCHOOL.
STILL COOL SCHOOL.
Behind a relatively small Sonos retail display sat a 49-page Scope of Works containing assembly instructions, wiring diagrams and installation requirements. Organising and interpreting that information was an essential part of delivering the finished installation.
Click to enlarge
SONOS / 49-PAGE SCOPE OF WORKS / TECHNICAL INSTALLATION DOCUMENTATION
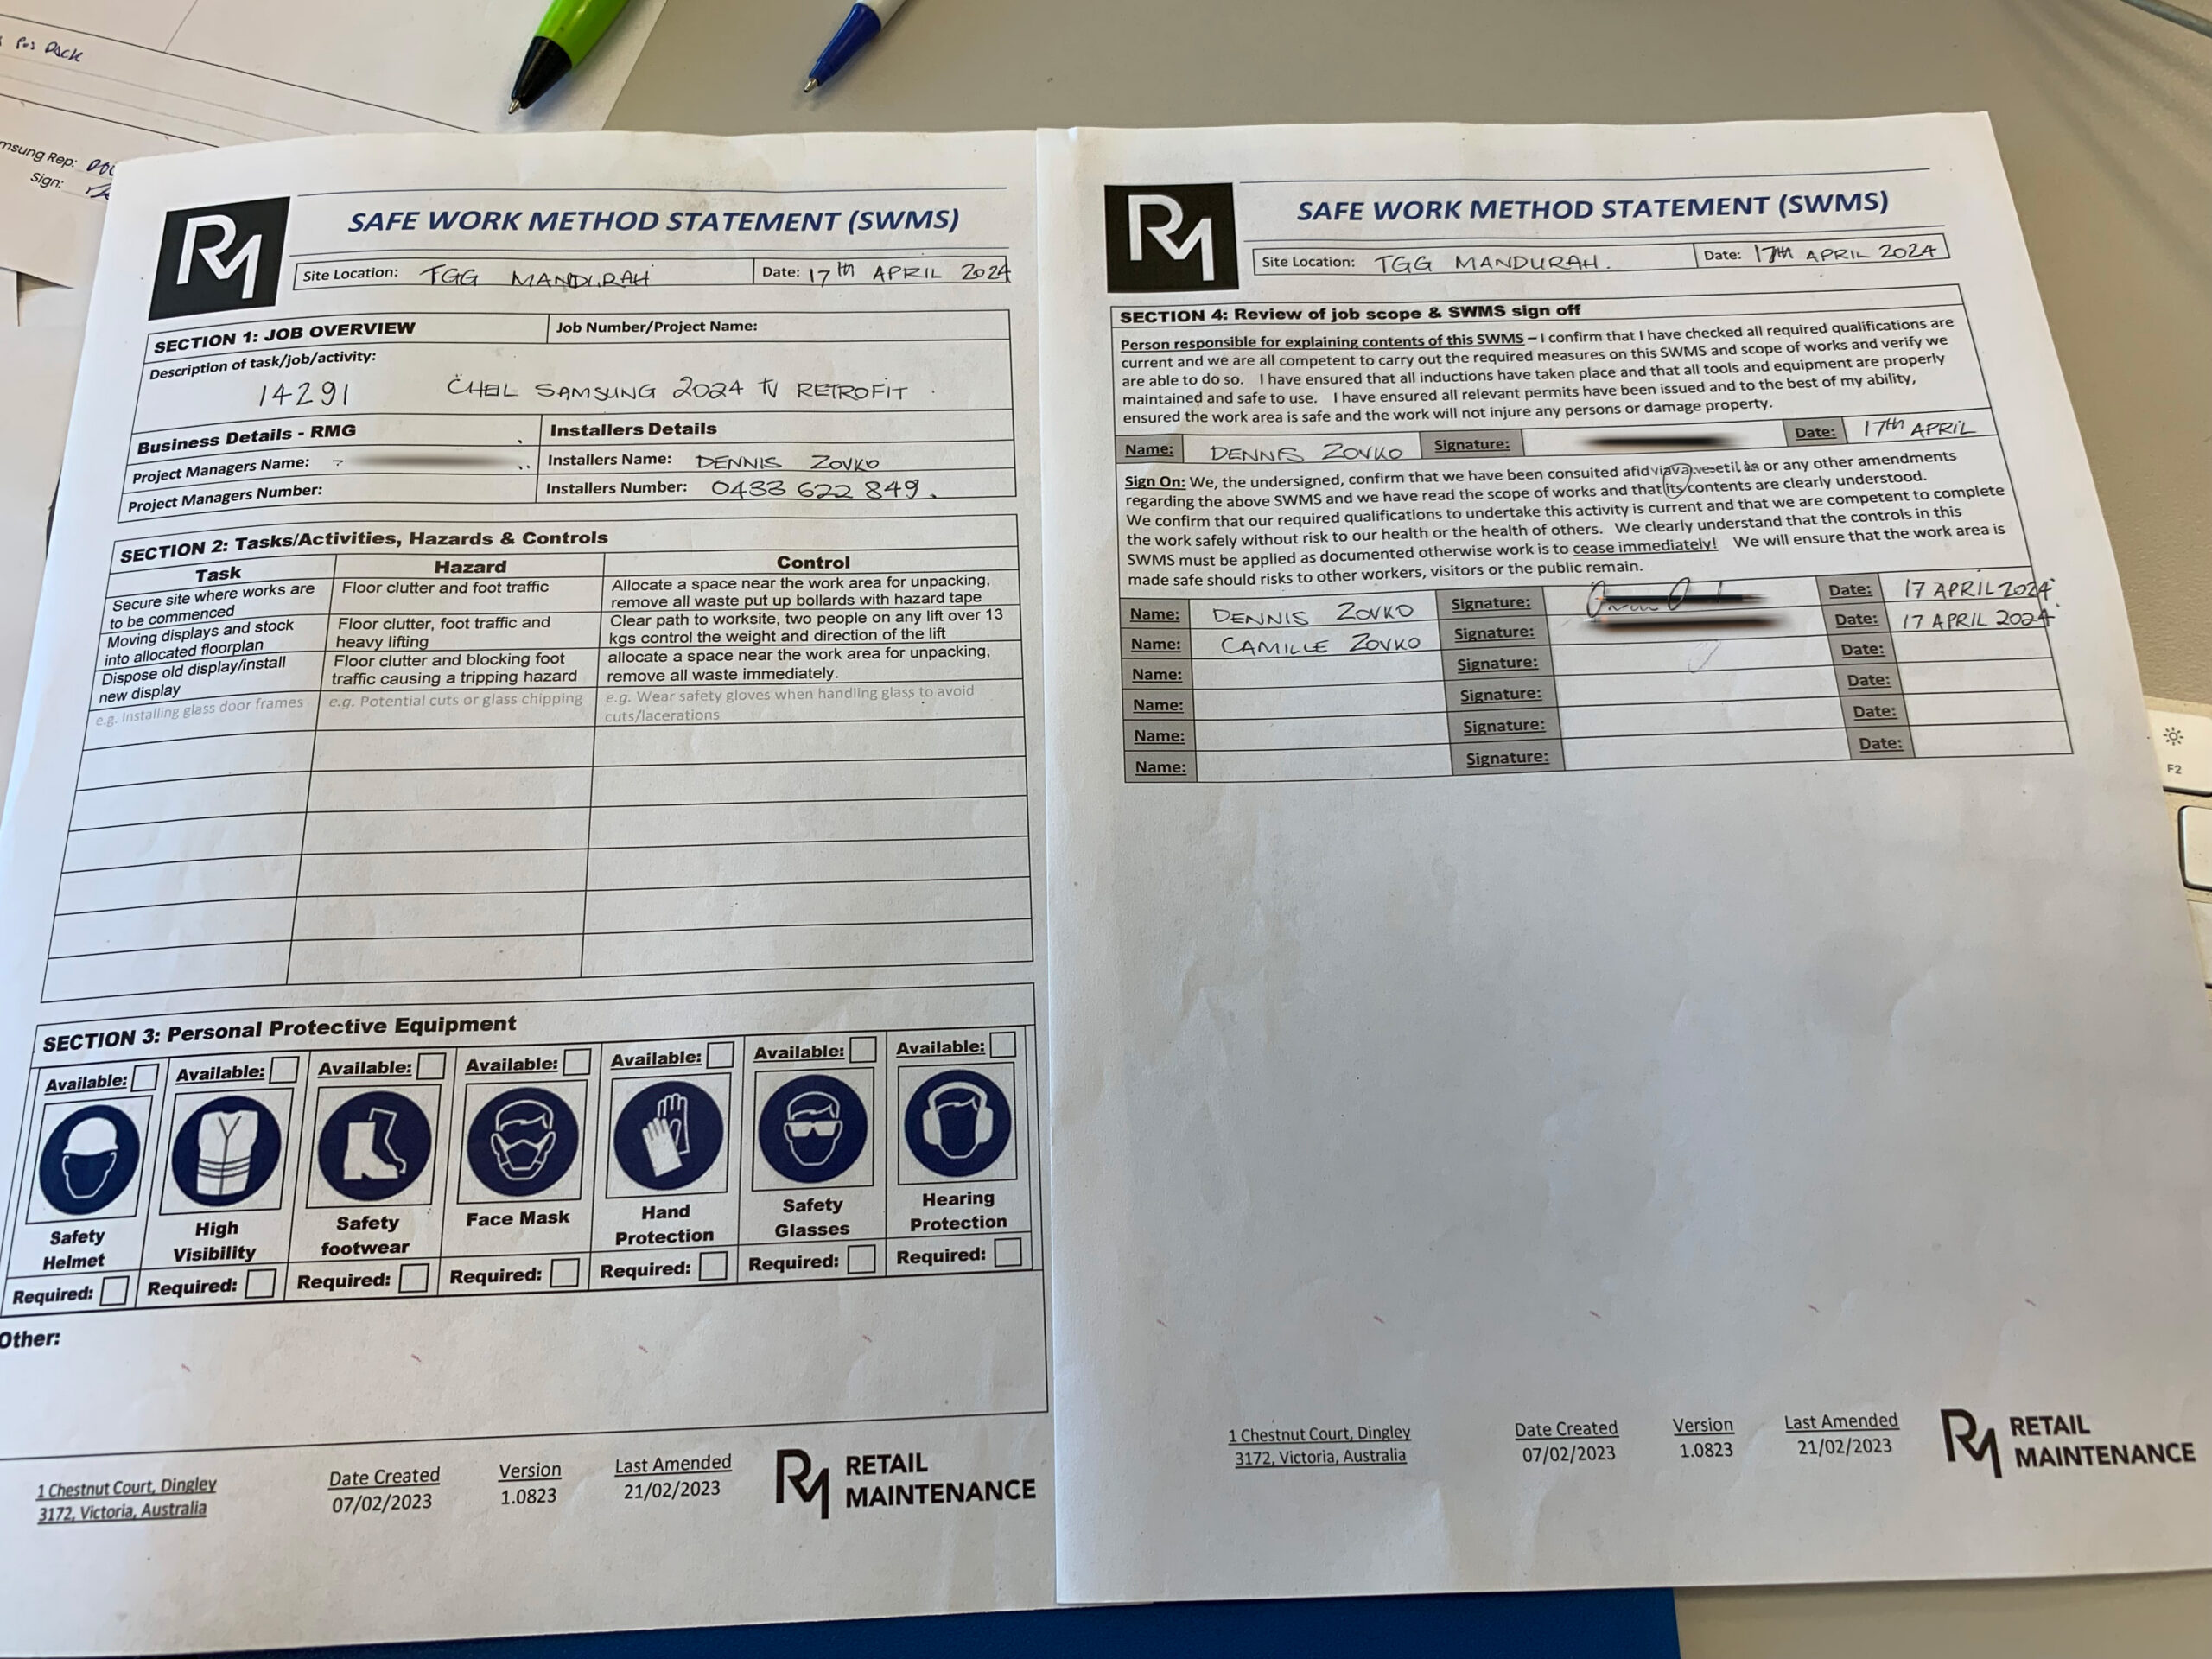
02 / SITE + SAFETY
The job starts before the tools come out.
Commercial installations took place in operating retail environments, often with customers and staff moving around the work area. Each assignment required coordination with store management, assessment of site conditions, identification of hazards and completion of the relevant safety documentation.
Managing equipment, tools, packaging and public access was part of the responsibility — not something separate from the technical work.
Click to enlarge
DOCUMENTED RESPONSIBILITY
Site-specific safety procedures, hazard identification and formal sign-off formed part of the installation process.
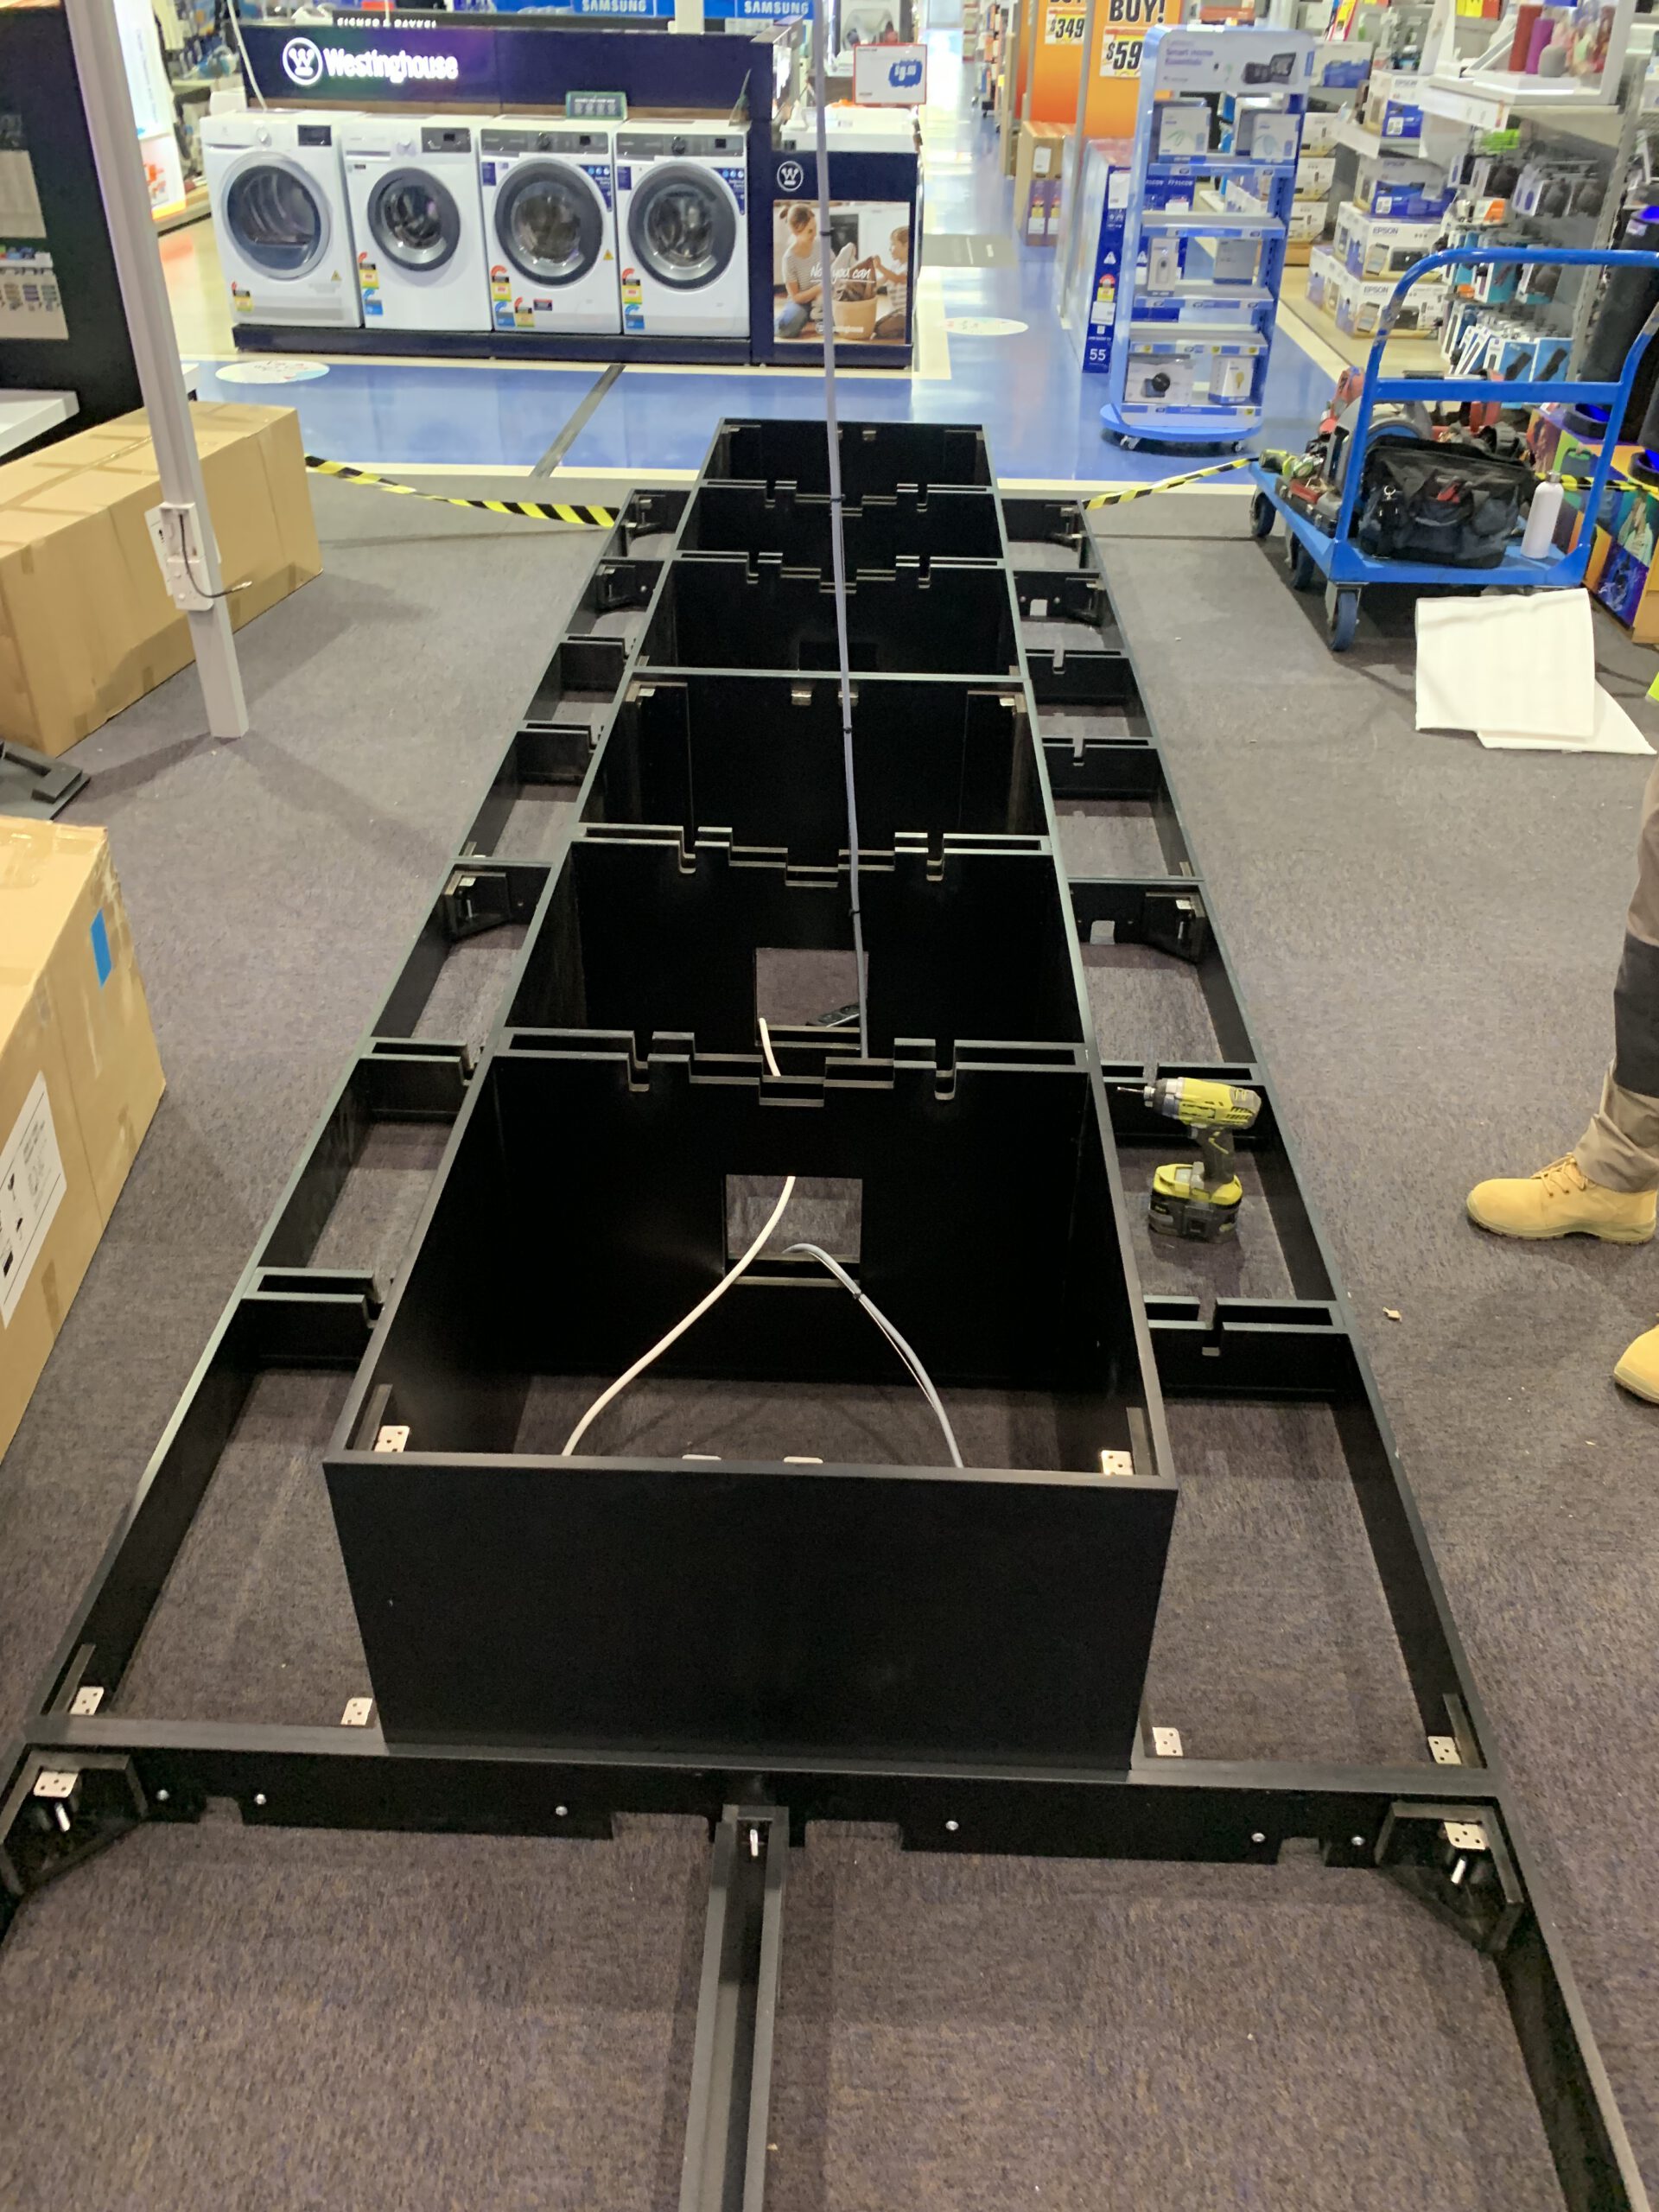
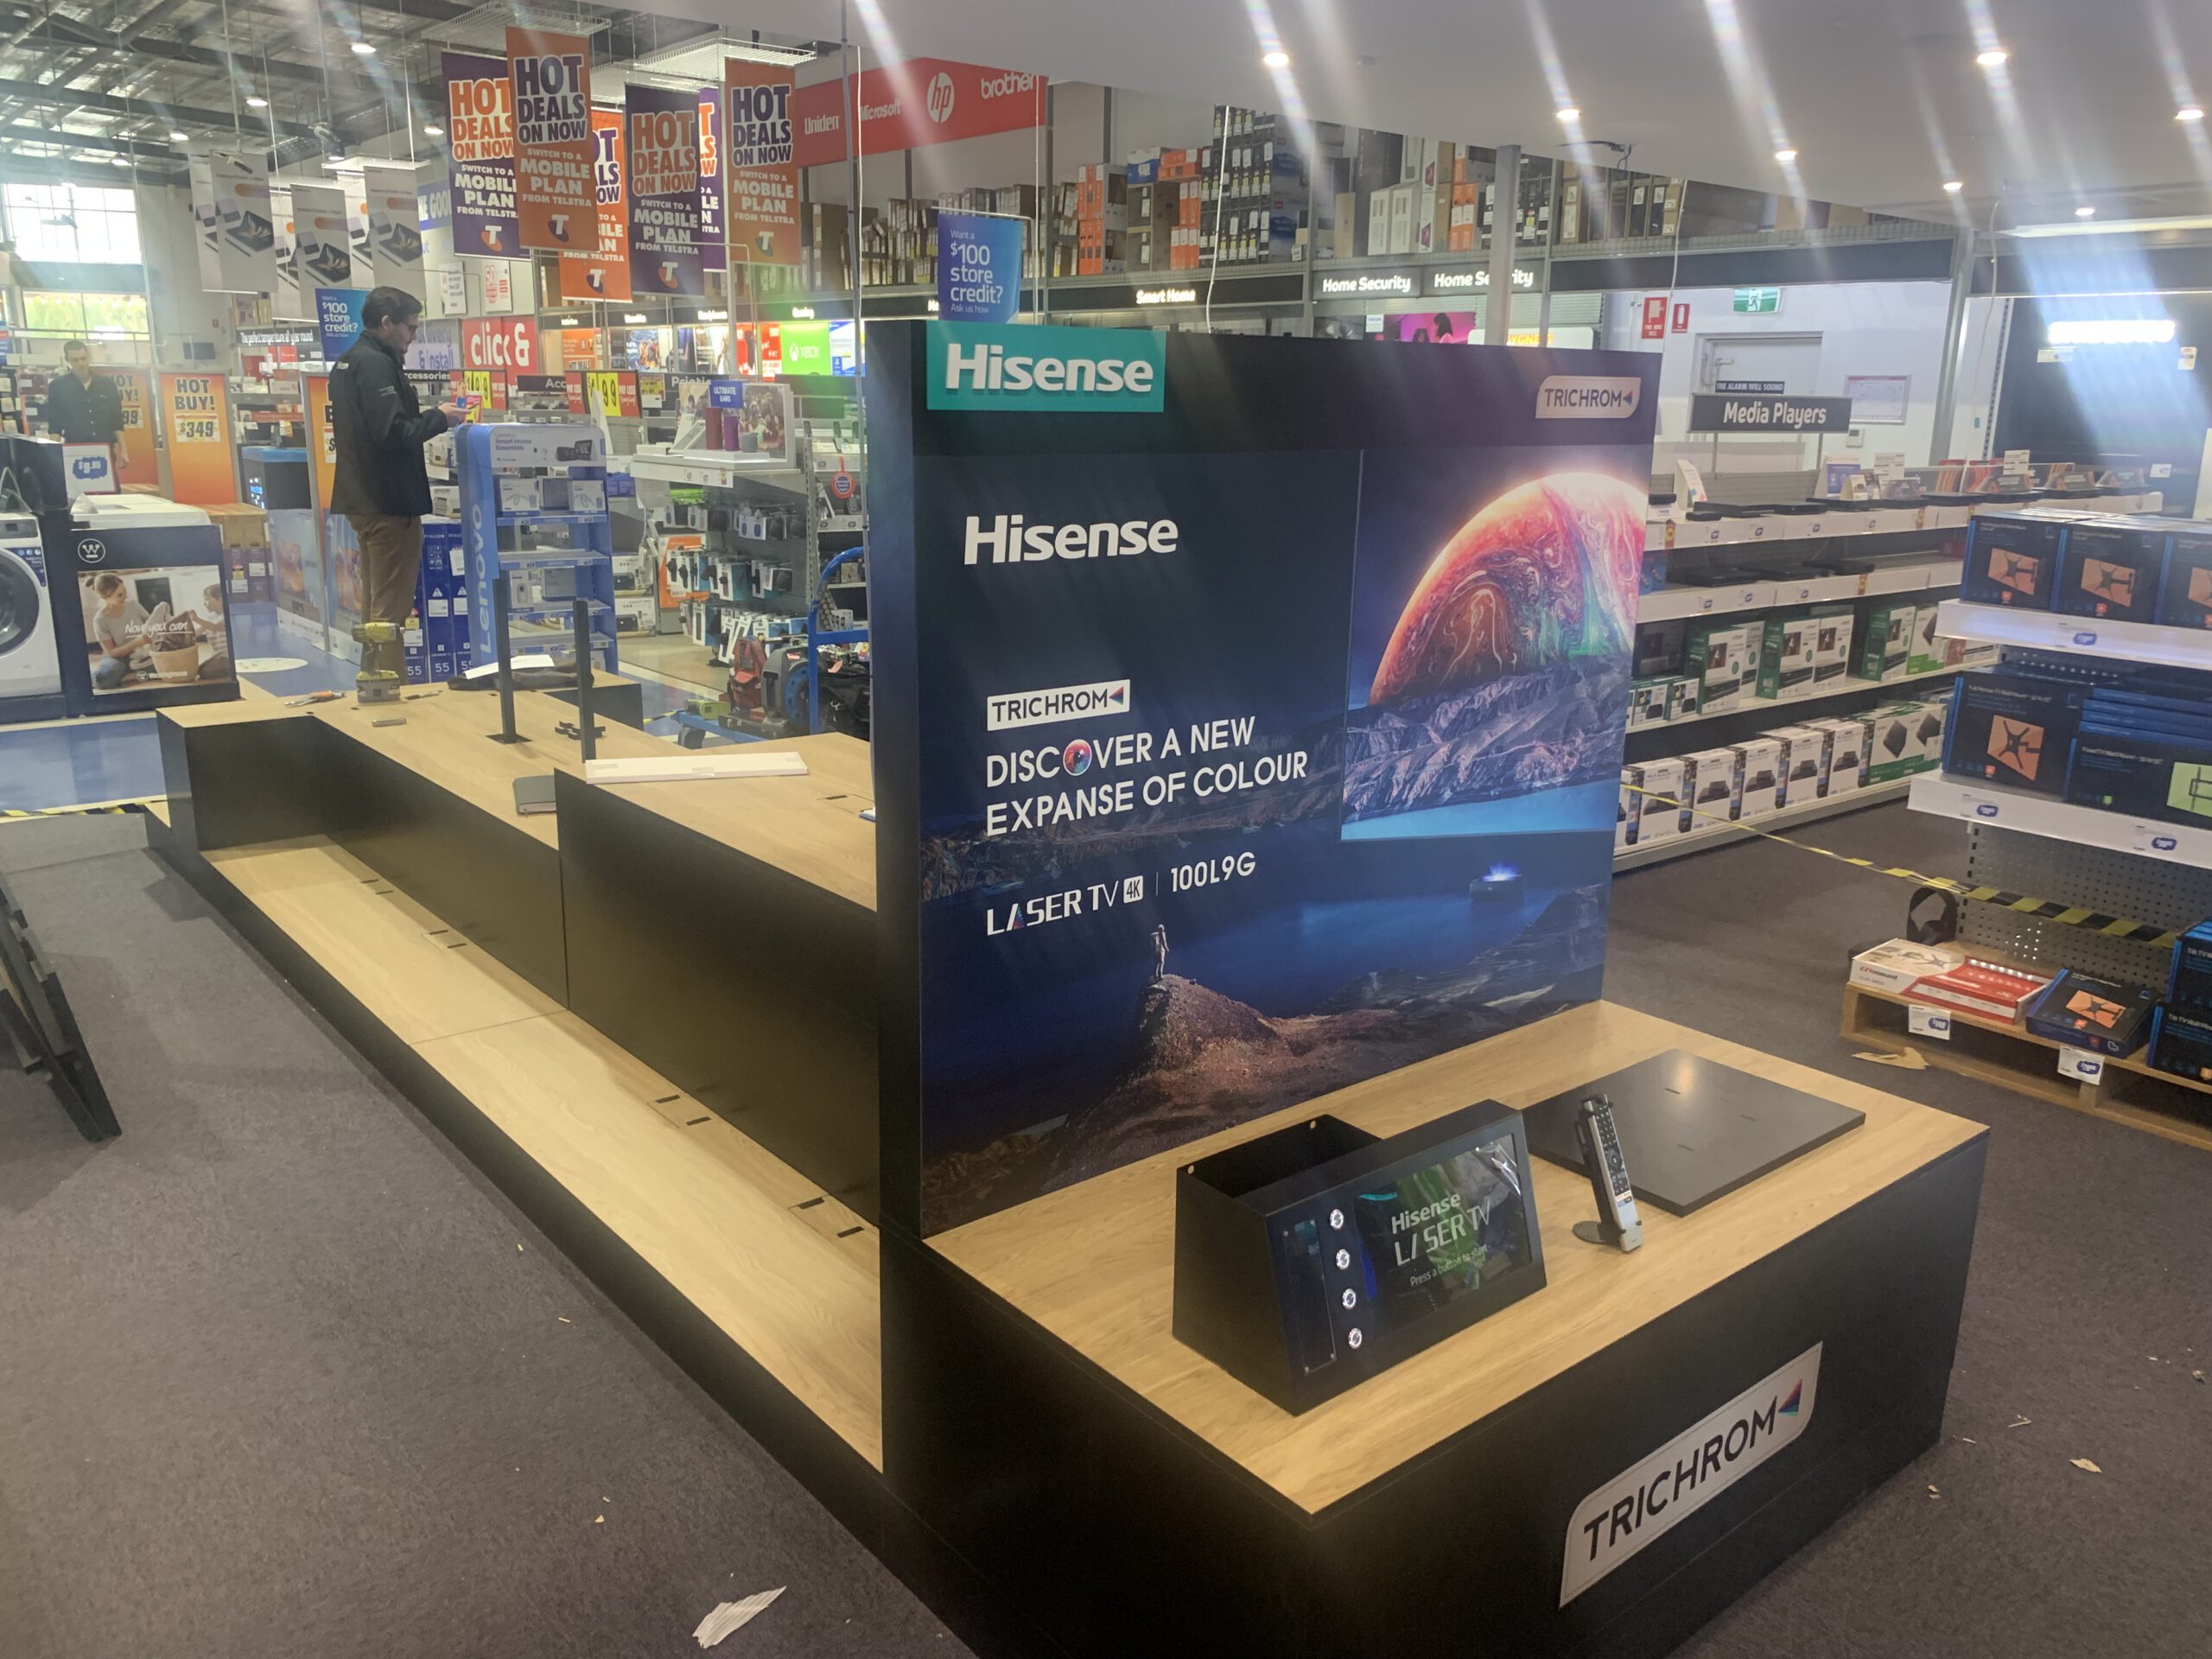
03 / PHYSICAL INSTALLATION
More than mounting screens.
Commercial technology installations involved much more than positioning equipment. The physical work included assembling modular display structures, fitting fixtures, preparing mounting points and integrating equipment into existing retail environments.
Accurate measurement, careful assembly and practical problem-solving were essential to delivering a professional result.
01 / THE STRUCTURE
Click to enlarge
02 / TAKING SHAPE
Click to enlarge
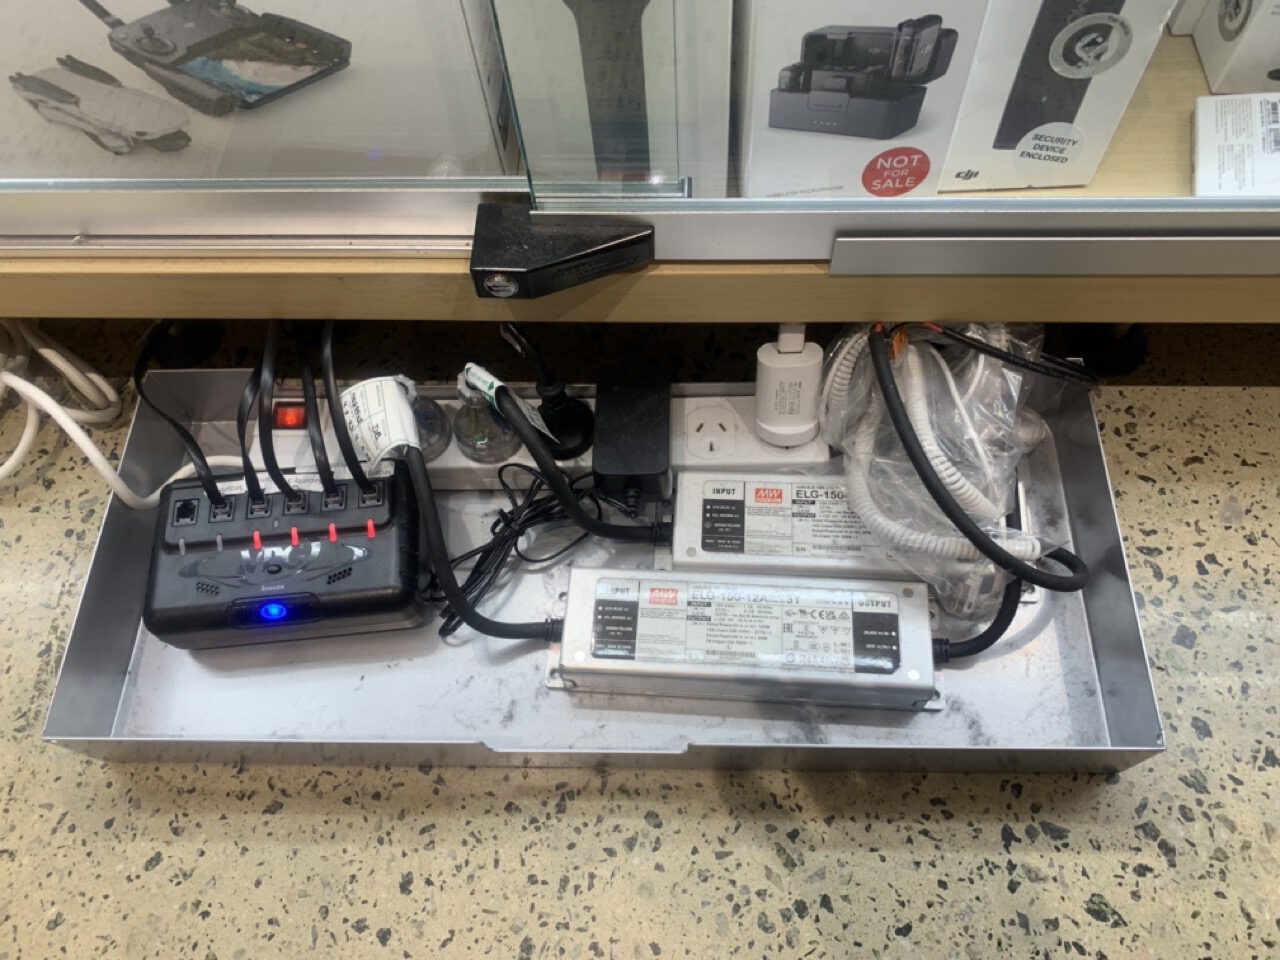
04 / POWER, DATA + SECURITY
The technology behind the installation.
Behind the finished displays were interconnected systems involving supplied power equipment, low-voltage wiring, data connections, network interfaces and product security hardware.
The work required interpreting connection diagrams, identifying components, integrating equipment within the specified scope and checking that the complete system operated as intended.
01 / POWER + DISTRIBUTION
Click to enlarge
02 / DATA + INTERFACES
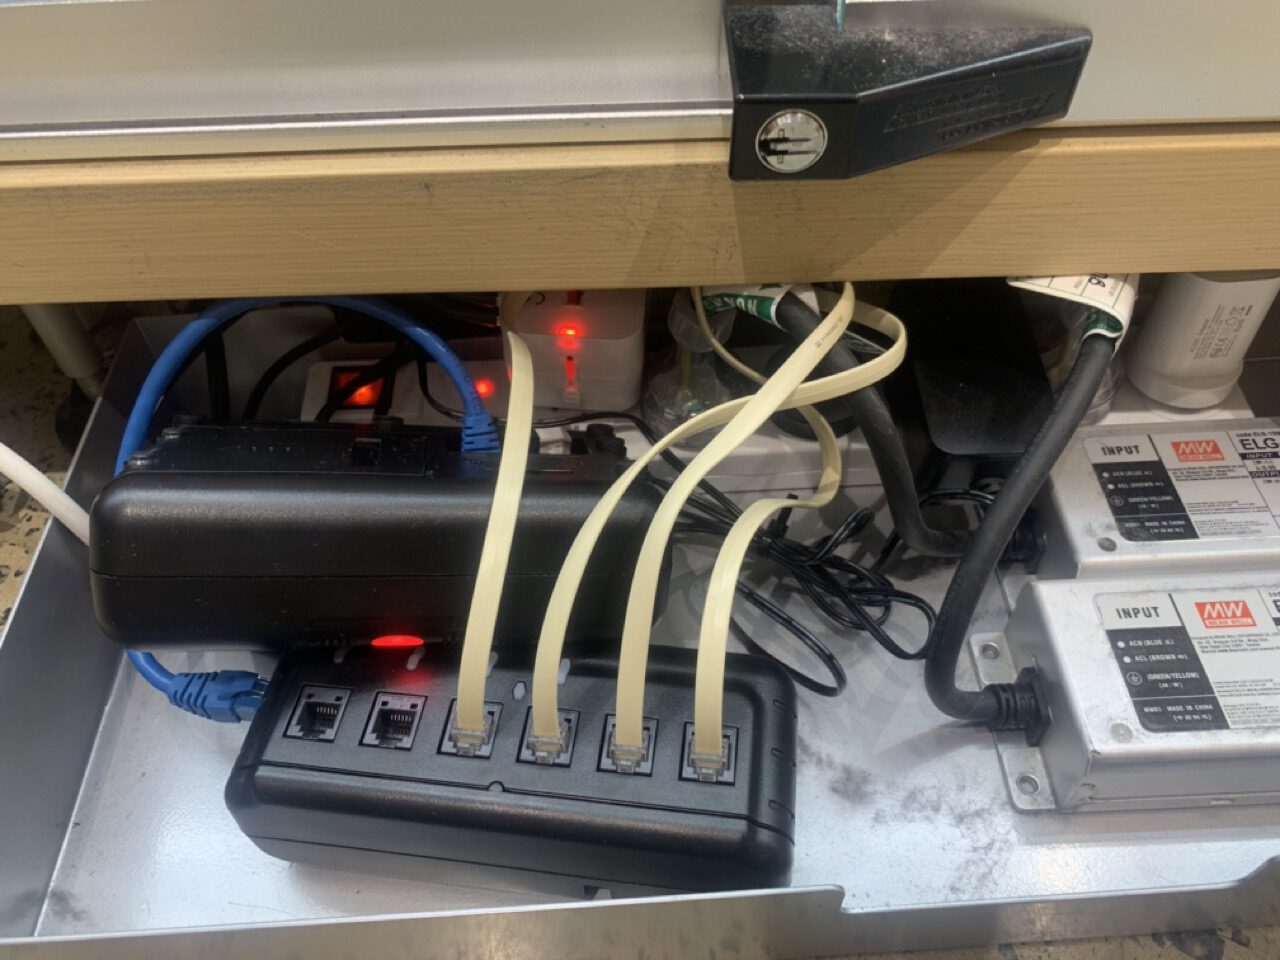
Click to enlarge
03 / NETWORK CONNECTIVITY
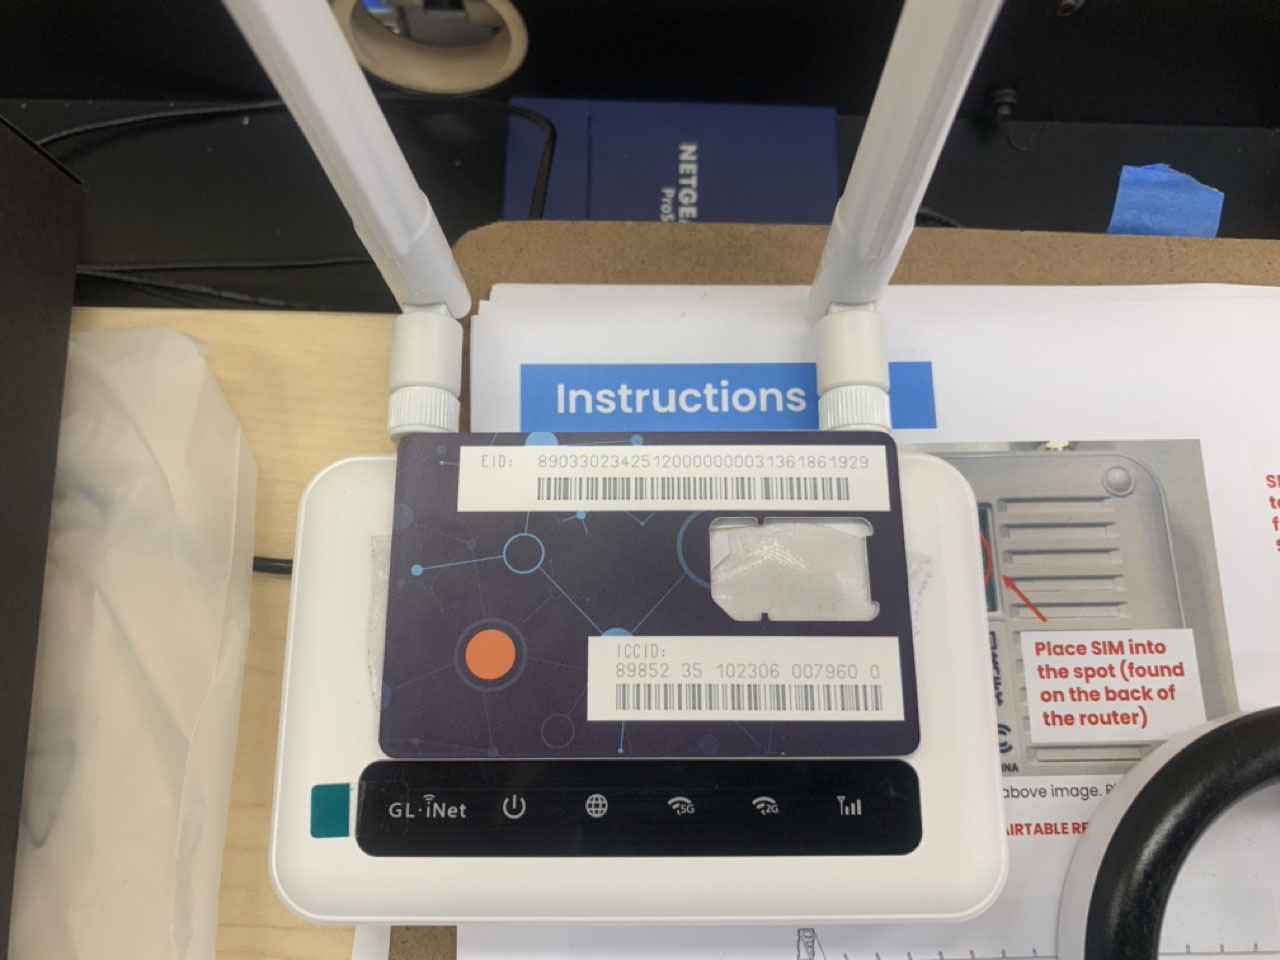
Click to enlarge
THE INSTALLATION DOESN'T END WHEN
THE EQUIPMENT IS MOUNTED.
Commercial display systems required physical assembly and the integration of multiple supplied components. Understanding how those components worked together was essential to testing, troubleshooting and commissioning the finished installation.
05 / CONFIGURE + COMMISSION
Installing the hardware is only half the job.
Not every installation ended with a screwdriver. Some assignments required software installation, device preparation, configuration and testing before the equipment could be handed over.
An Intel Unison demonstration involved preparing the supplied laptop, installing software components and bringing together the demonstration equipment for customer interaction.
01 / SOFTWARE DEPLOYMENT
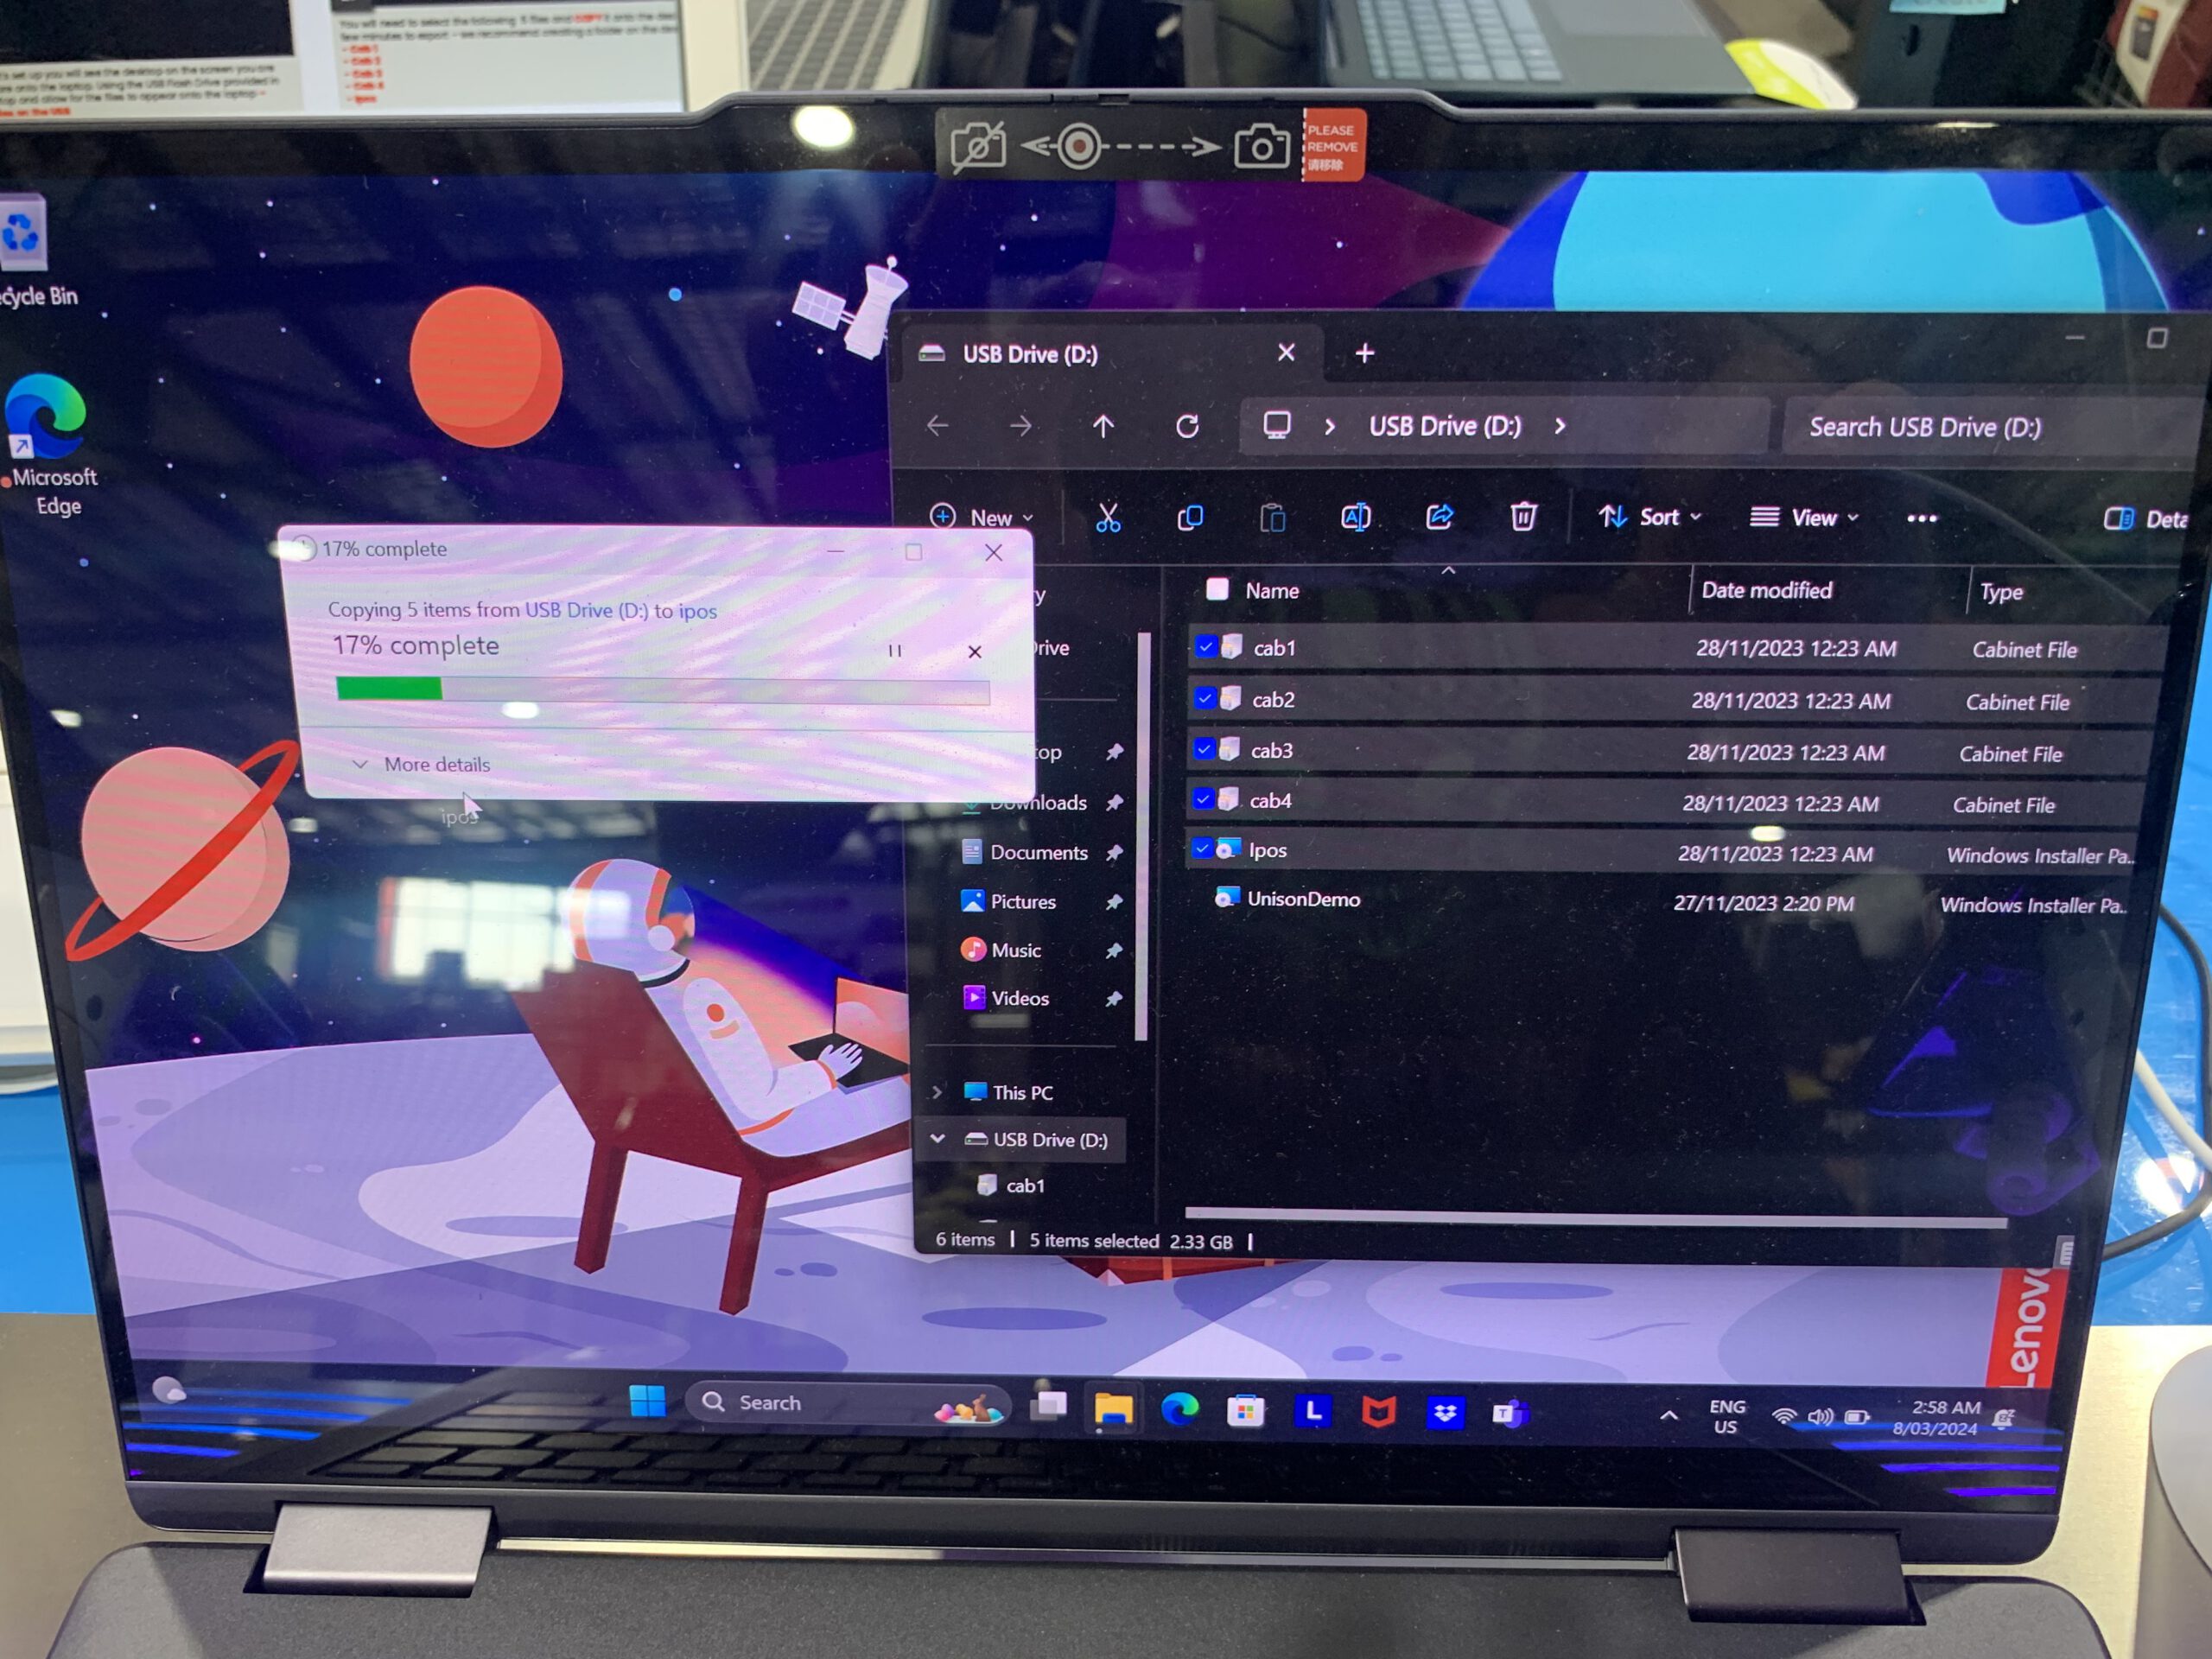
Click to enlarge
02 / DEVICE INTEGRATION
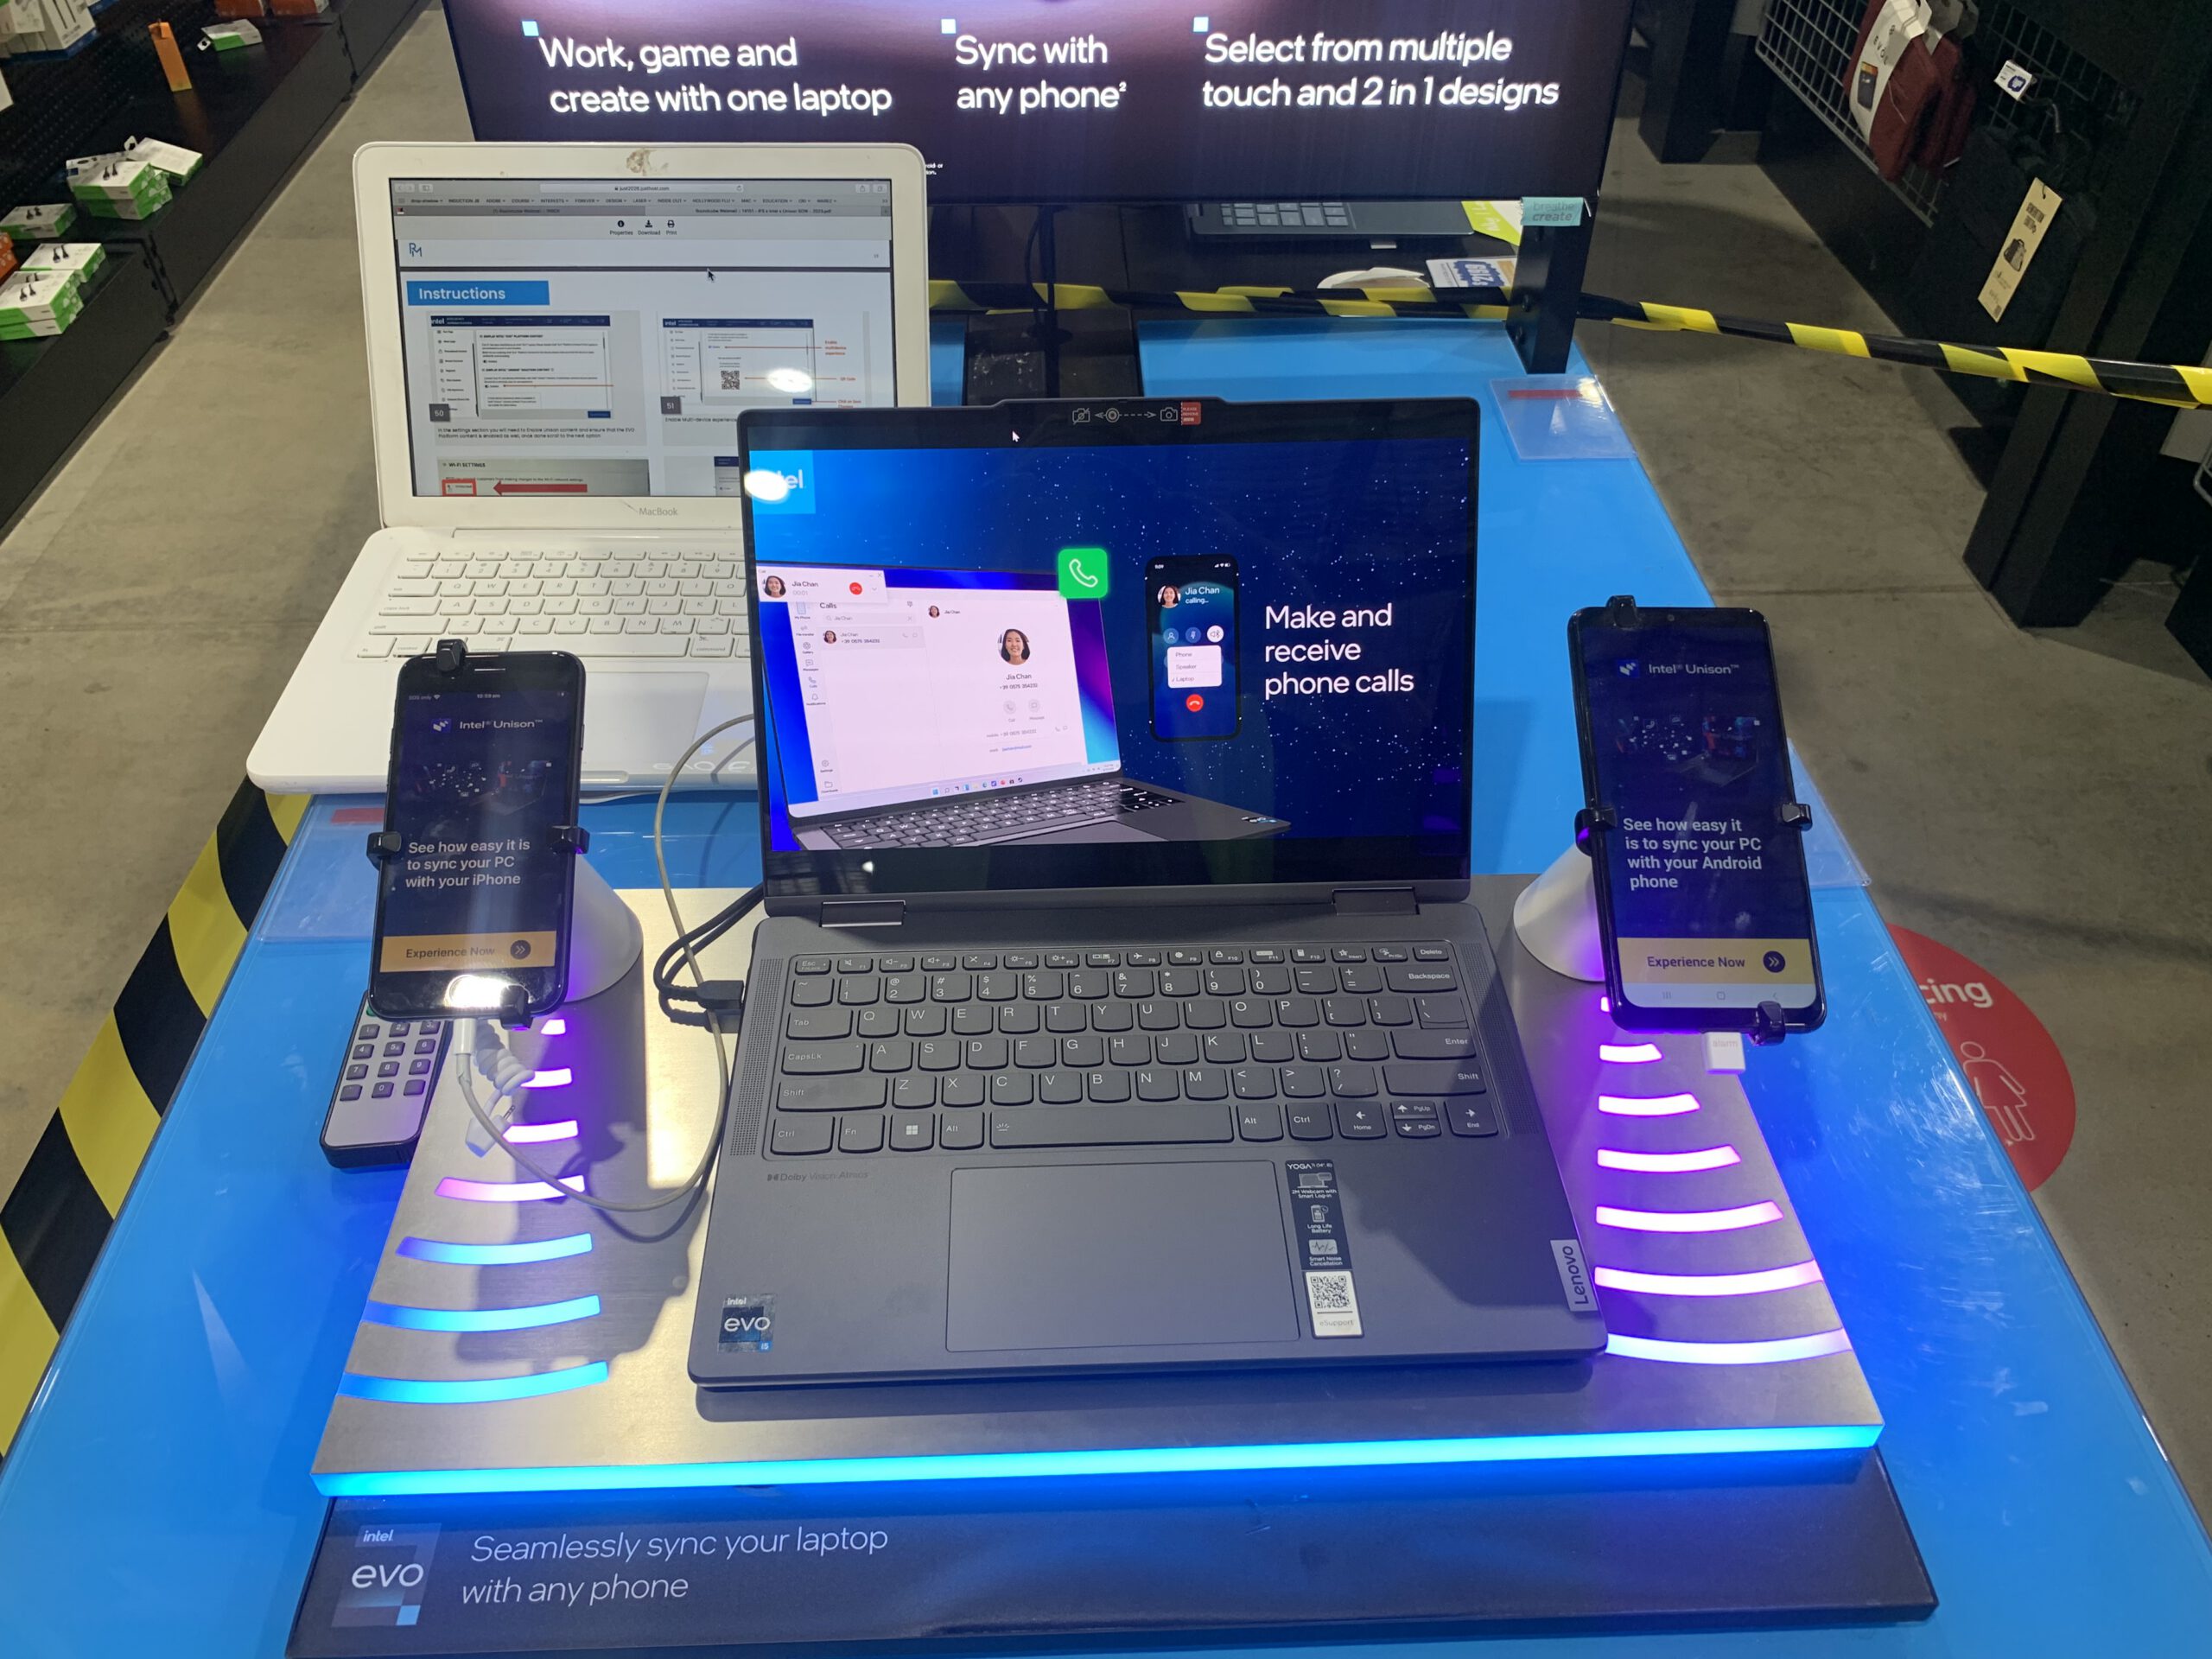
Click to enlarge
FROM INSTALLATION TO OPERATION.
The objective wasn't simply to assemble the equipment. It was to leave behind a functioning demonstration that customers and store staff could use.
CROSS-PLATFORM CAPABILITY
Experienced across Windows, macOS and Linux environments, including software installation, system configuration, troubleshooting and working with different hardware and applications.
My interest in computing has also included repurposing ageing computers, installing Linux operating systems and extending the useful life of older hardware.
06 / FAULT-FINDING + PROBLEM-SOLVING
When the system doesn't work, find out why.
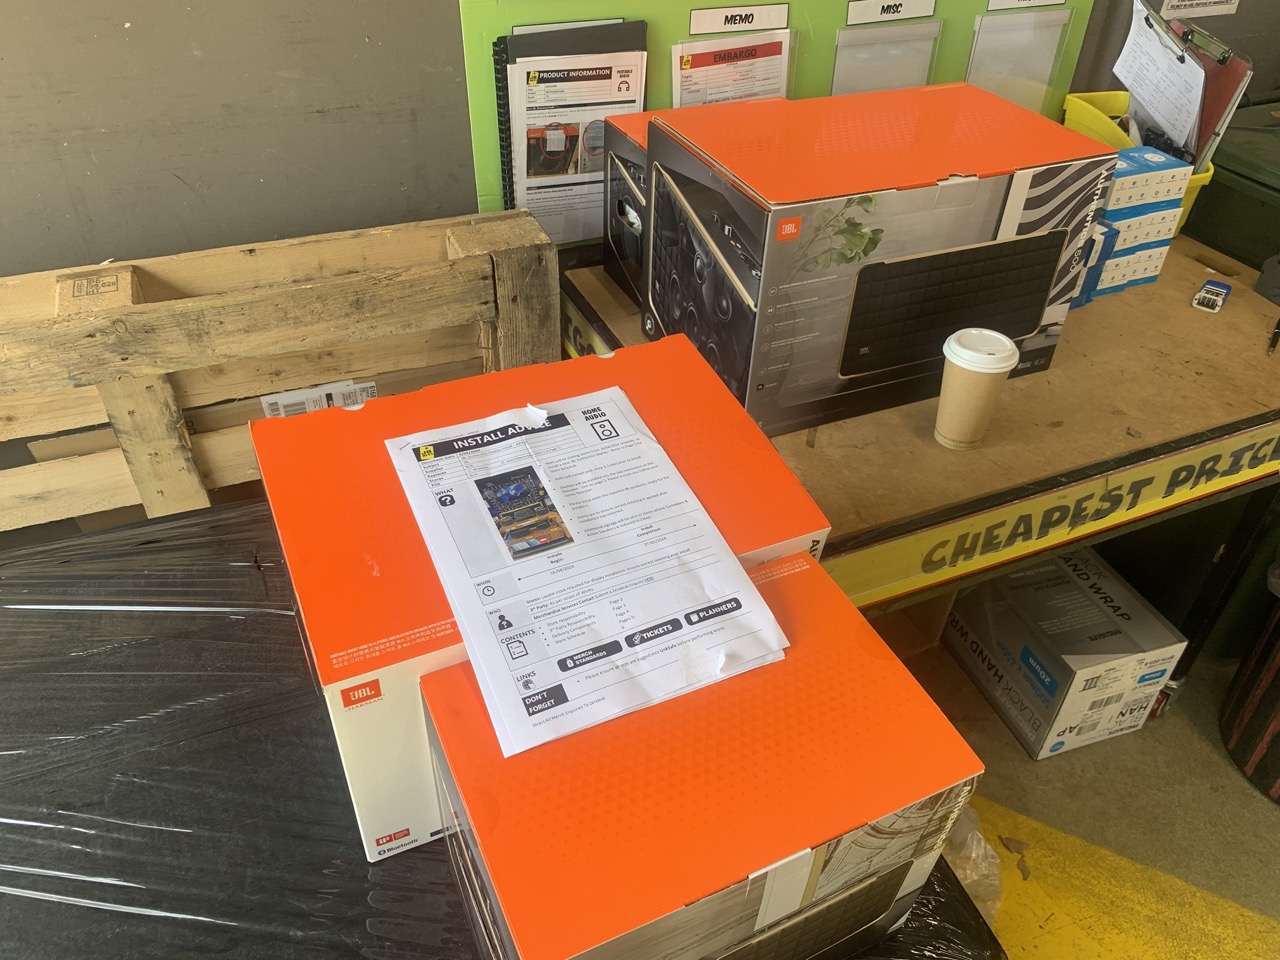
FIELD CASE / JBL GREENFIELDS
Independent troubleshooting of an interactive commercial audiovisual demonstration.
01 / THE DISPLAY
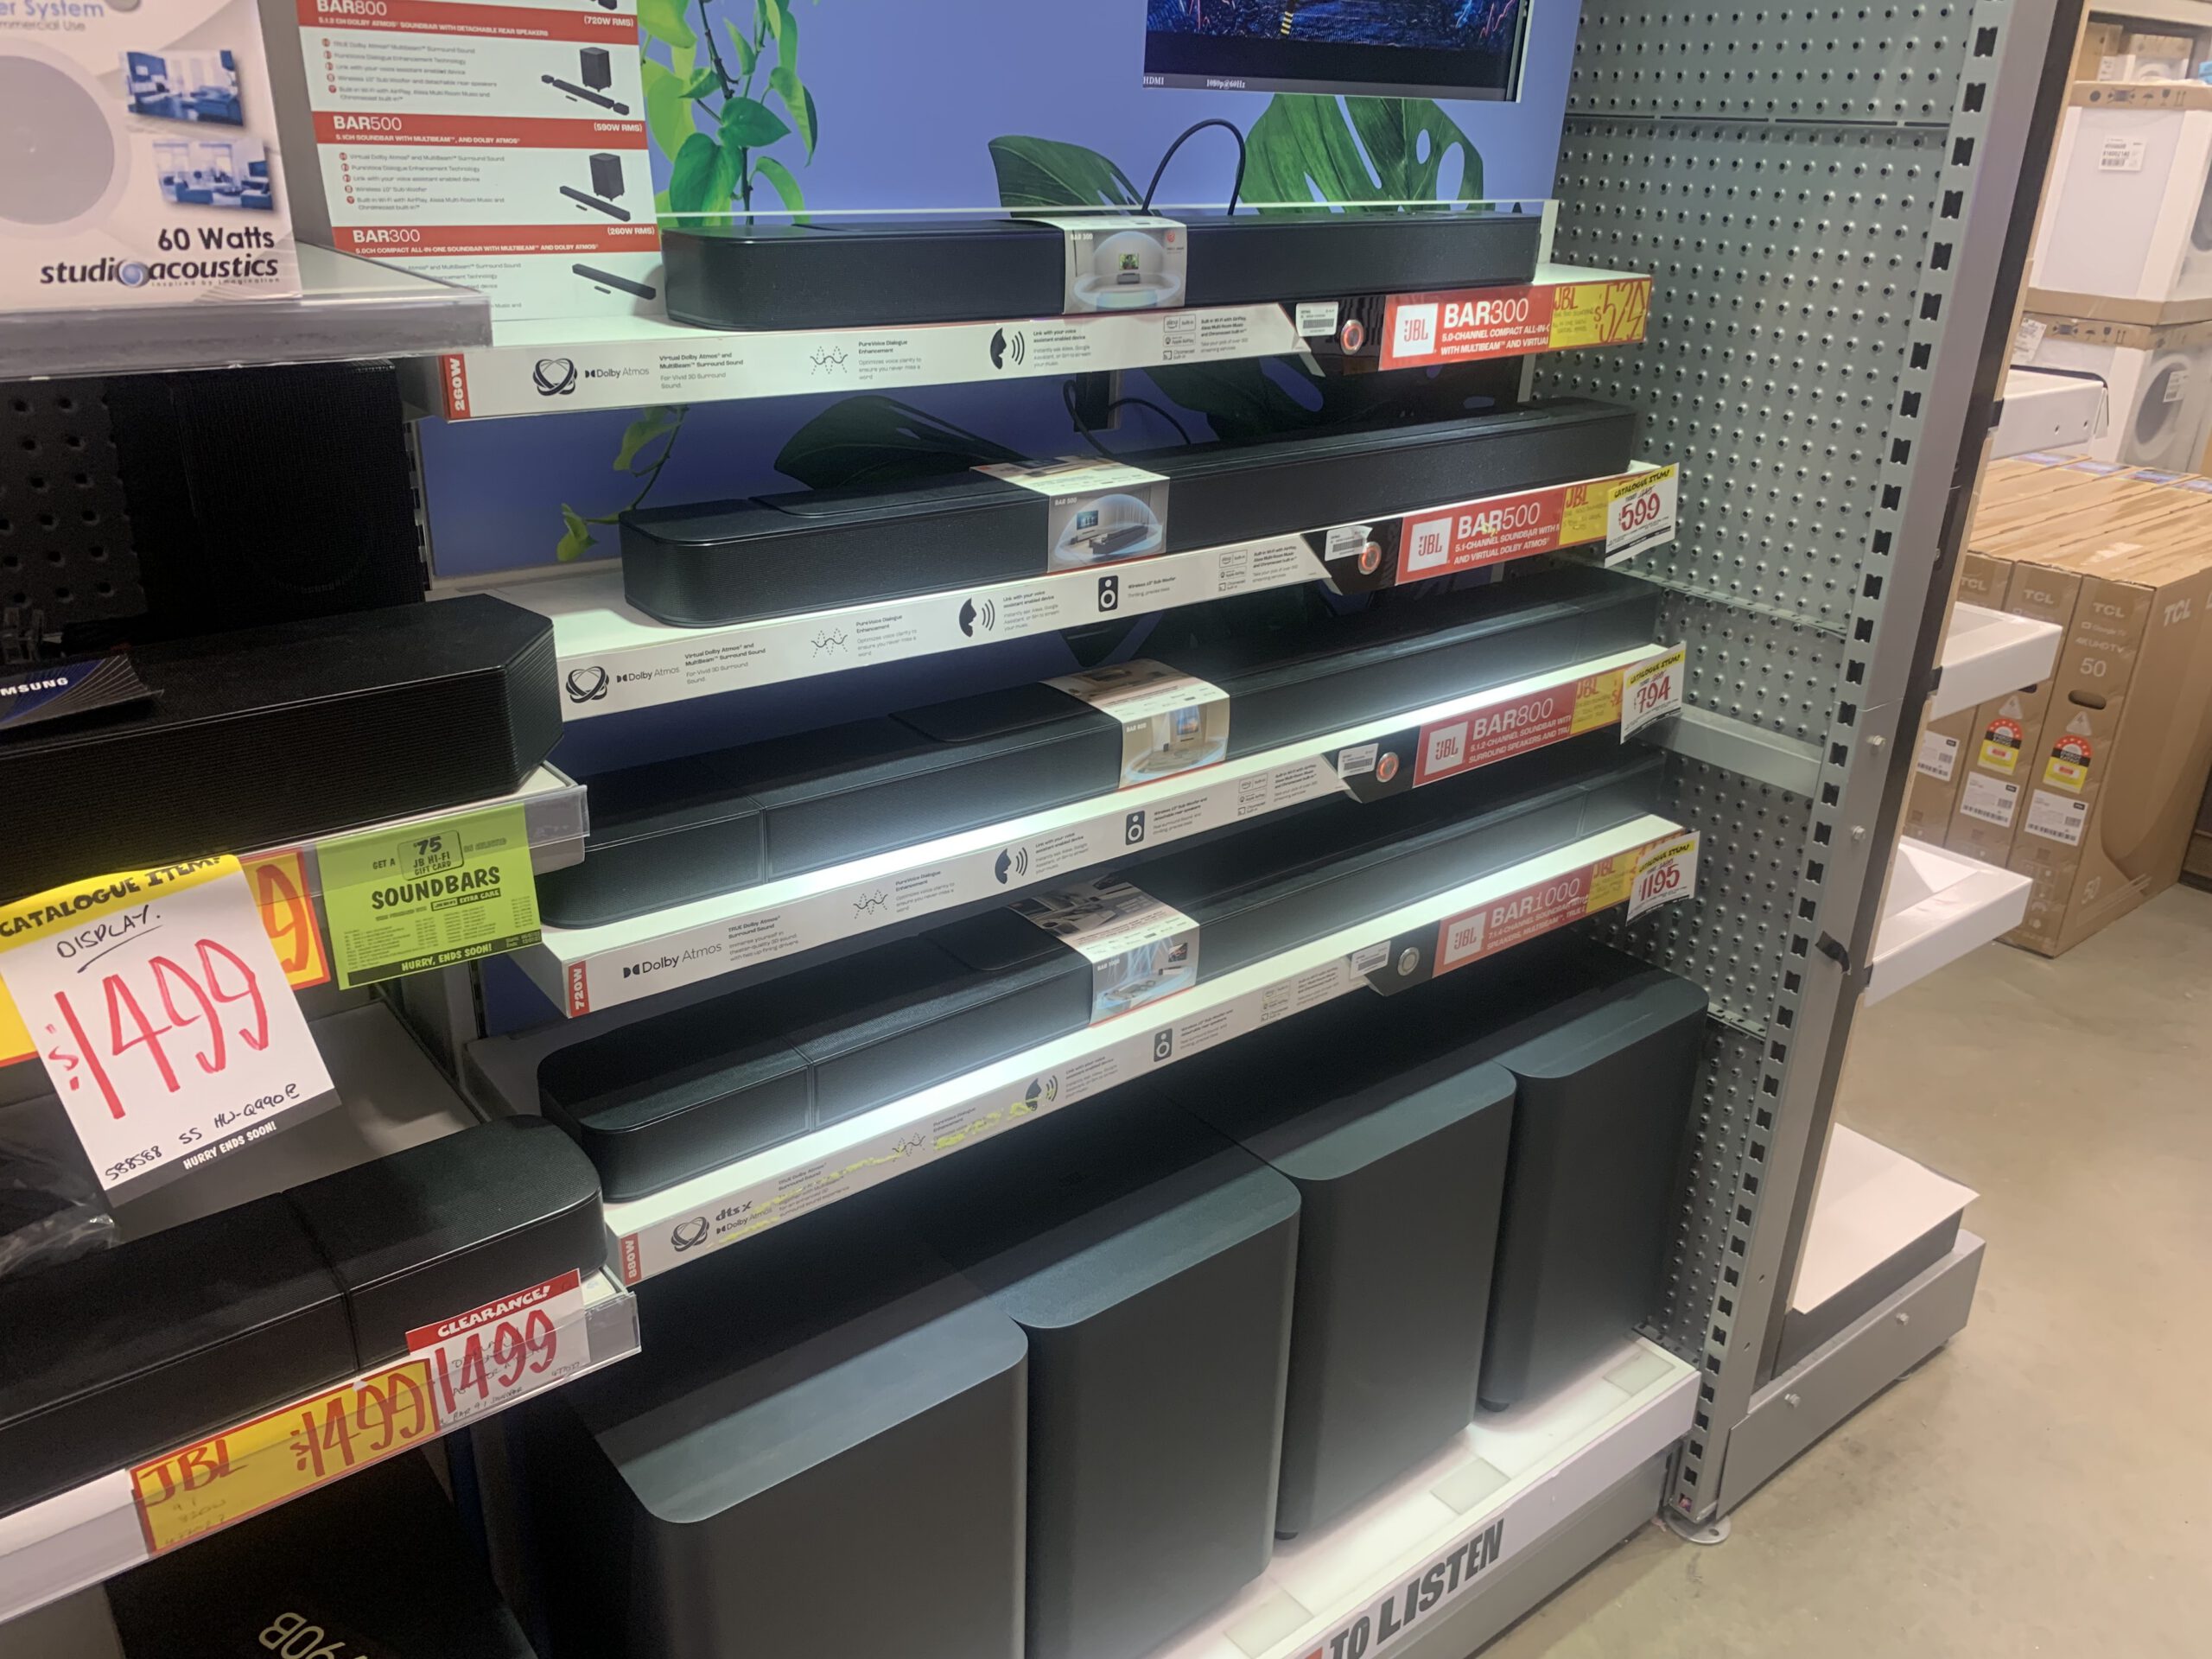
Click to enlarge
02 / BEHIND THE DISPLAY
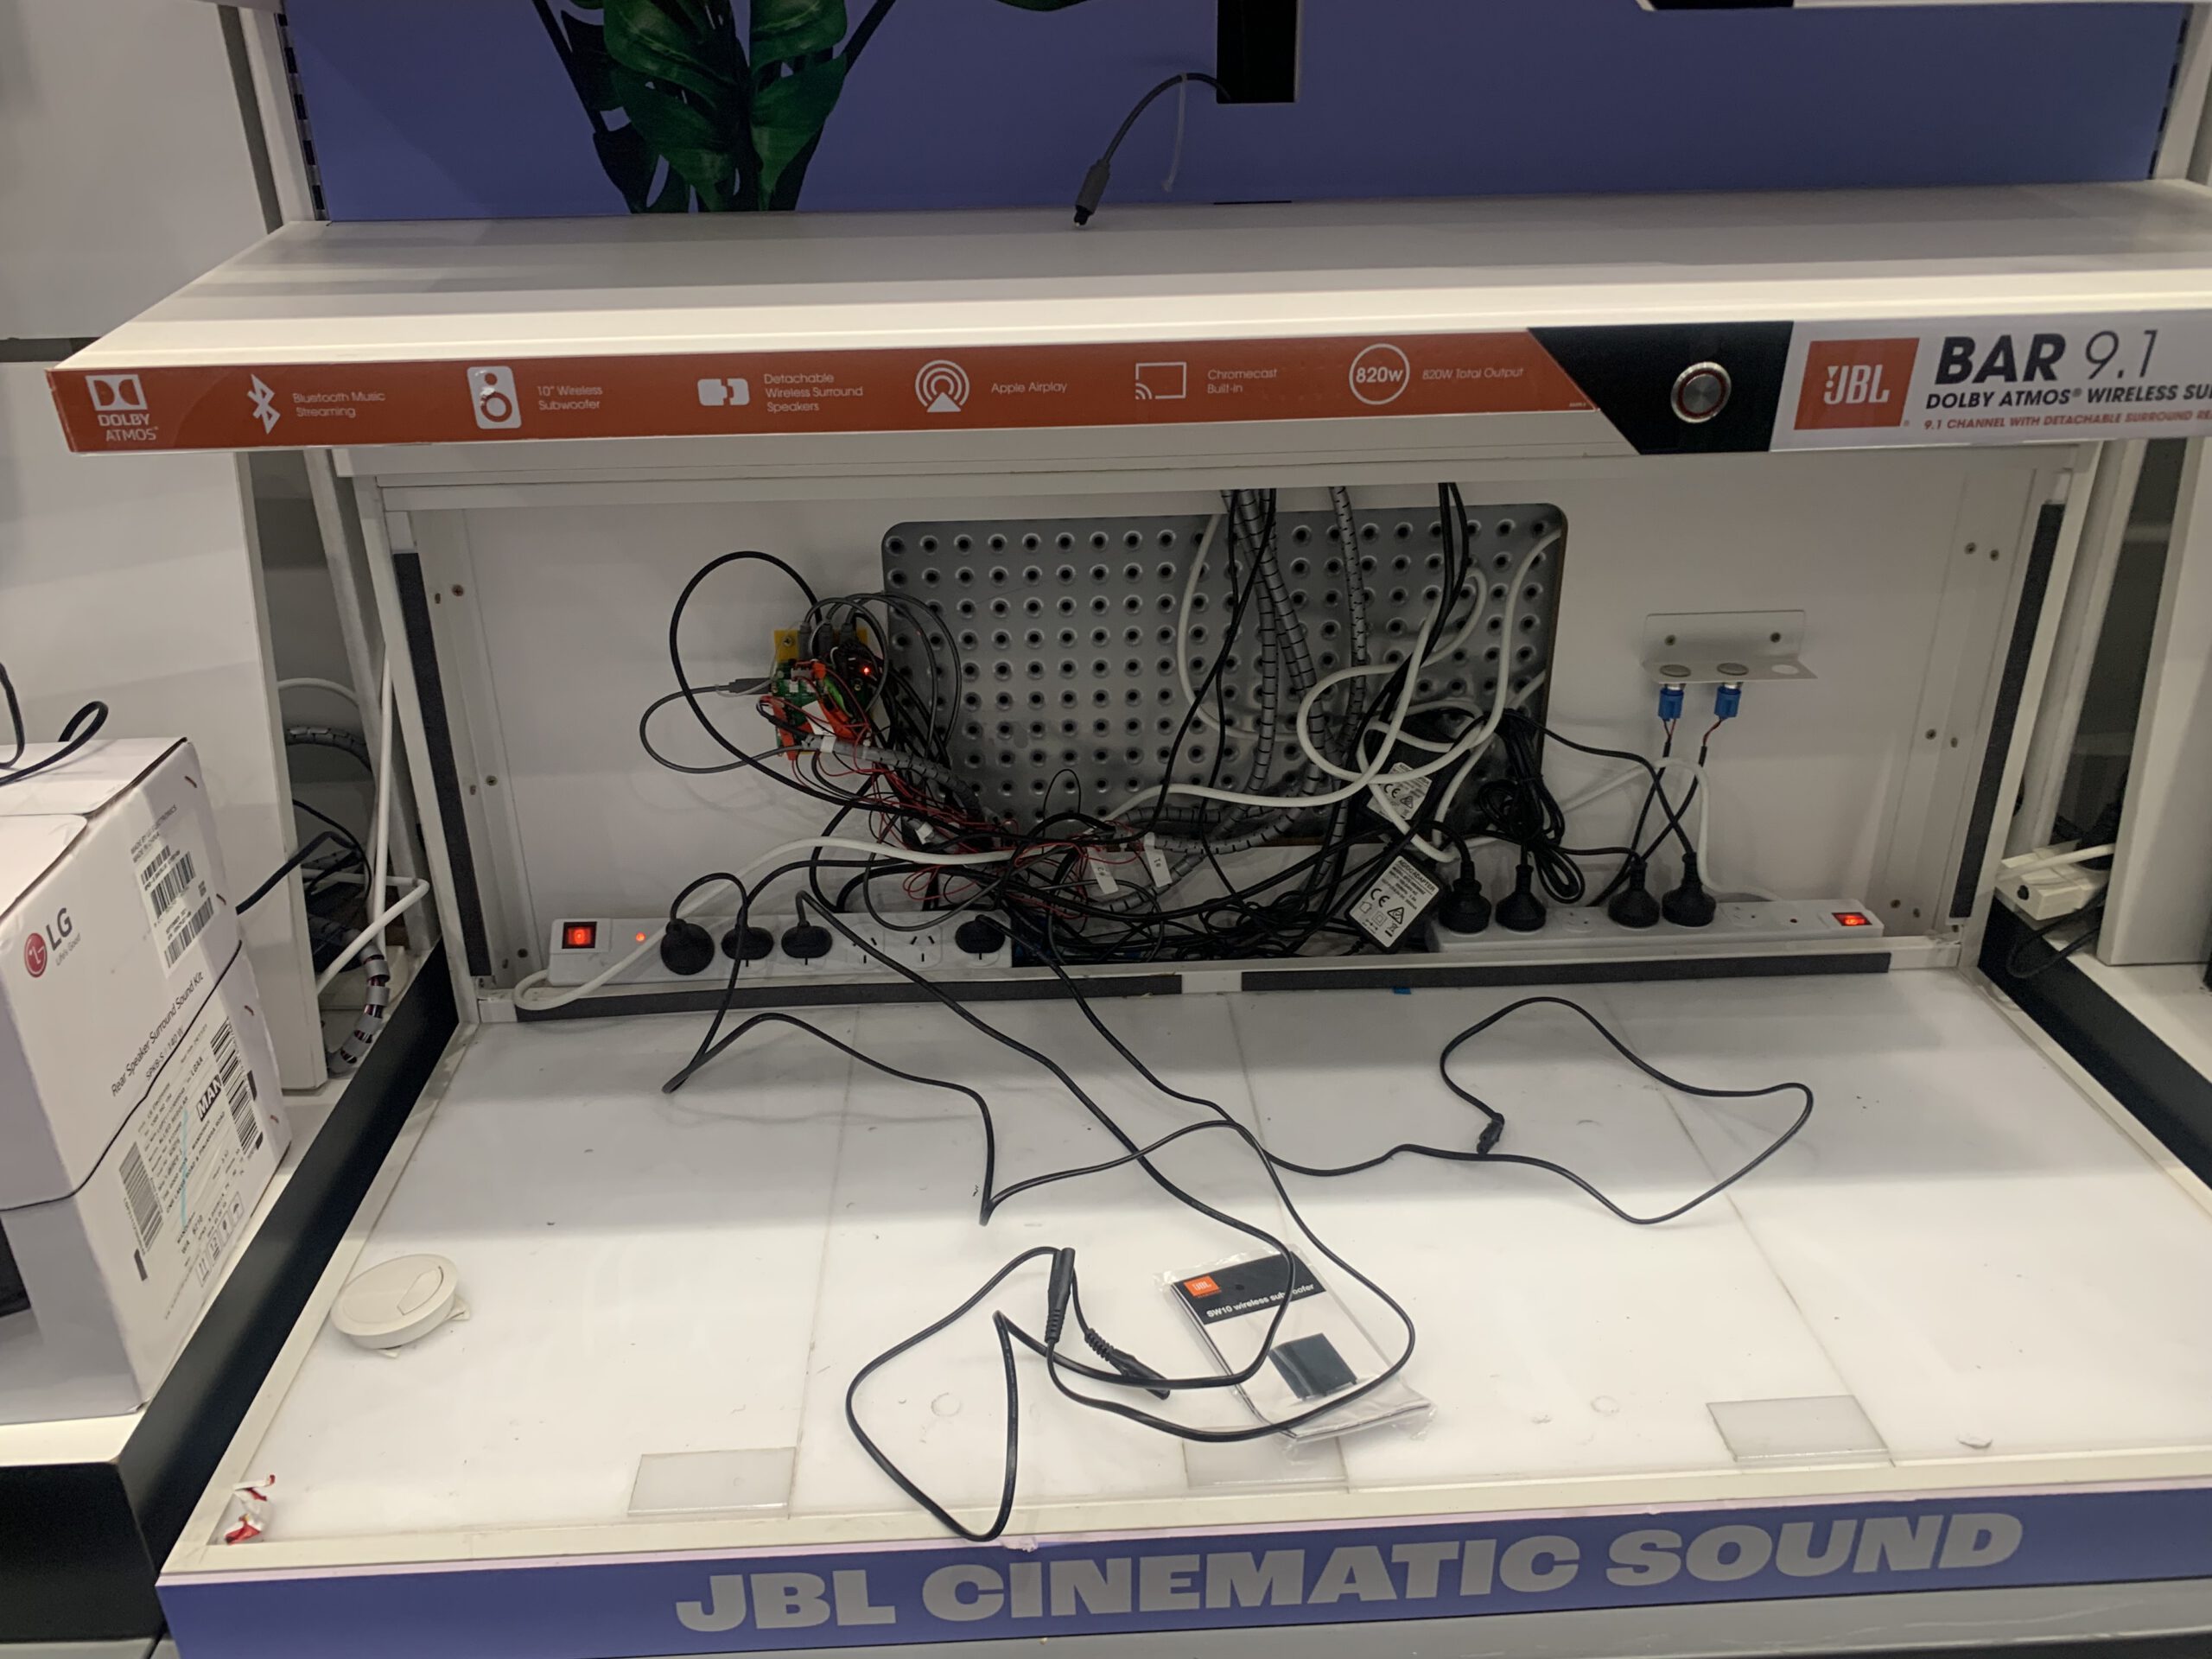
Click to enlarge
The customer-facing demonstration concealed a complex arrangement of controls, audio equipment, video connections and internal wiring.
The photographs document the system encountered during fault-finding, not the finished condition of the internal wiring.
01 / THE CHALLENGE
A JBL retail demonstration was designed to activate selected shelf speakers and corresponding subwoofers, display video content and illuminate the appropriate selection buttons.
The system was not functioning as intended, and the complicated internal wiring presented a significant troubleshooting challenge.
02 / THE CONDITIONS
The equipment was located at the rear of a busy retail store where mobile reception was unavailable.
Technical enquiries required walking approximately 80 metres to the front of the building.
By the afternoon, the Melbourne-based support team had closed, limiting access to technical assistance.
03 / THE RESPONSE
Working through the interconnected controls, audio equipment and display system, I identified and resolved the problems preventing the demonstration from operating correctly.
04 / THE RESULT
The complete interactive demonstration was restored to working order, including speaker and subwoofer selection, synchronised audiovisual playback and illuminated button indicators.
07 / PRECISION AT SCALE
Accuracy matters when everything is on display.
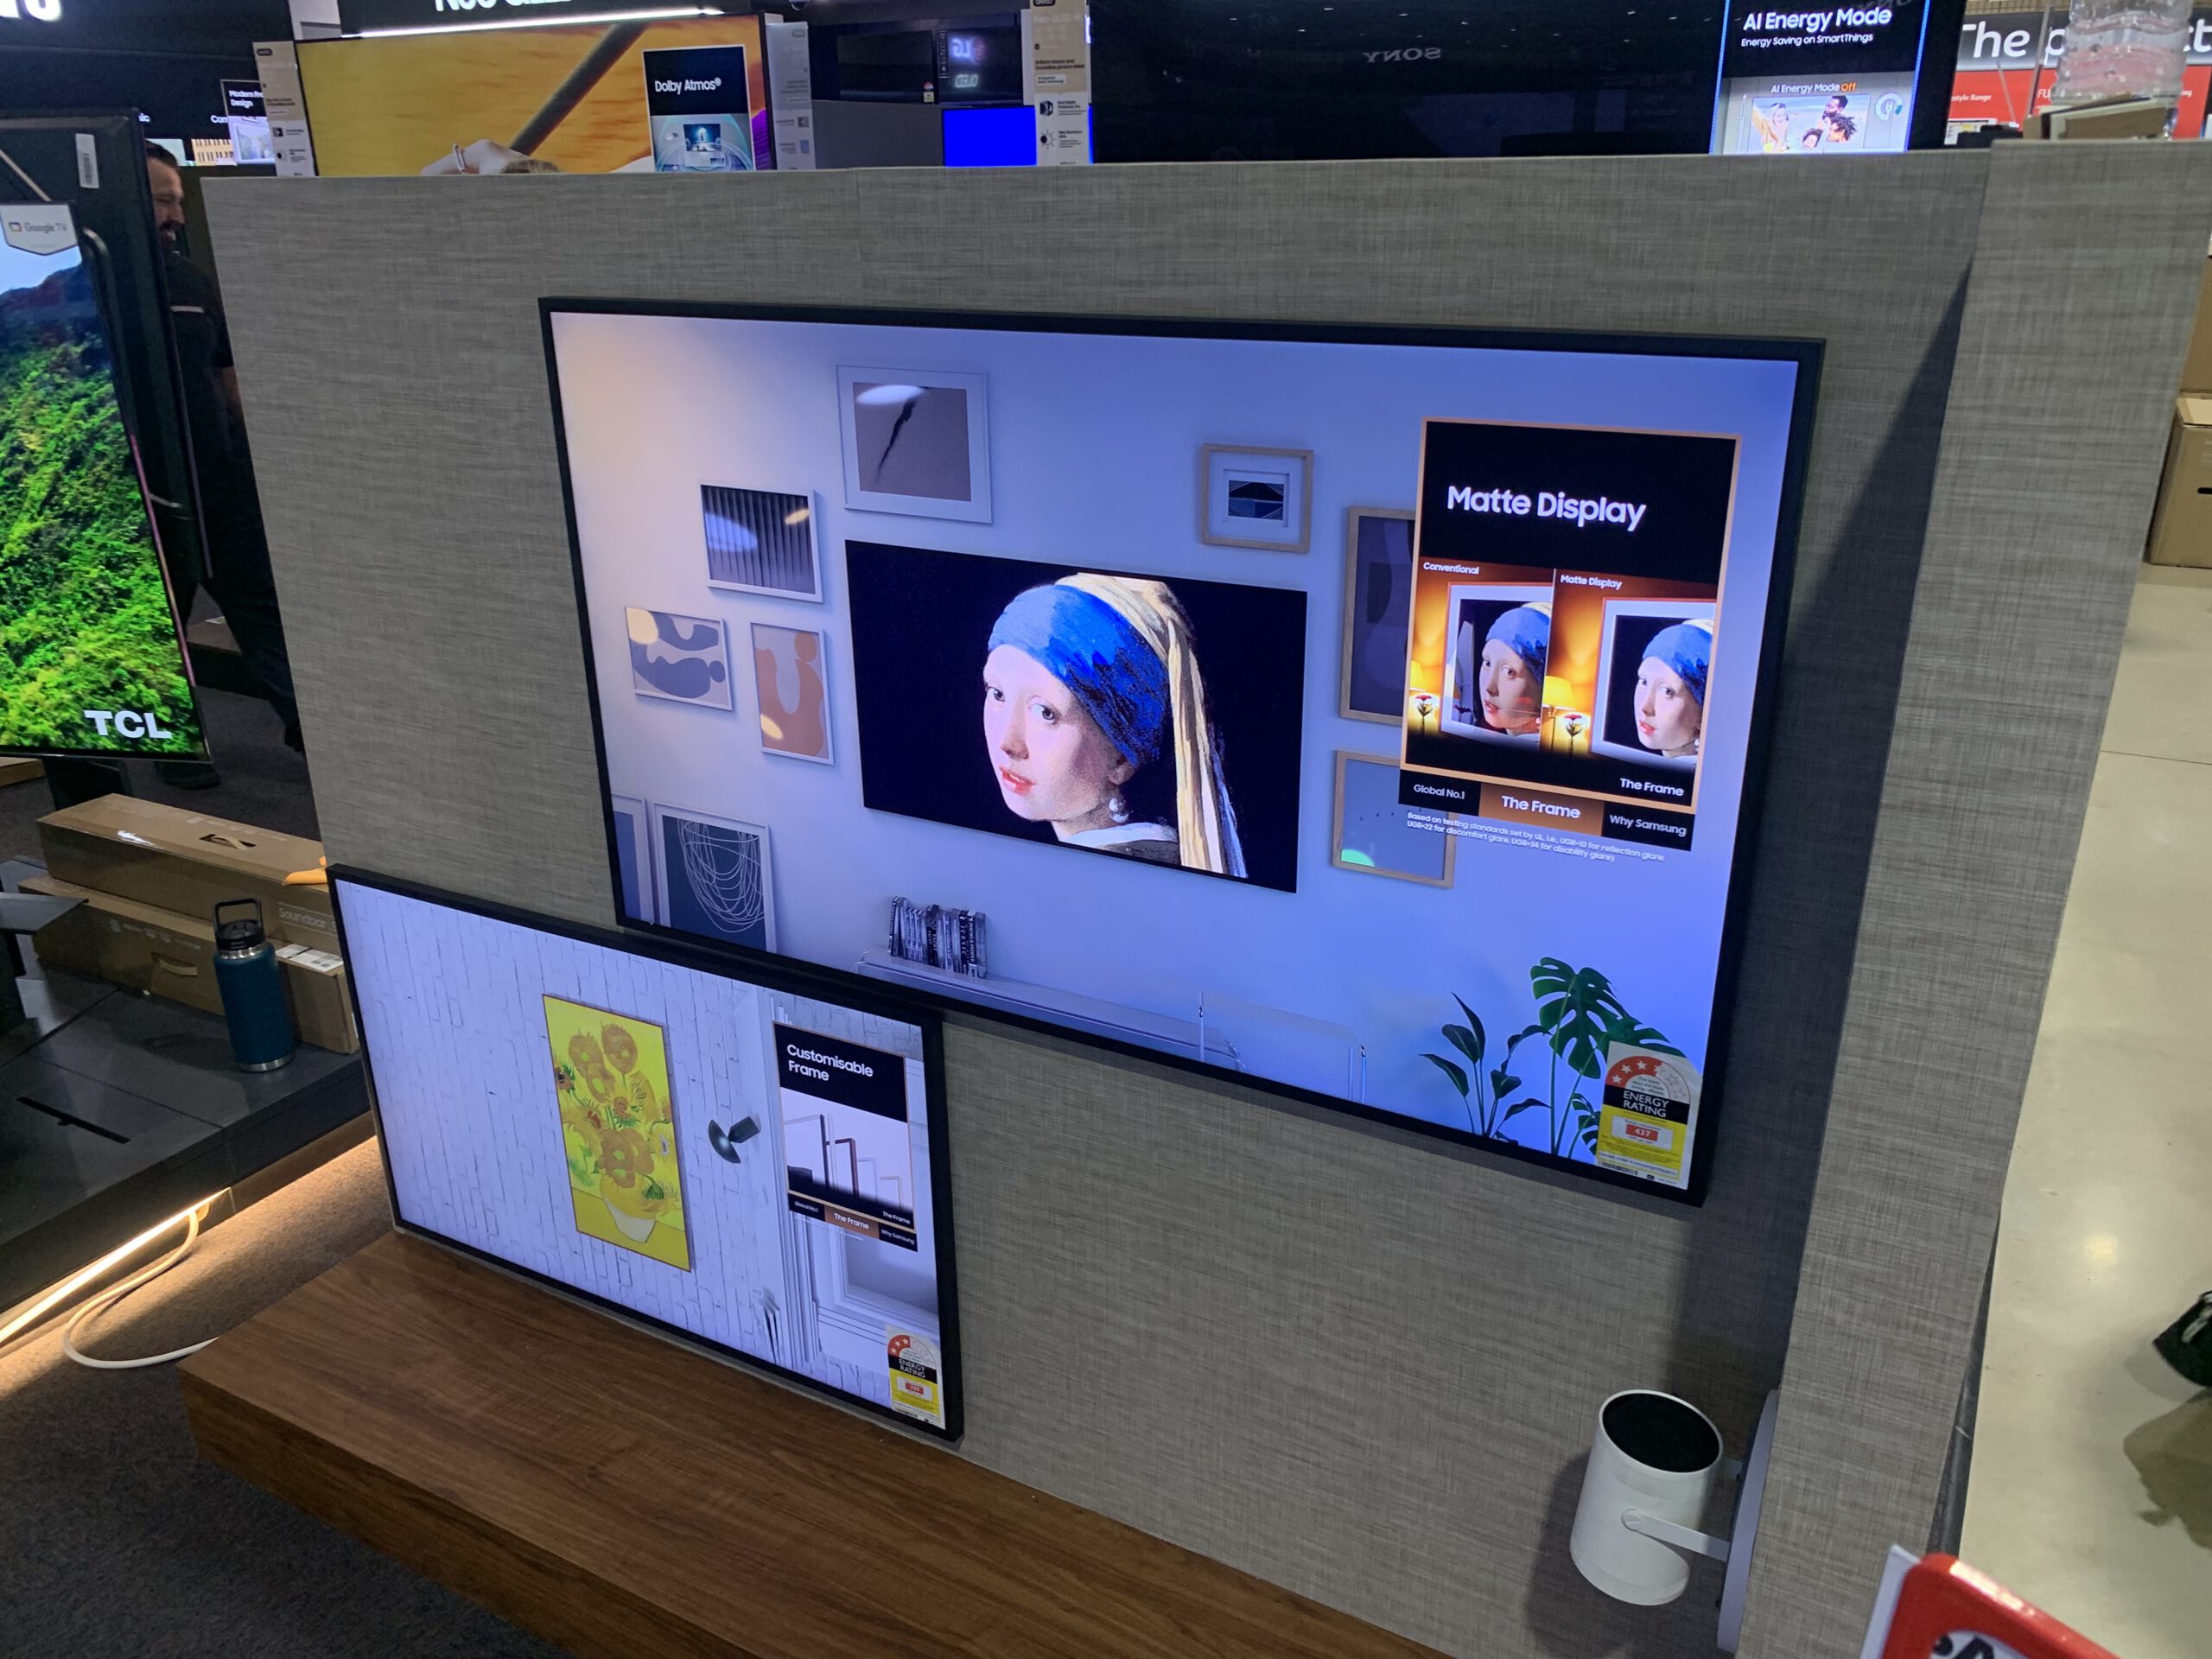
Commercial display installations demanded accuracy in positioning, alignment and presentation.
Working from supplied planograms, technical documentation and installation specifications, I was responsible for translating instructions into practical results on site.
Whether installing, replacing or repositioning equipment, the finished presentation needed to meet the required layout and operational standards.
01 / COMMERCIAL DISPLAY INSTALLATION
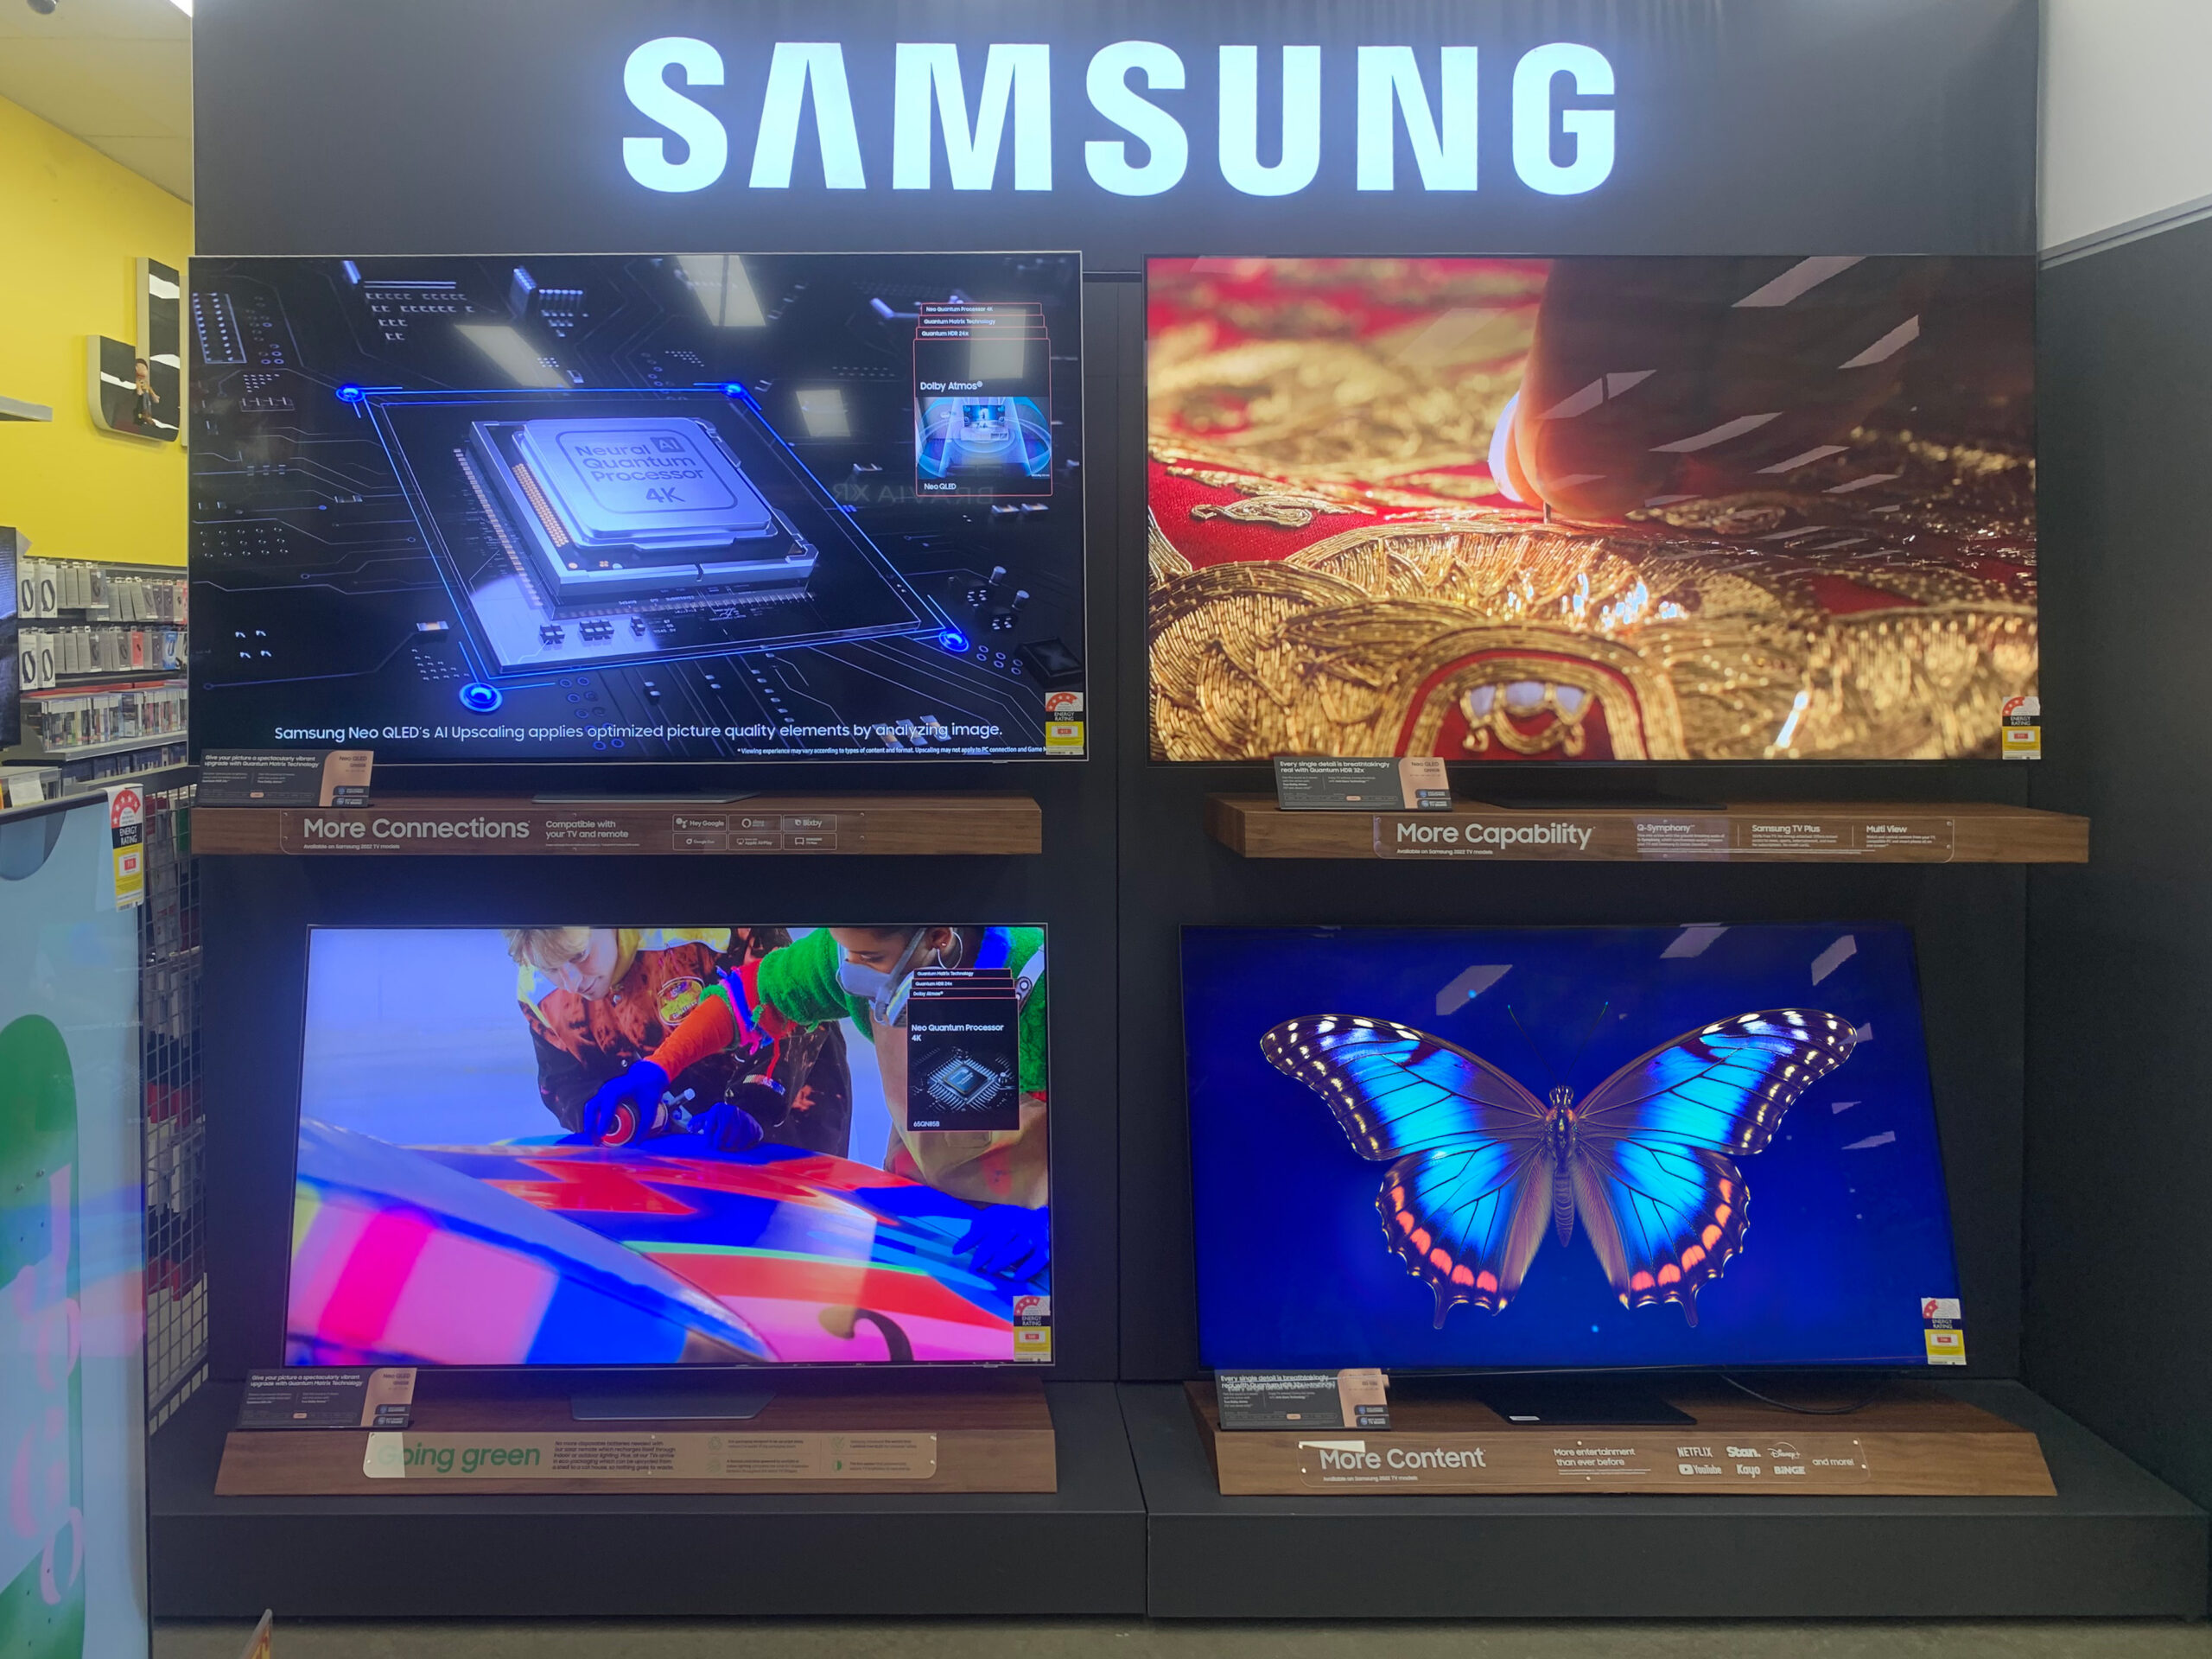
Click to enlarge
02 / MULTI-SCREEN INSTALLATION
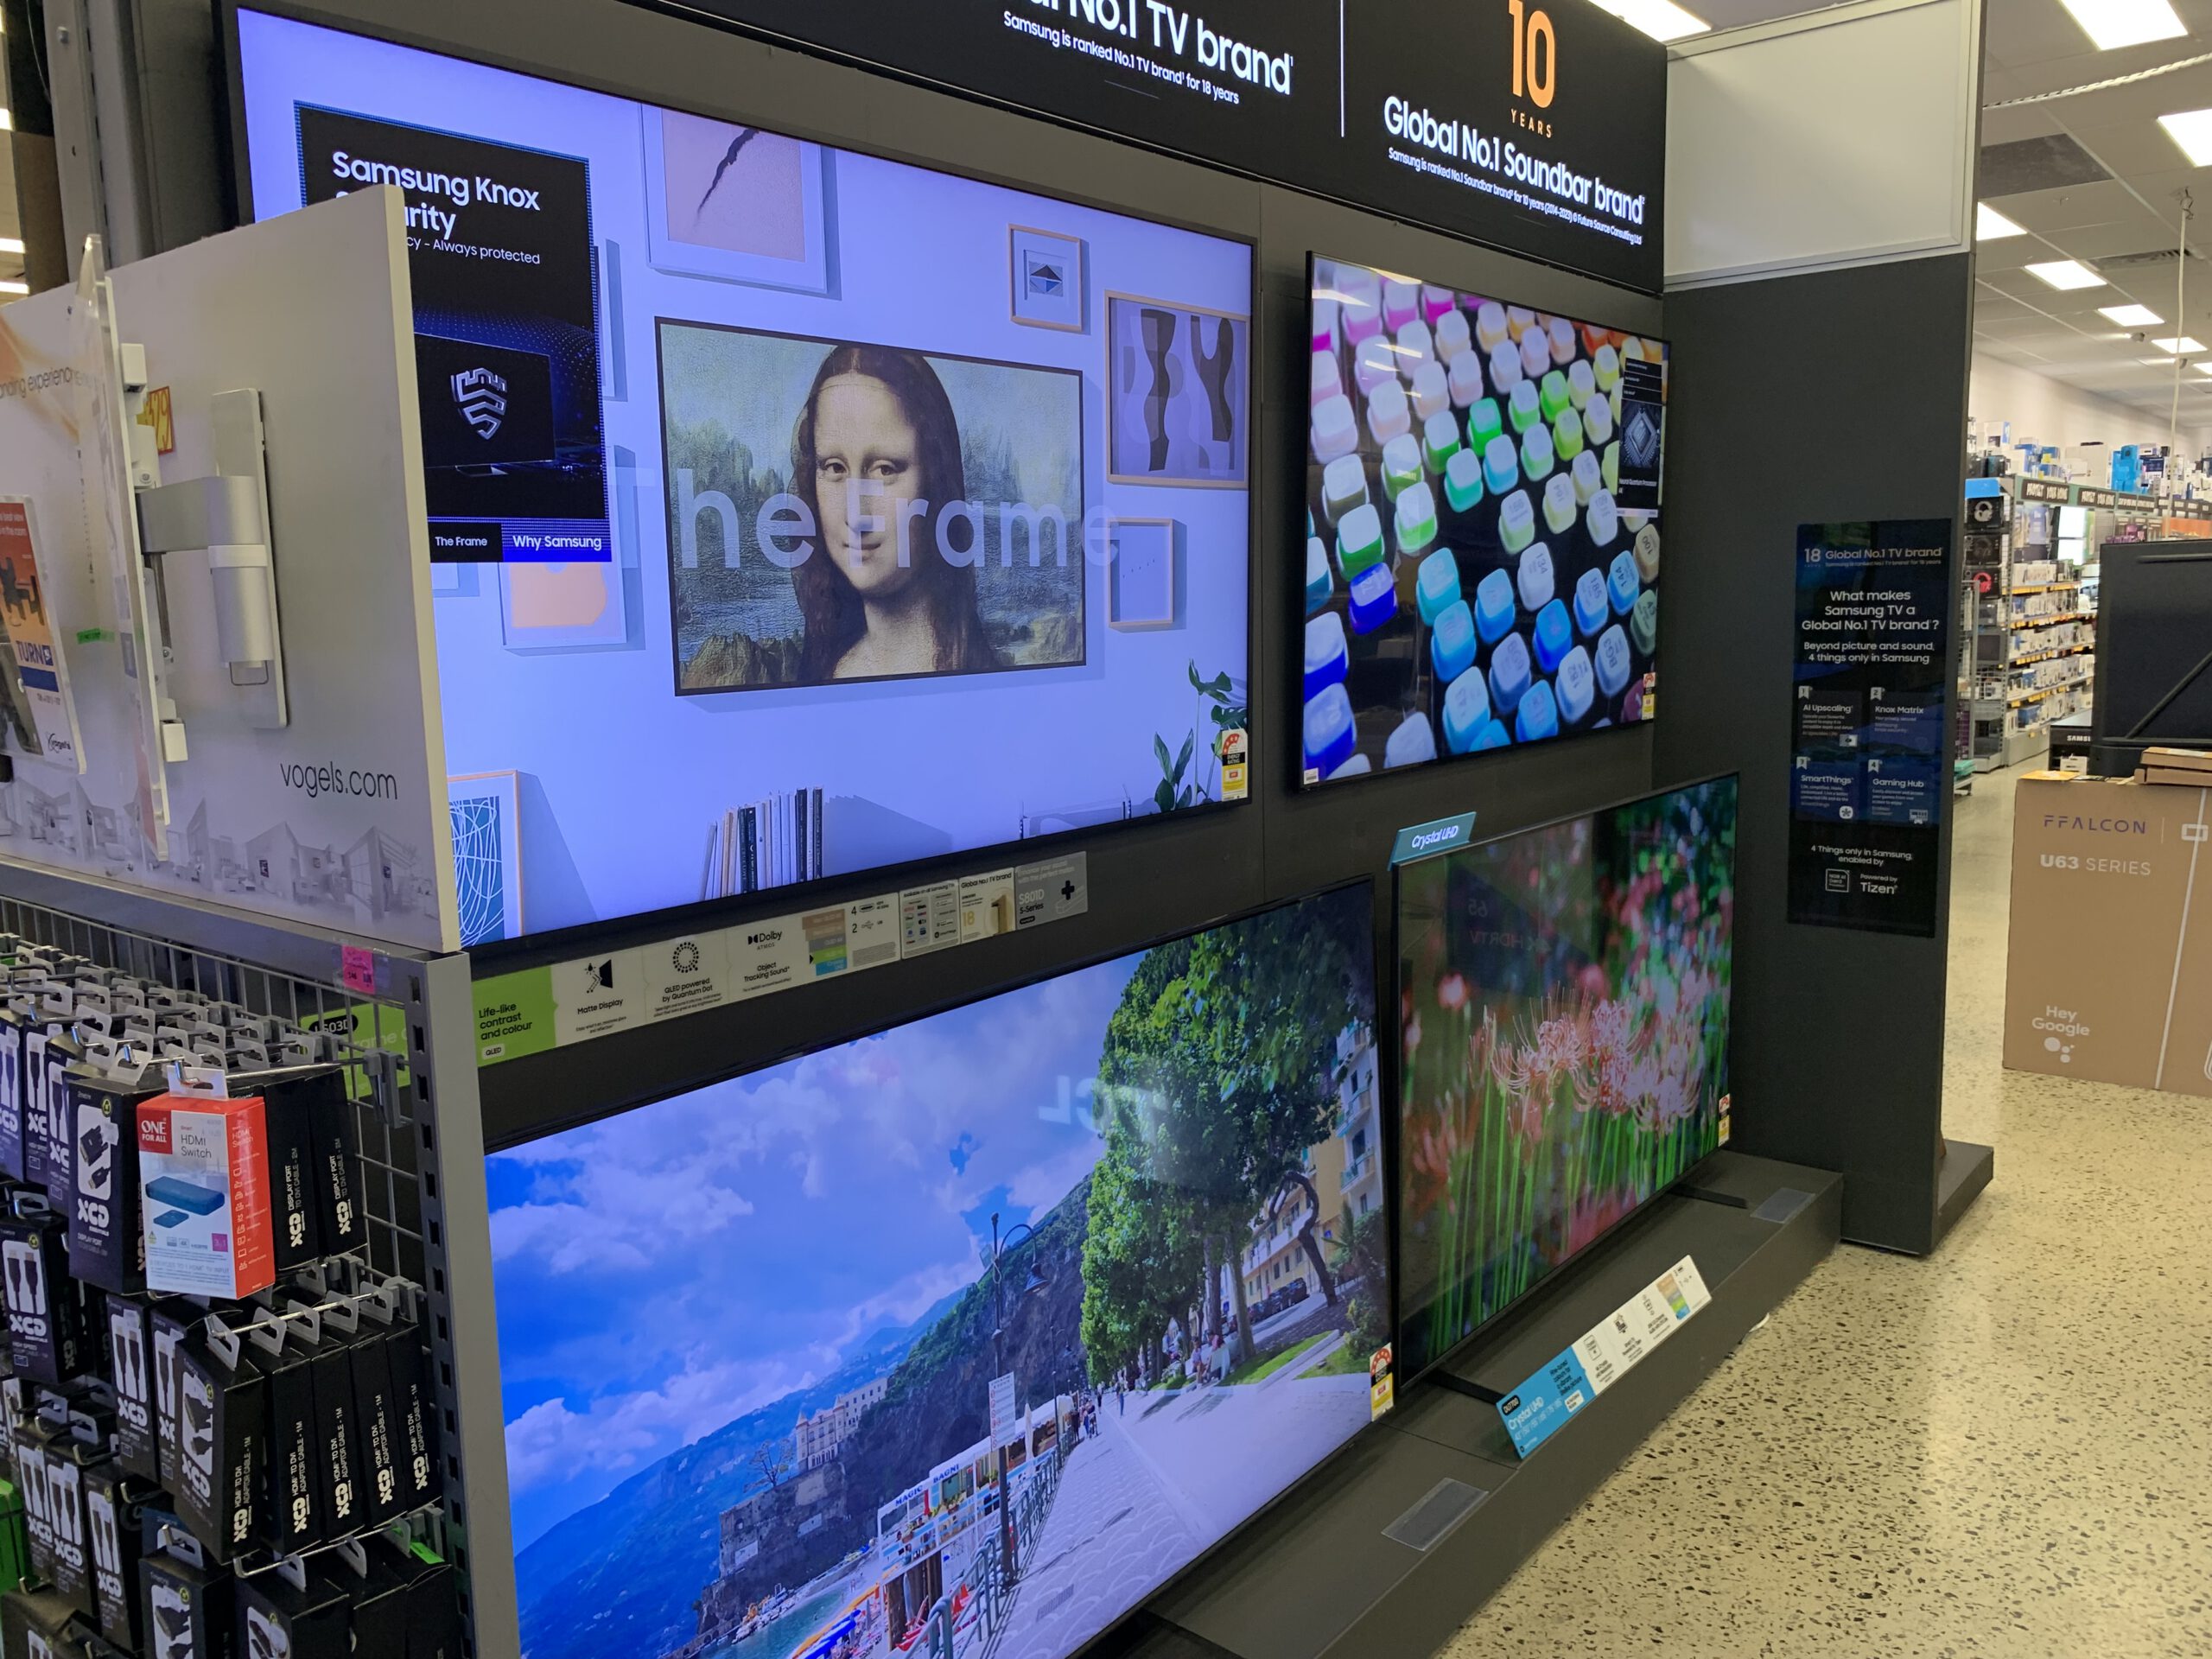
Click to enlarge
03 / INTEGRATED PRESENTATION
Click to enlarge
FROM PLANOGRAM
TO PHYSICAL INSTALLATION.
The challenge was not simply positioning individual pieces of equipment. It was bringing multiple components together accurately within an existing commercial environment, while maintaining the intended presentation and functionality.
08 / DOCUMENTATION + HANDOVER
The job isn't finished until it's documented.
Commercial field assignments involved a structured reporting process extending beyond the physical installation.
Each Scope of Works included a QR code linking directly to the corresponding Airtable job record, where installation details, photographic evidence, safety documentation and completion information were submitted.
01 / PERSONNEL + TIME
Recording personnel attending site, hours worked and time taken to complete the assignment.
02 / SITE COORDINATION
Recording store personnel consulted and relevant site management contacts.
03 / PHOTOGRAPHIC EVIDENCE
Before, during and after photographs, including additional images documenting problems encountered.
04 / EQUIPMENT ACCOUNTABILITY
Recording where equipment and materials were sent, retained or allocated.
05 / SAFETY DOCUMENTATION
Photographing and uploading correctly completed Safe Work Method Statements.
06 / COMPLETION + SIGN-OFF
Recording outstanding issues, completion details and confirmation of store management sign-off.
ACCOUNTABILITY DOESN'T END
WHEN THE TOOLS ARE PACKED AWAY.
Accurate documentation provided the project management team with a record of work completed, problems encountered, safety requirements addressed and the status of each assignment.
Photographic evidence was mandatory. Missing documentation could require a return visit, even when the physical installation had been completed successfully.
09 / THE PEOPLE BEHIND THE WORK
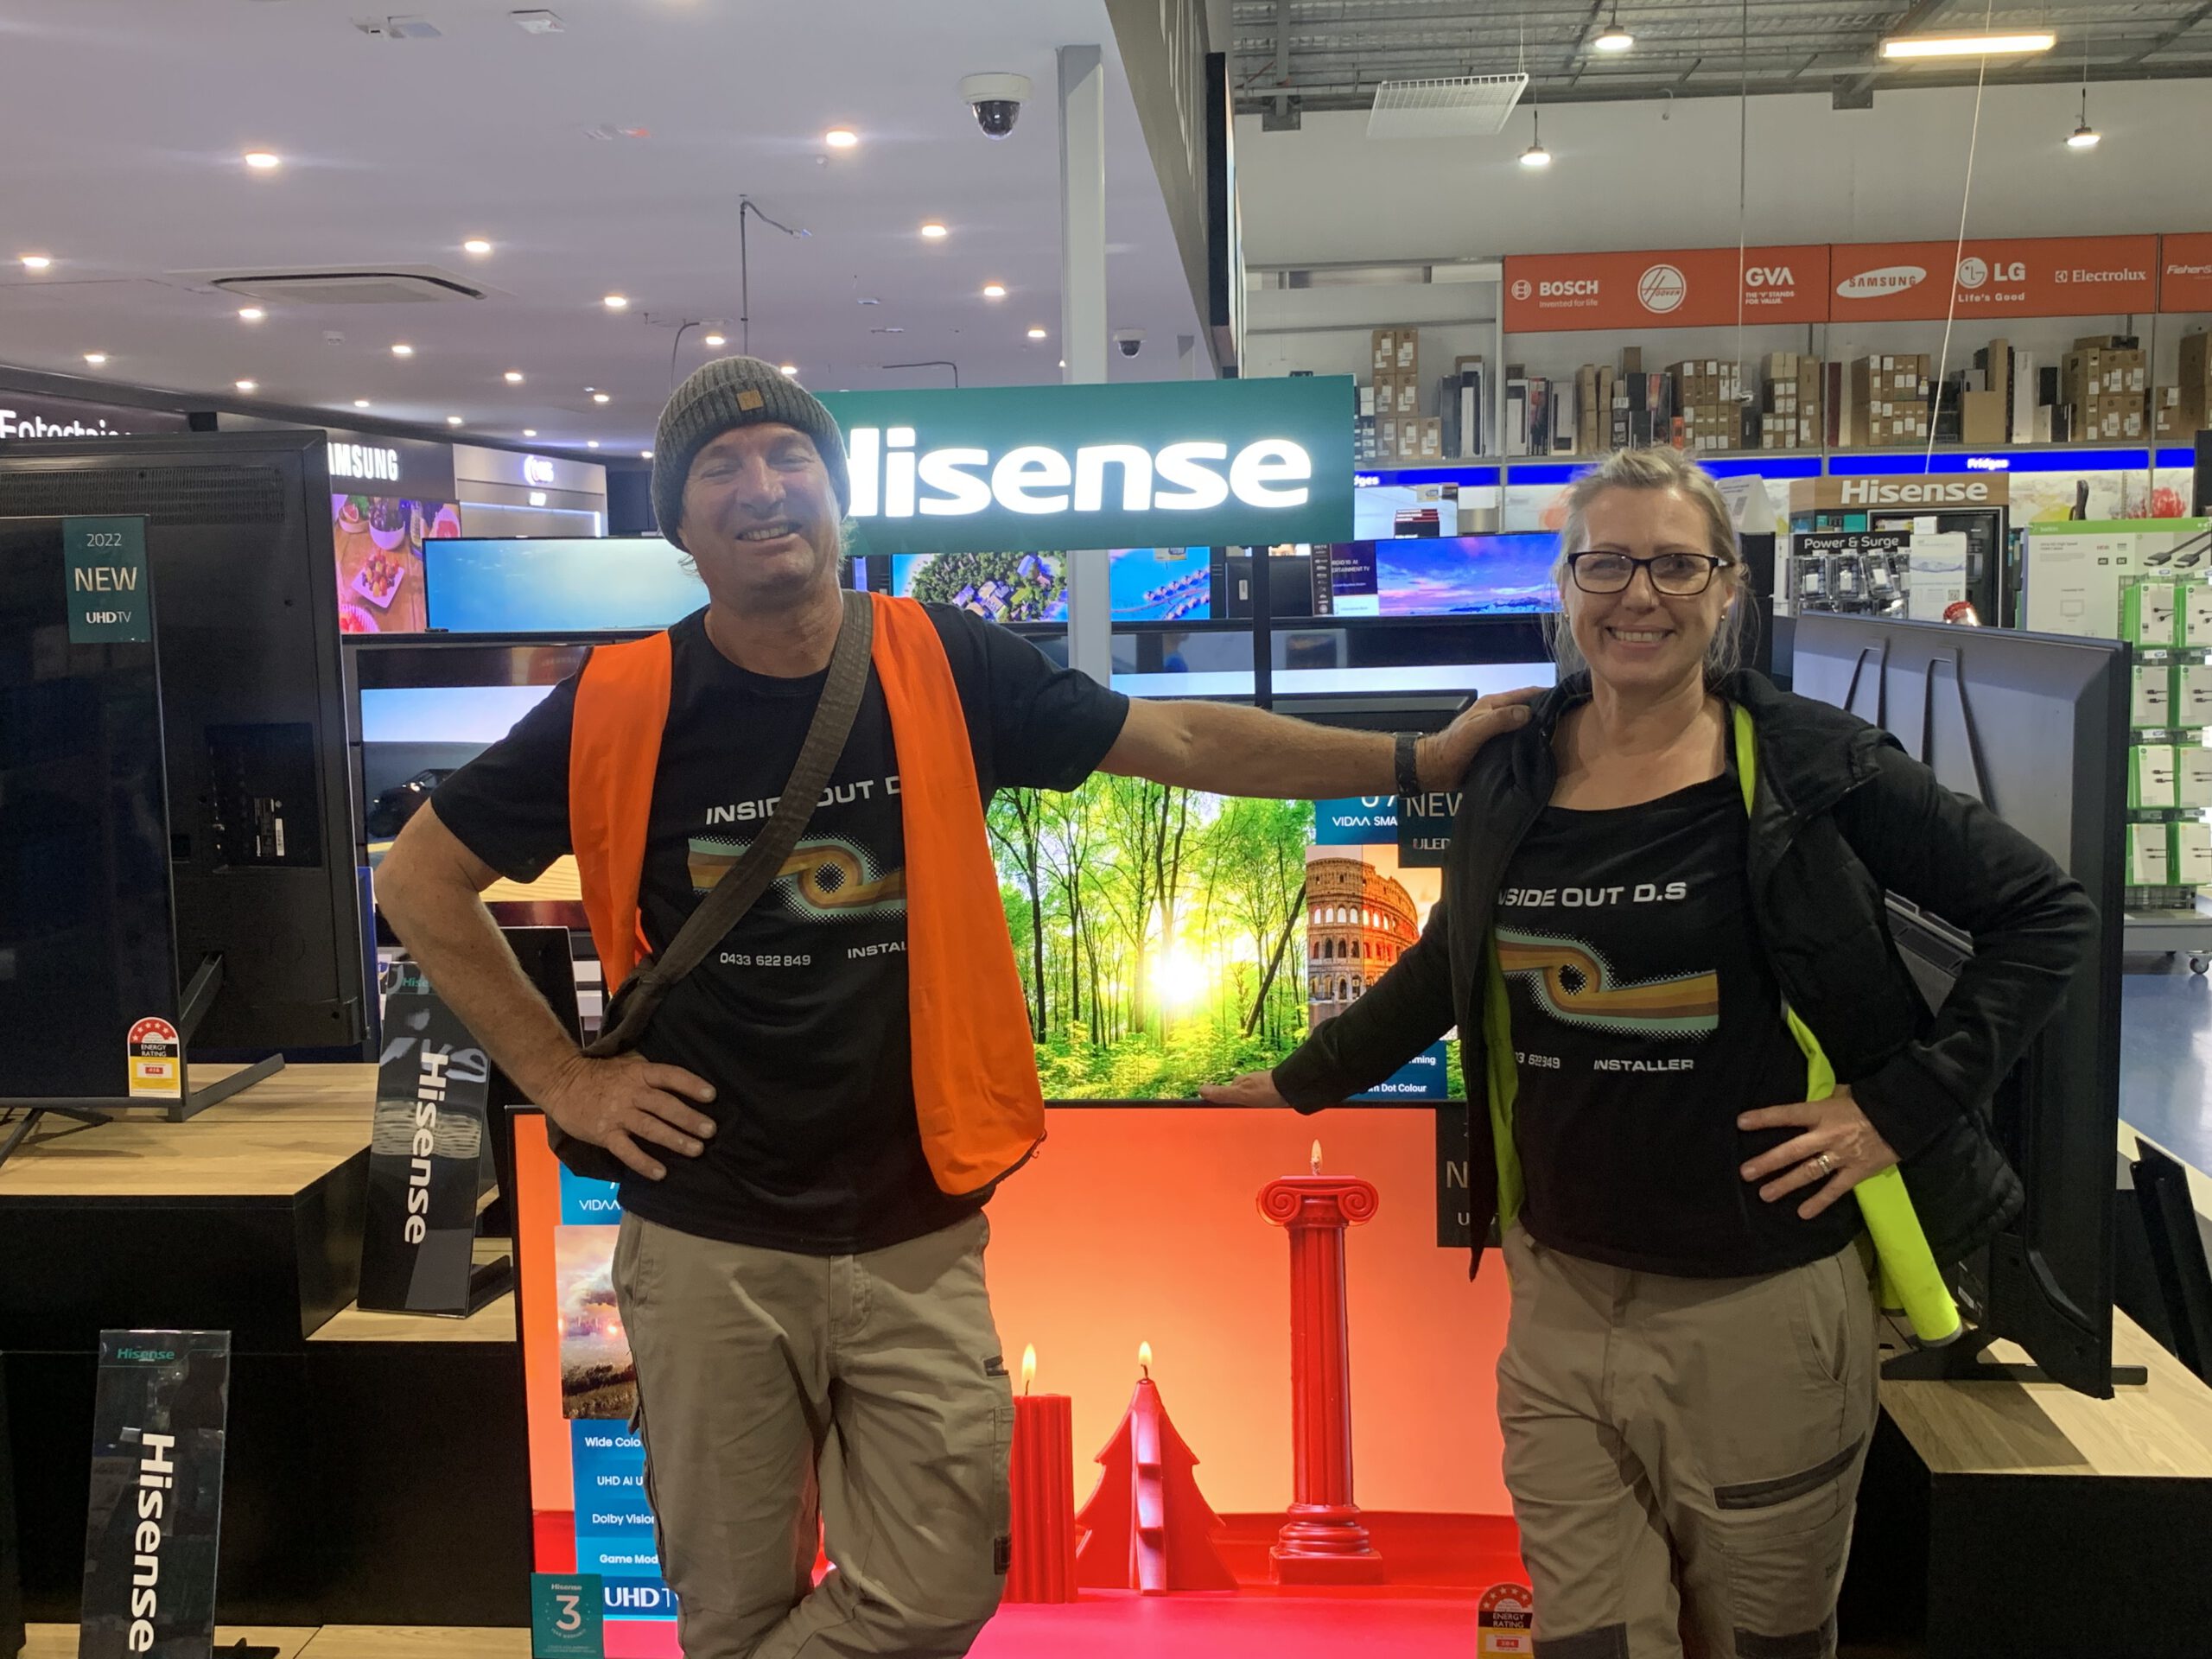
Behind every installation are people.
Commercial field work involves more than equipment and technical instructions.
It requires cooperation, communication, adaptability and a willingness to work through the unexpected.
Click to enlarge
ON SITE / HISENSE RETAIL INSTALLATION
Dennis Zovko and his wife, Camille, during a commercial retail display installation.
GOOD WORK IS TECHNICAL.
GREAT WORK IS ALSO HUMAN.
03 / DRONE OPERATIONS
Drone Operations + Aerial Systems
Drone technology provides a practical way to observe, document and understand environments that are difficult to assess from ground level. My work has included aerial site assessment, client-directed photography and filming, and vessel tracking in active marine environments.
01 / QUALIFICATIONS + PREPARATION
THE FLIGHT BEGINS
BEFORE TAKE-OFF.
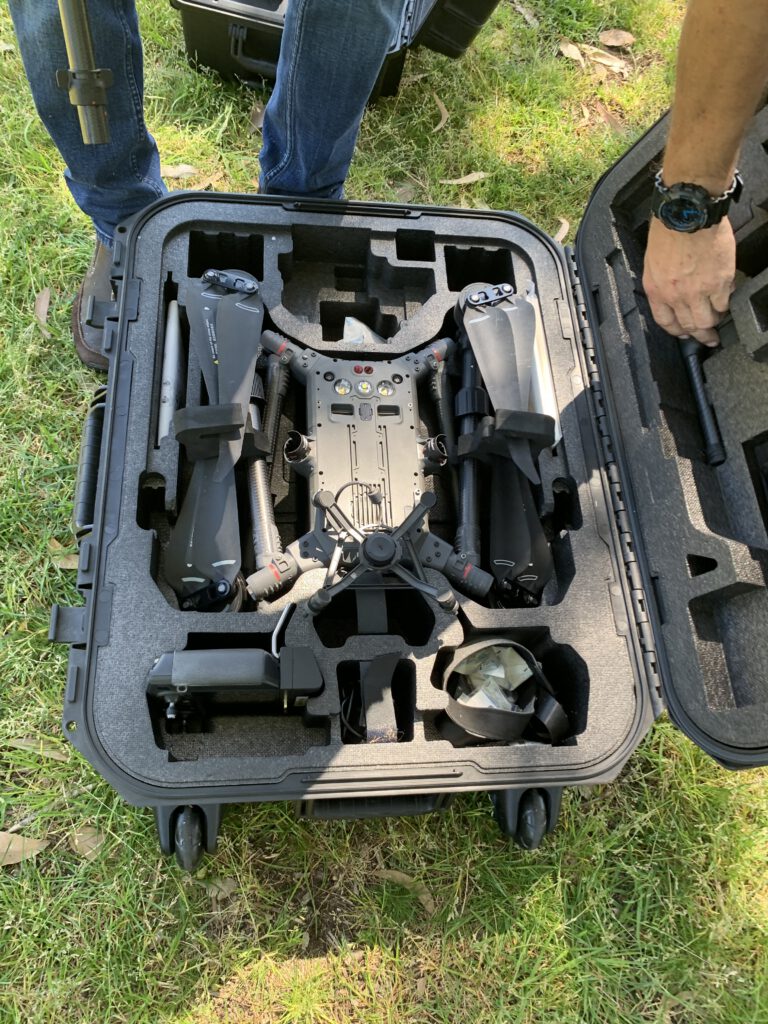
I hold a CASA Remote Pilot Licence (RePL) for multi-rotor aircraft up to 25 kg, granted in October 2025. Practical training included aircraft handling, operational planning, risk assessment and emergency procedures.
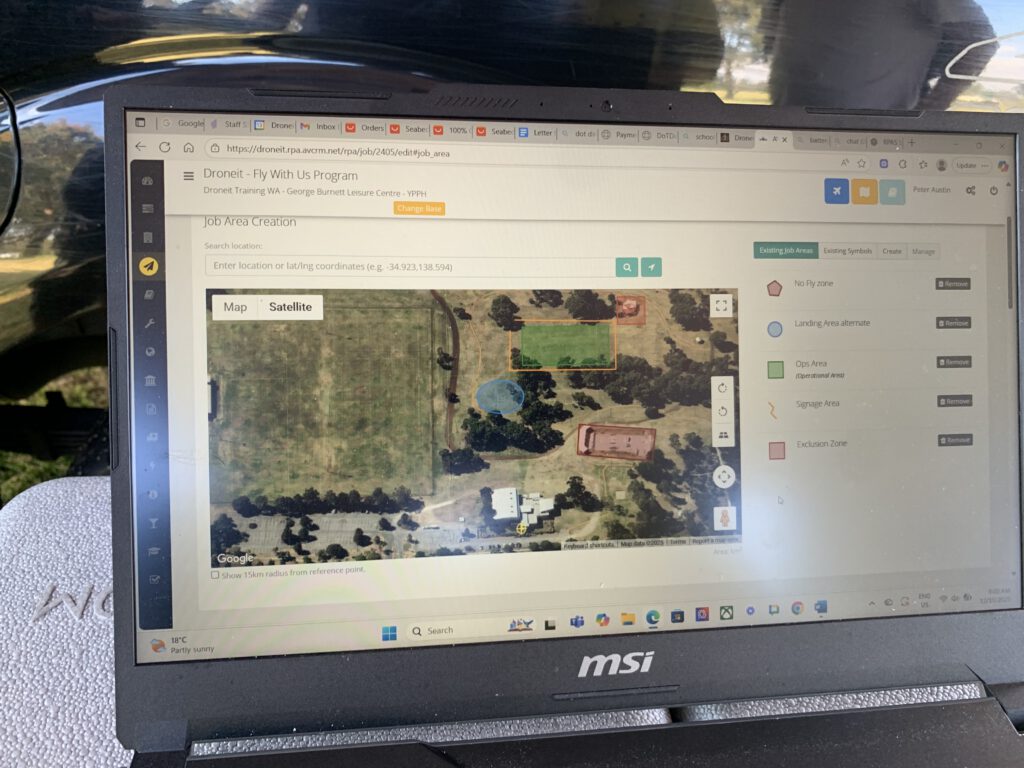
Flight preparation involves assessing the operating environment, reviewing relevant airspace and weather information, checking aircraft readiness and establishing appropriate operational controls.
Click to enlarge
DJI MATRICE 300 RTK / REPL PRACTICAL FLIGHT TRAINING
Click to enlarge
OPERATIONAL AREA PLANNING / FLIGHT ZONES + EXCLUSION AREAS
02 / AERIAL SITE ASSESSMENT
SEEING THE SITE.
UNDERSTANDING THE SCOPE.
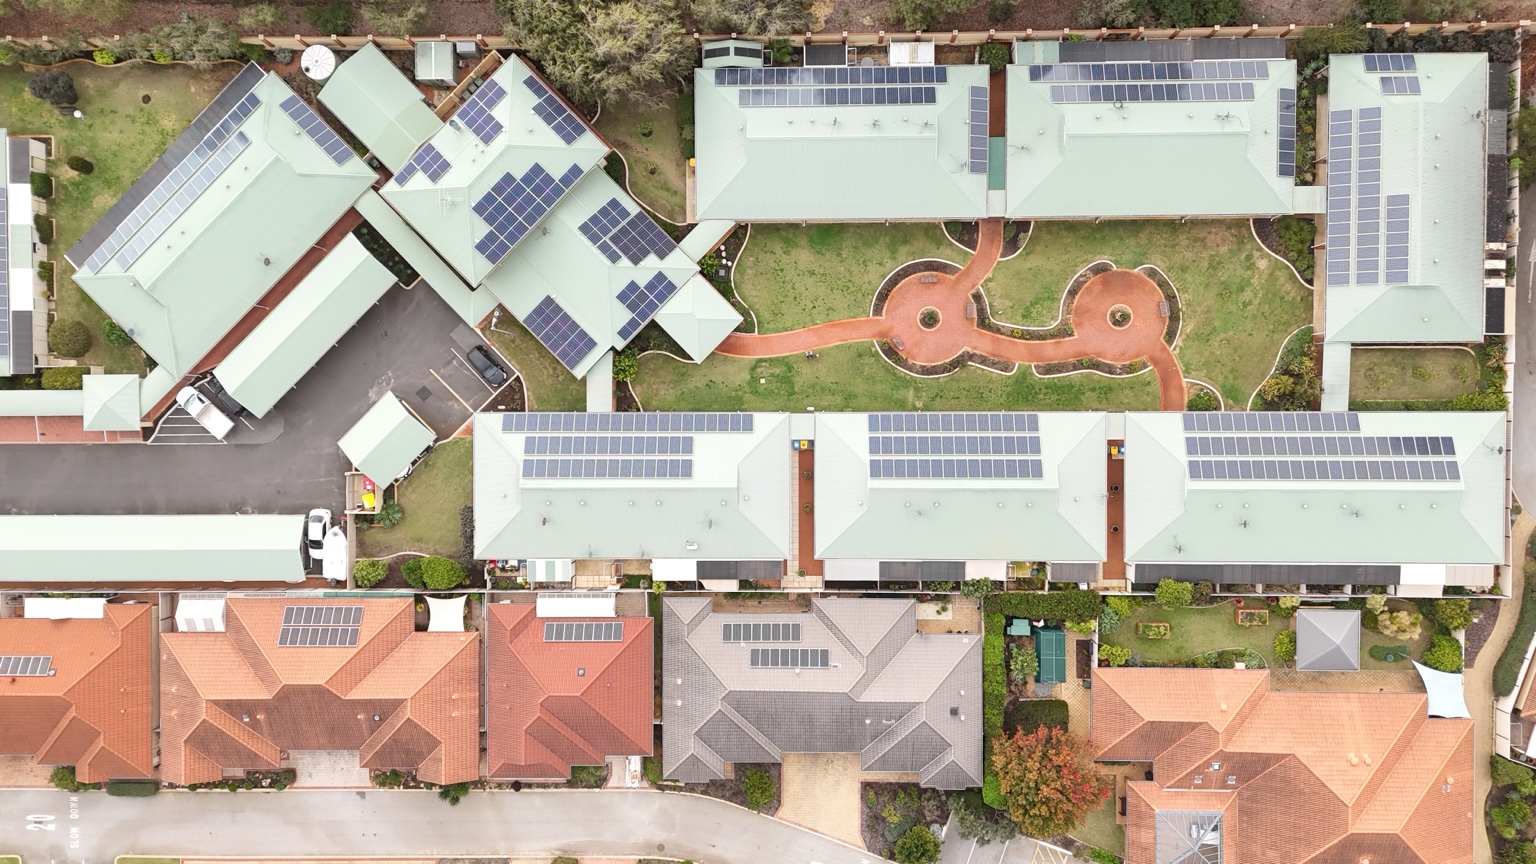
An aerial perimeter overview of Eureka Lifestyle Village in Erskine was undertaken to establish the property's layout, surrounding environment and overall site scope.
Click to enlarge
EUREKA LIFESTYLE VILLAGE / AERIAL SITE OVERVIEW
03 / CLIENT-DIRECTED AERIAL PRODUCTION
CAPTURING THE ACTIVITY.
COMMUNICATING THE PURPOSE.
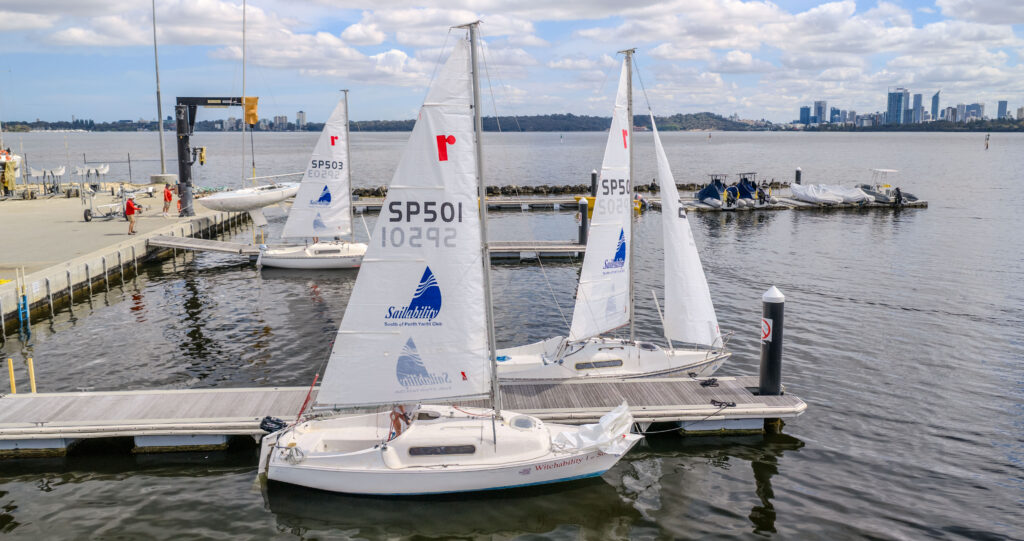
An aerial photography and filming assignment for Sailability WA involved documenting sailing activities and sponsor branding on the boats. The intended deliverables included a photographic portfolio and promotional film for display at the venue.
Click to enlarge
sailability wa / vessel branding + documentation
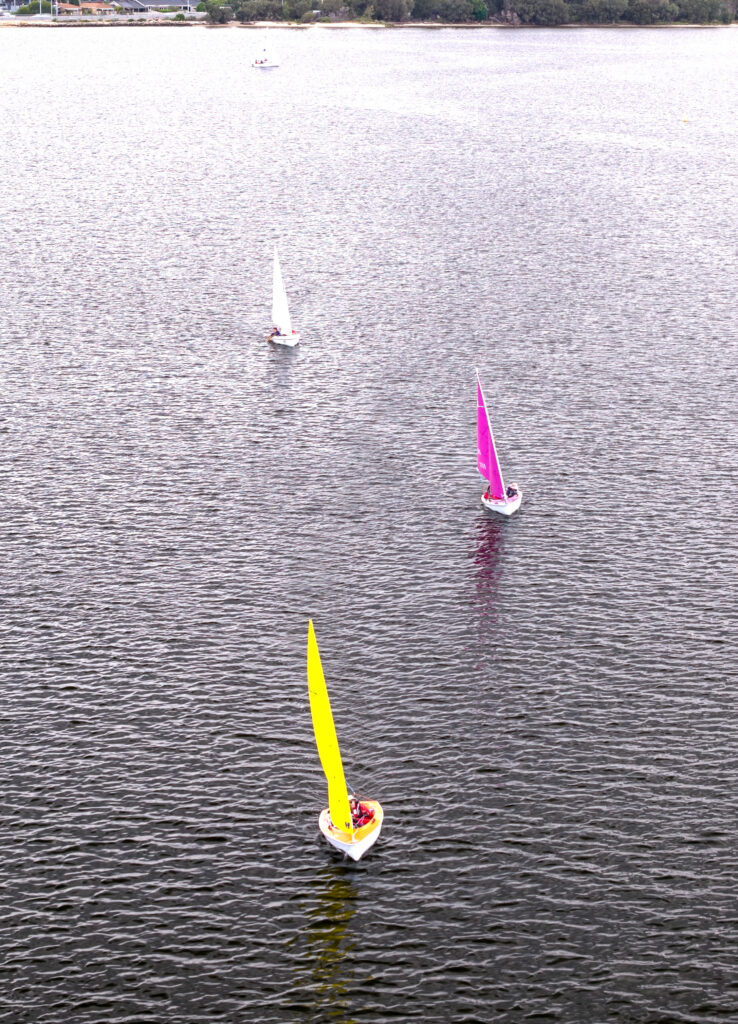
Different assignments bring different operational requirements. From understanding a site's layout to documenting activities on the water, each begins with identifying the objective and planning the appropriate approach.
Click to enlarge
SAILABILITY WA / SAILING ACTIVITIES / SWAN RIVER
01 / FIELD + TECHNICAL
Skills Development
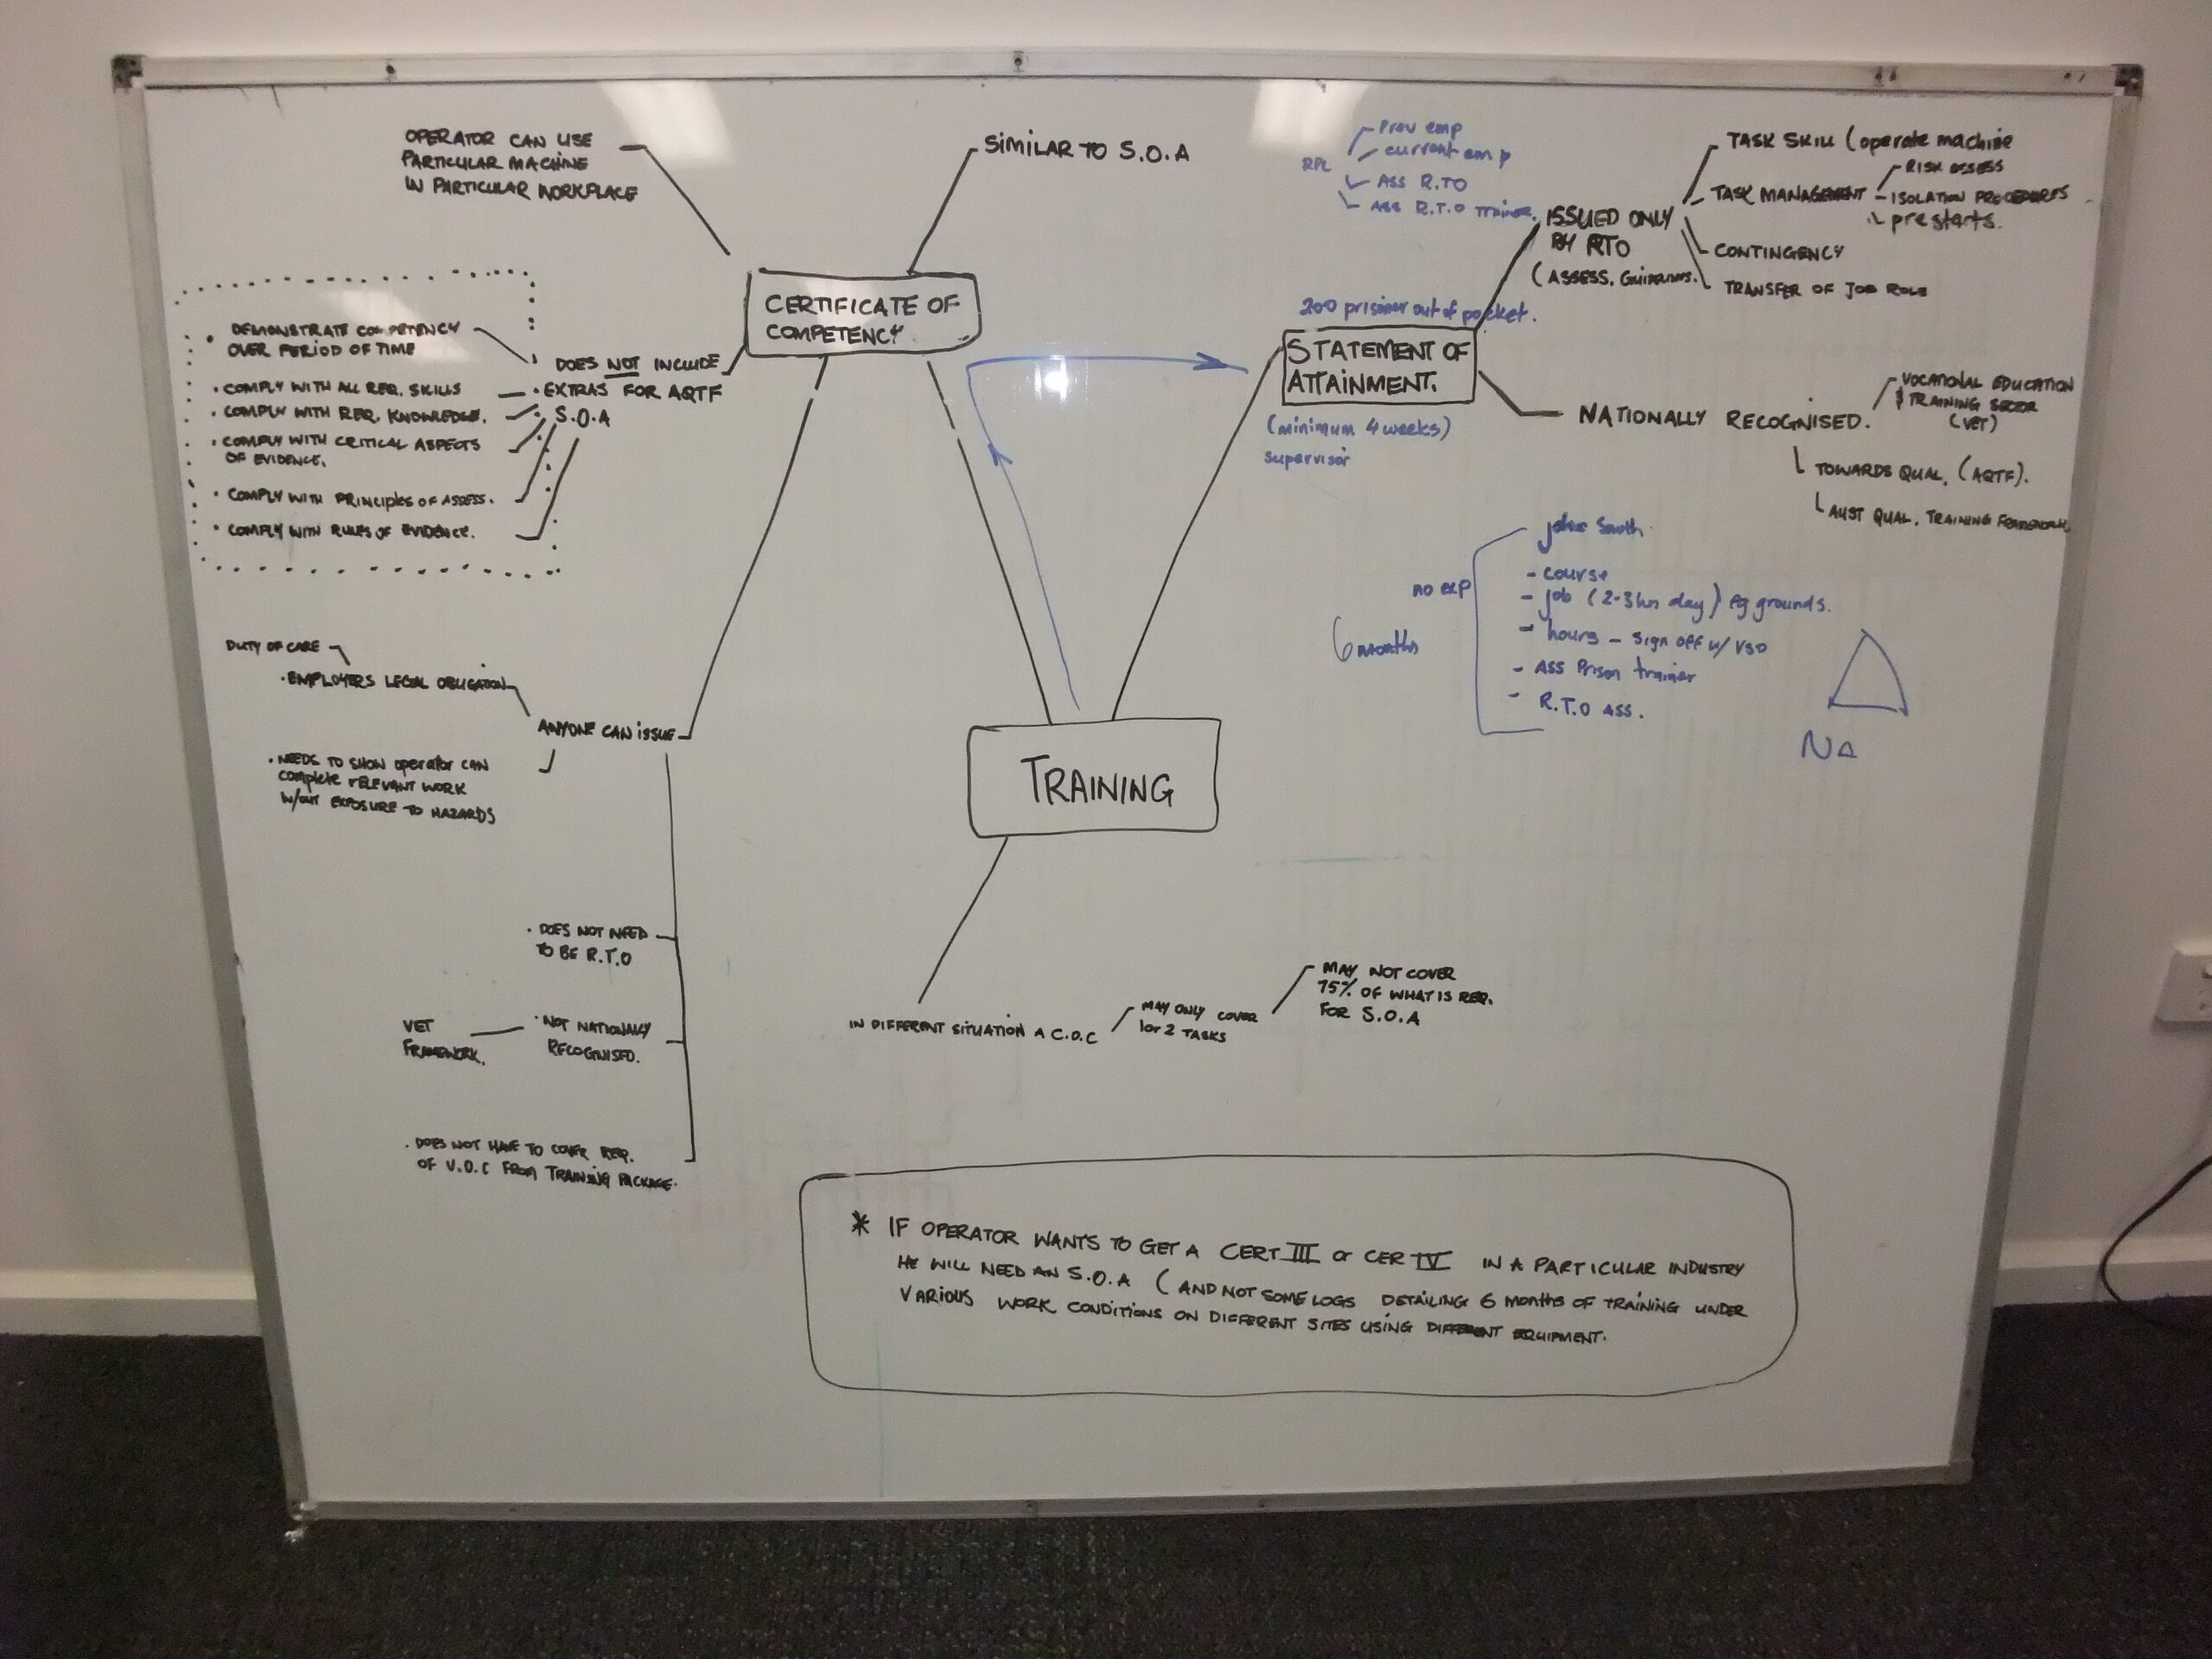
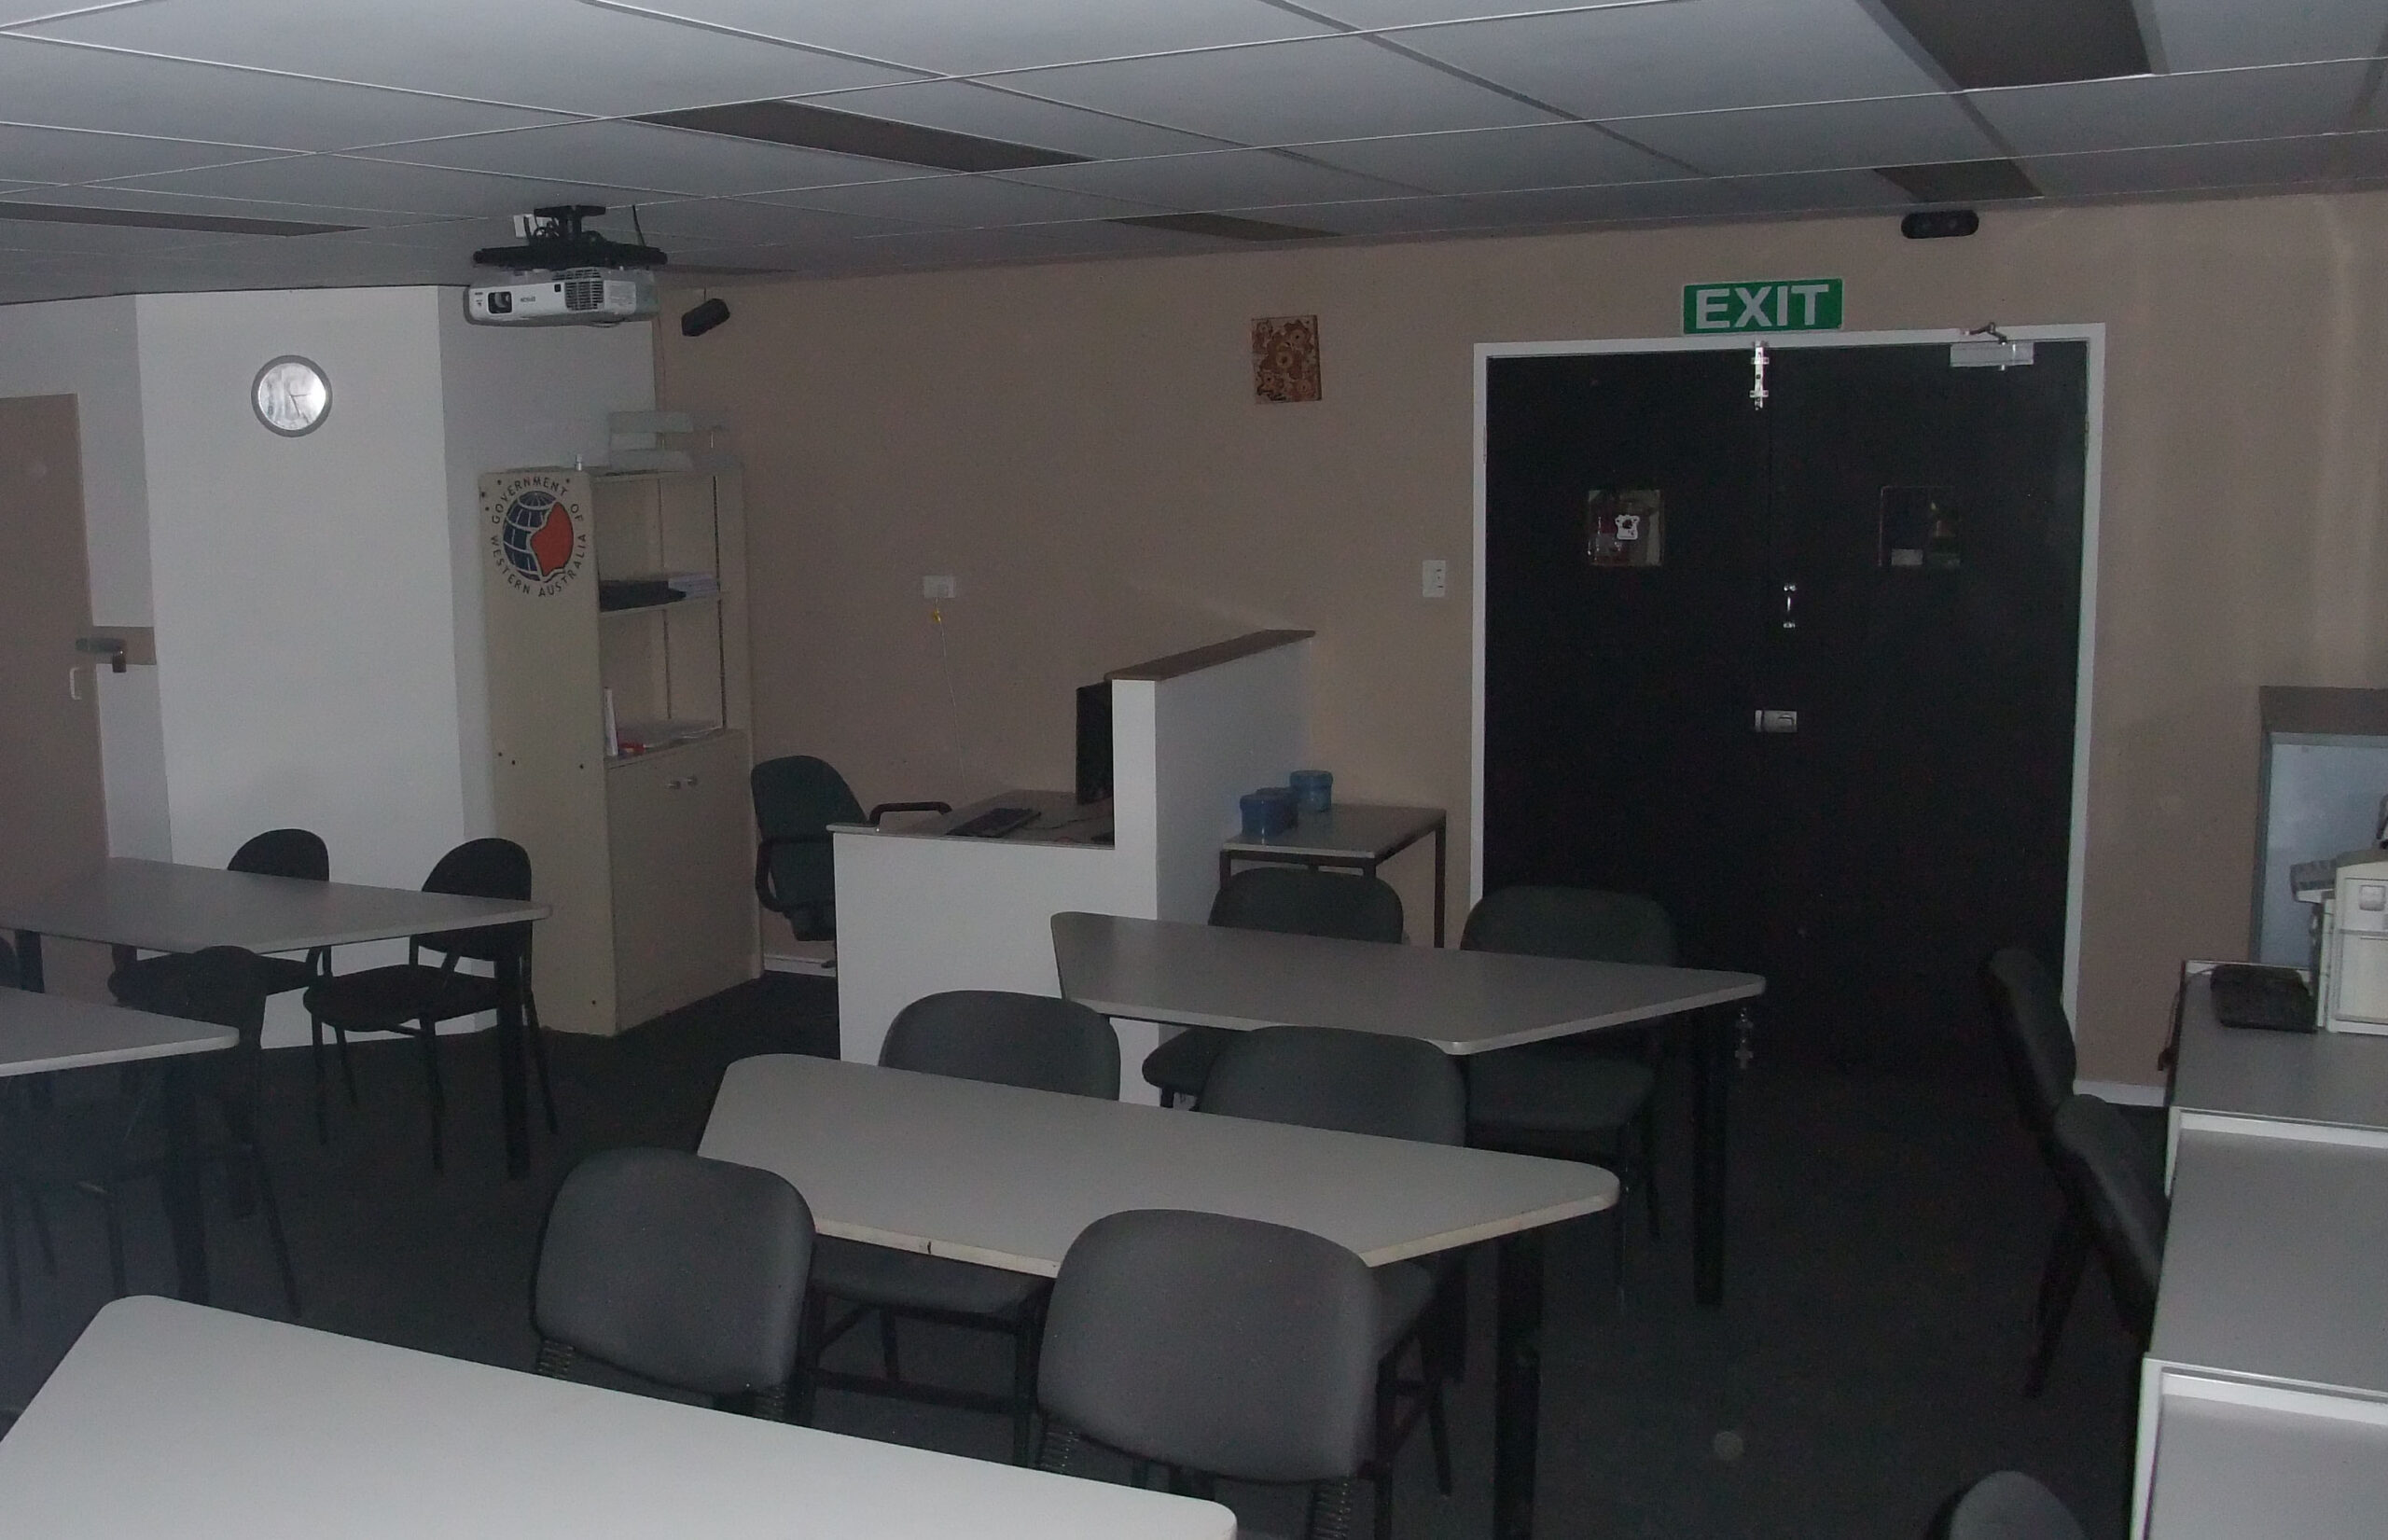
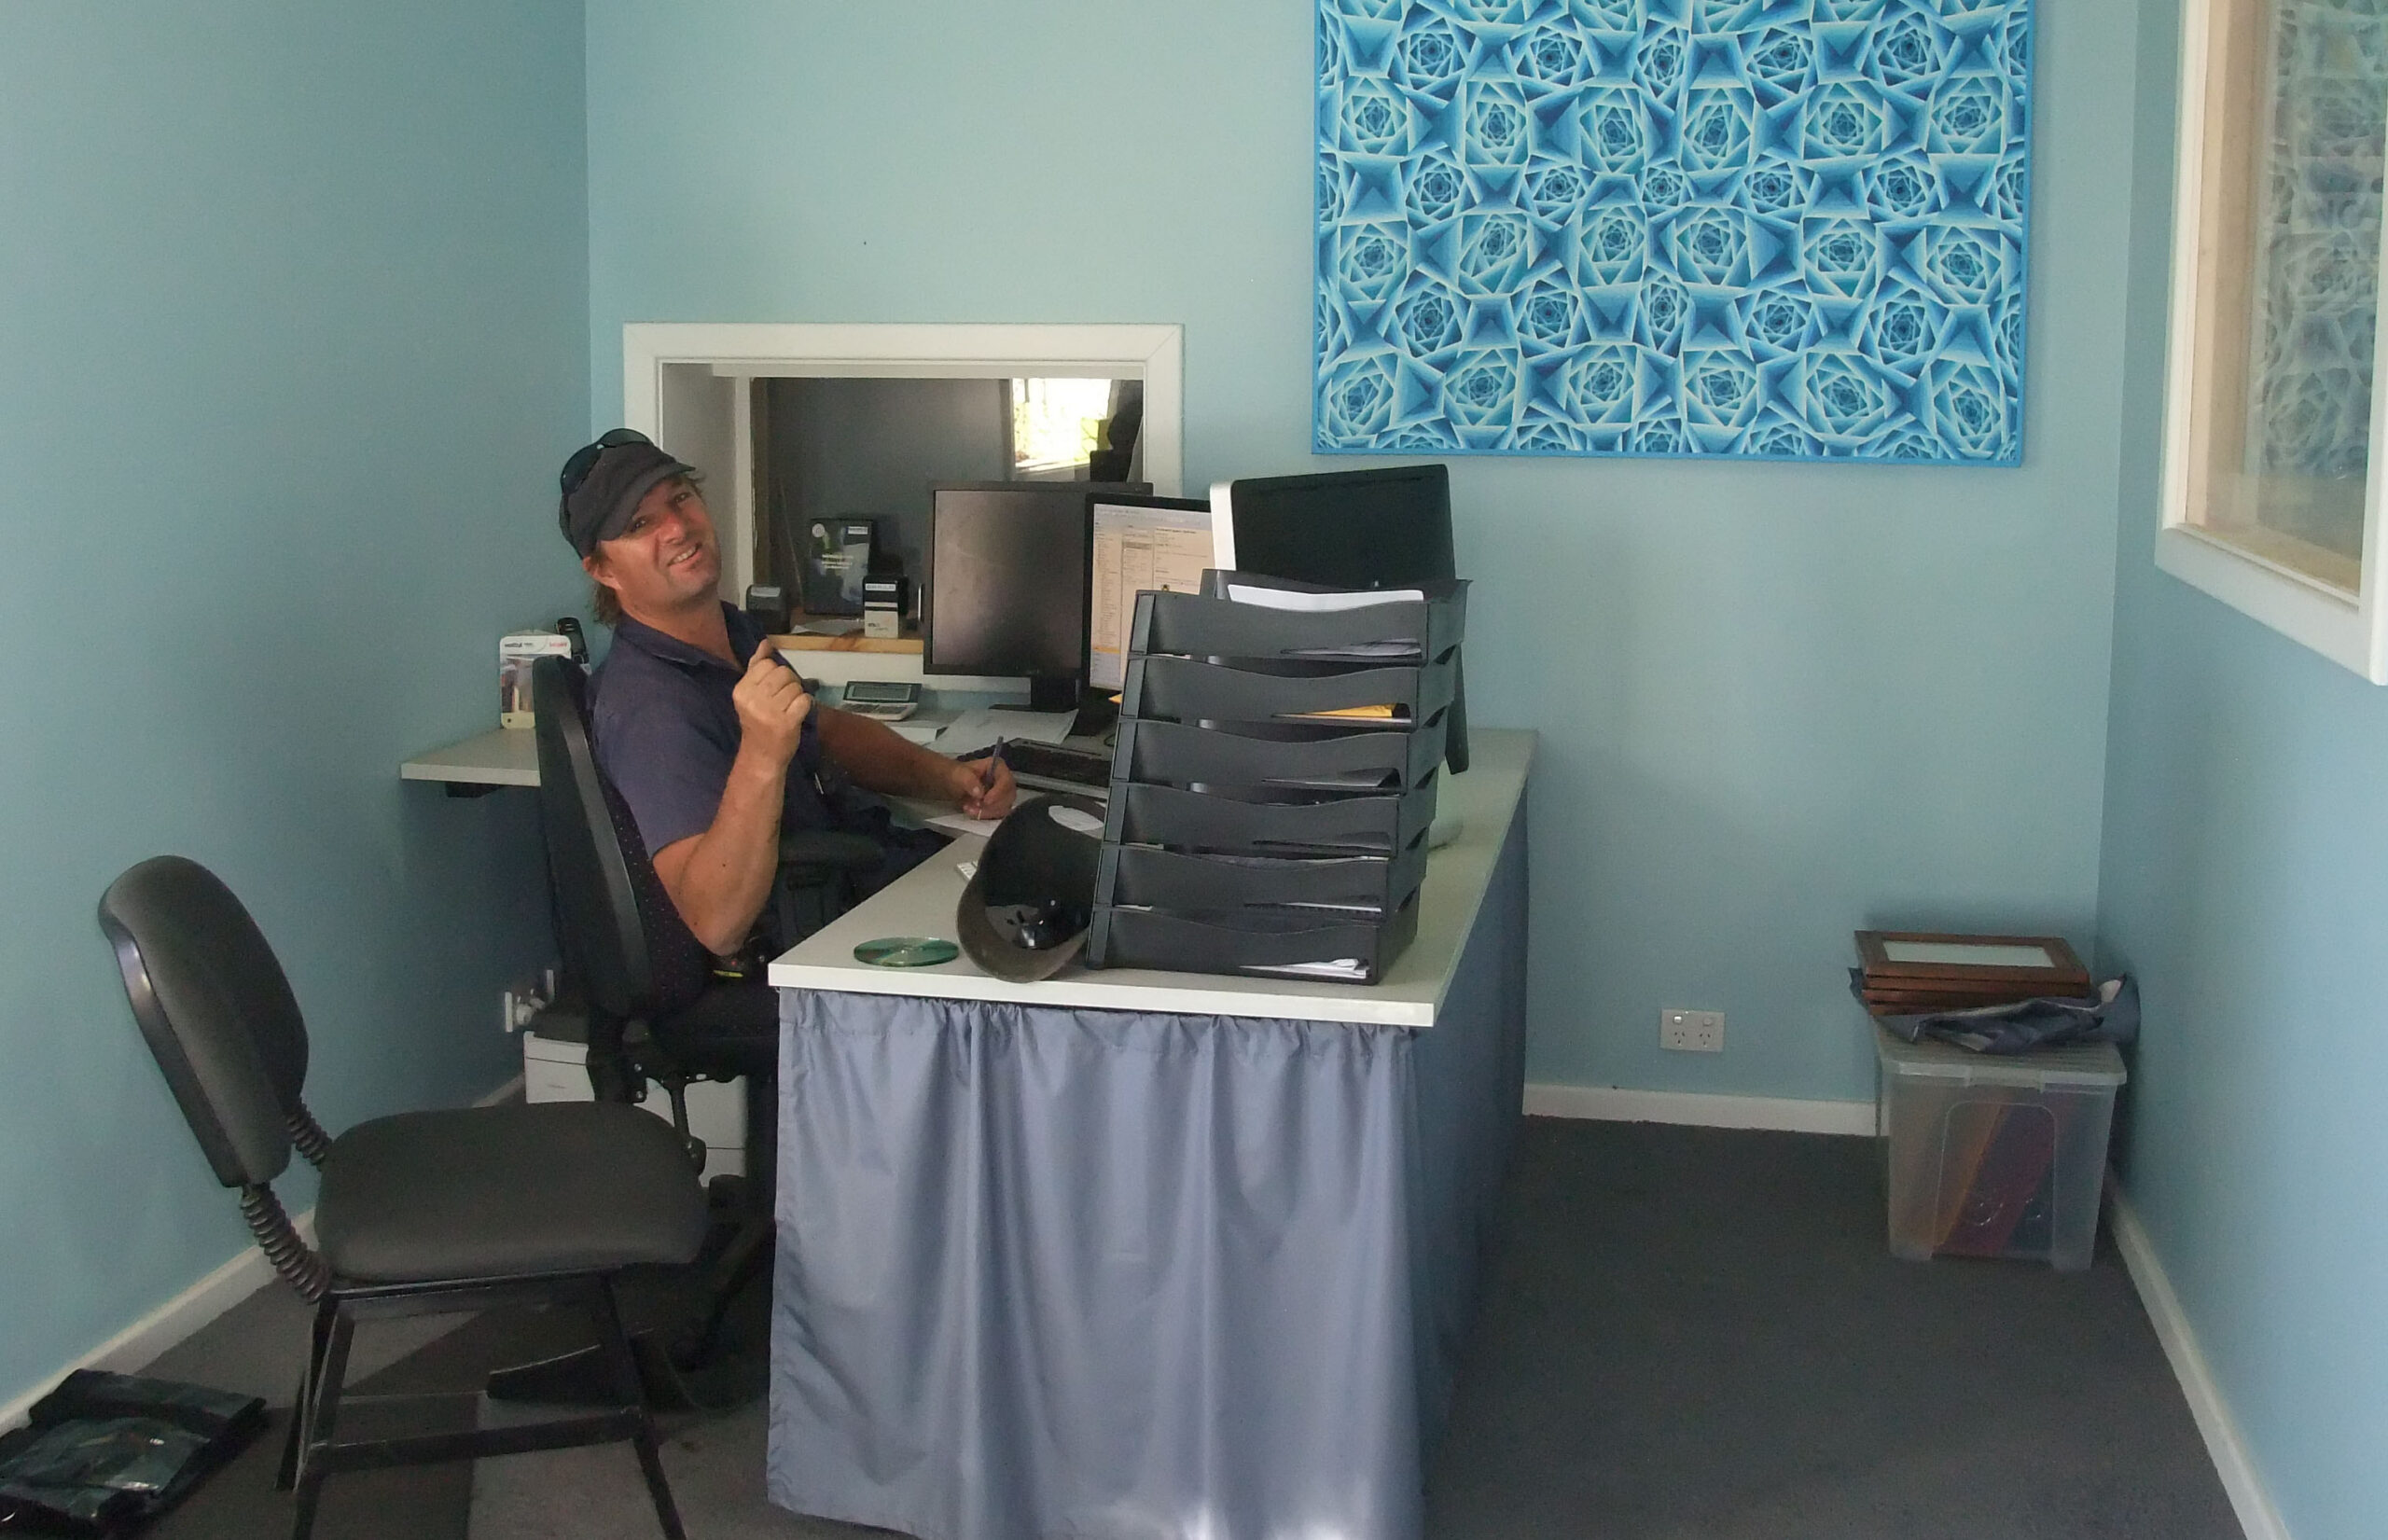
Building a functioning training workshop from an empty shed.
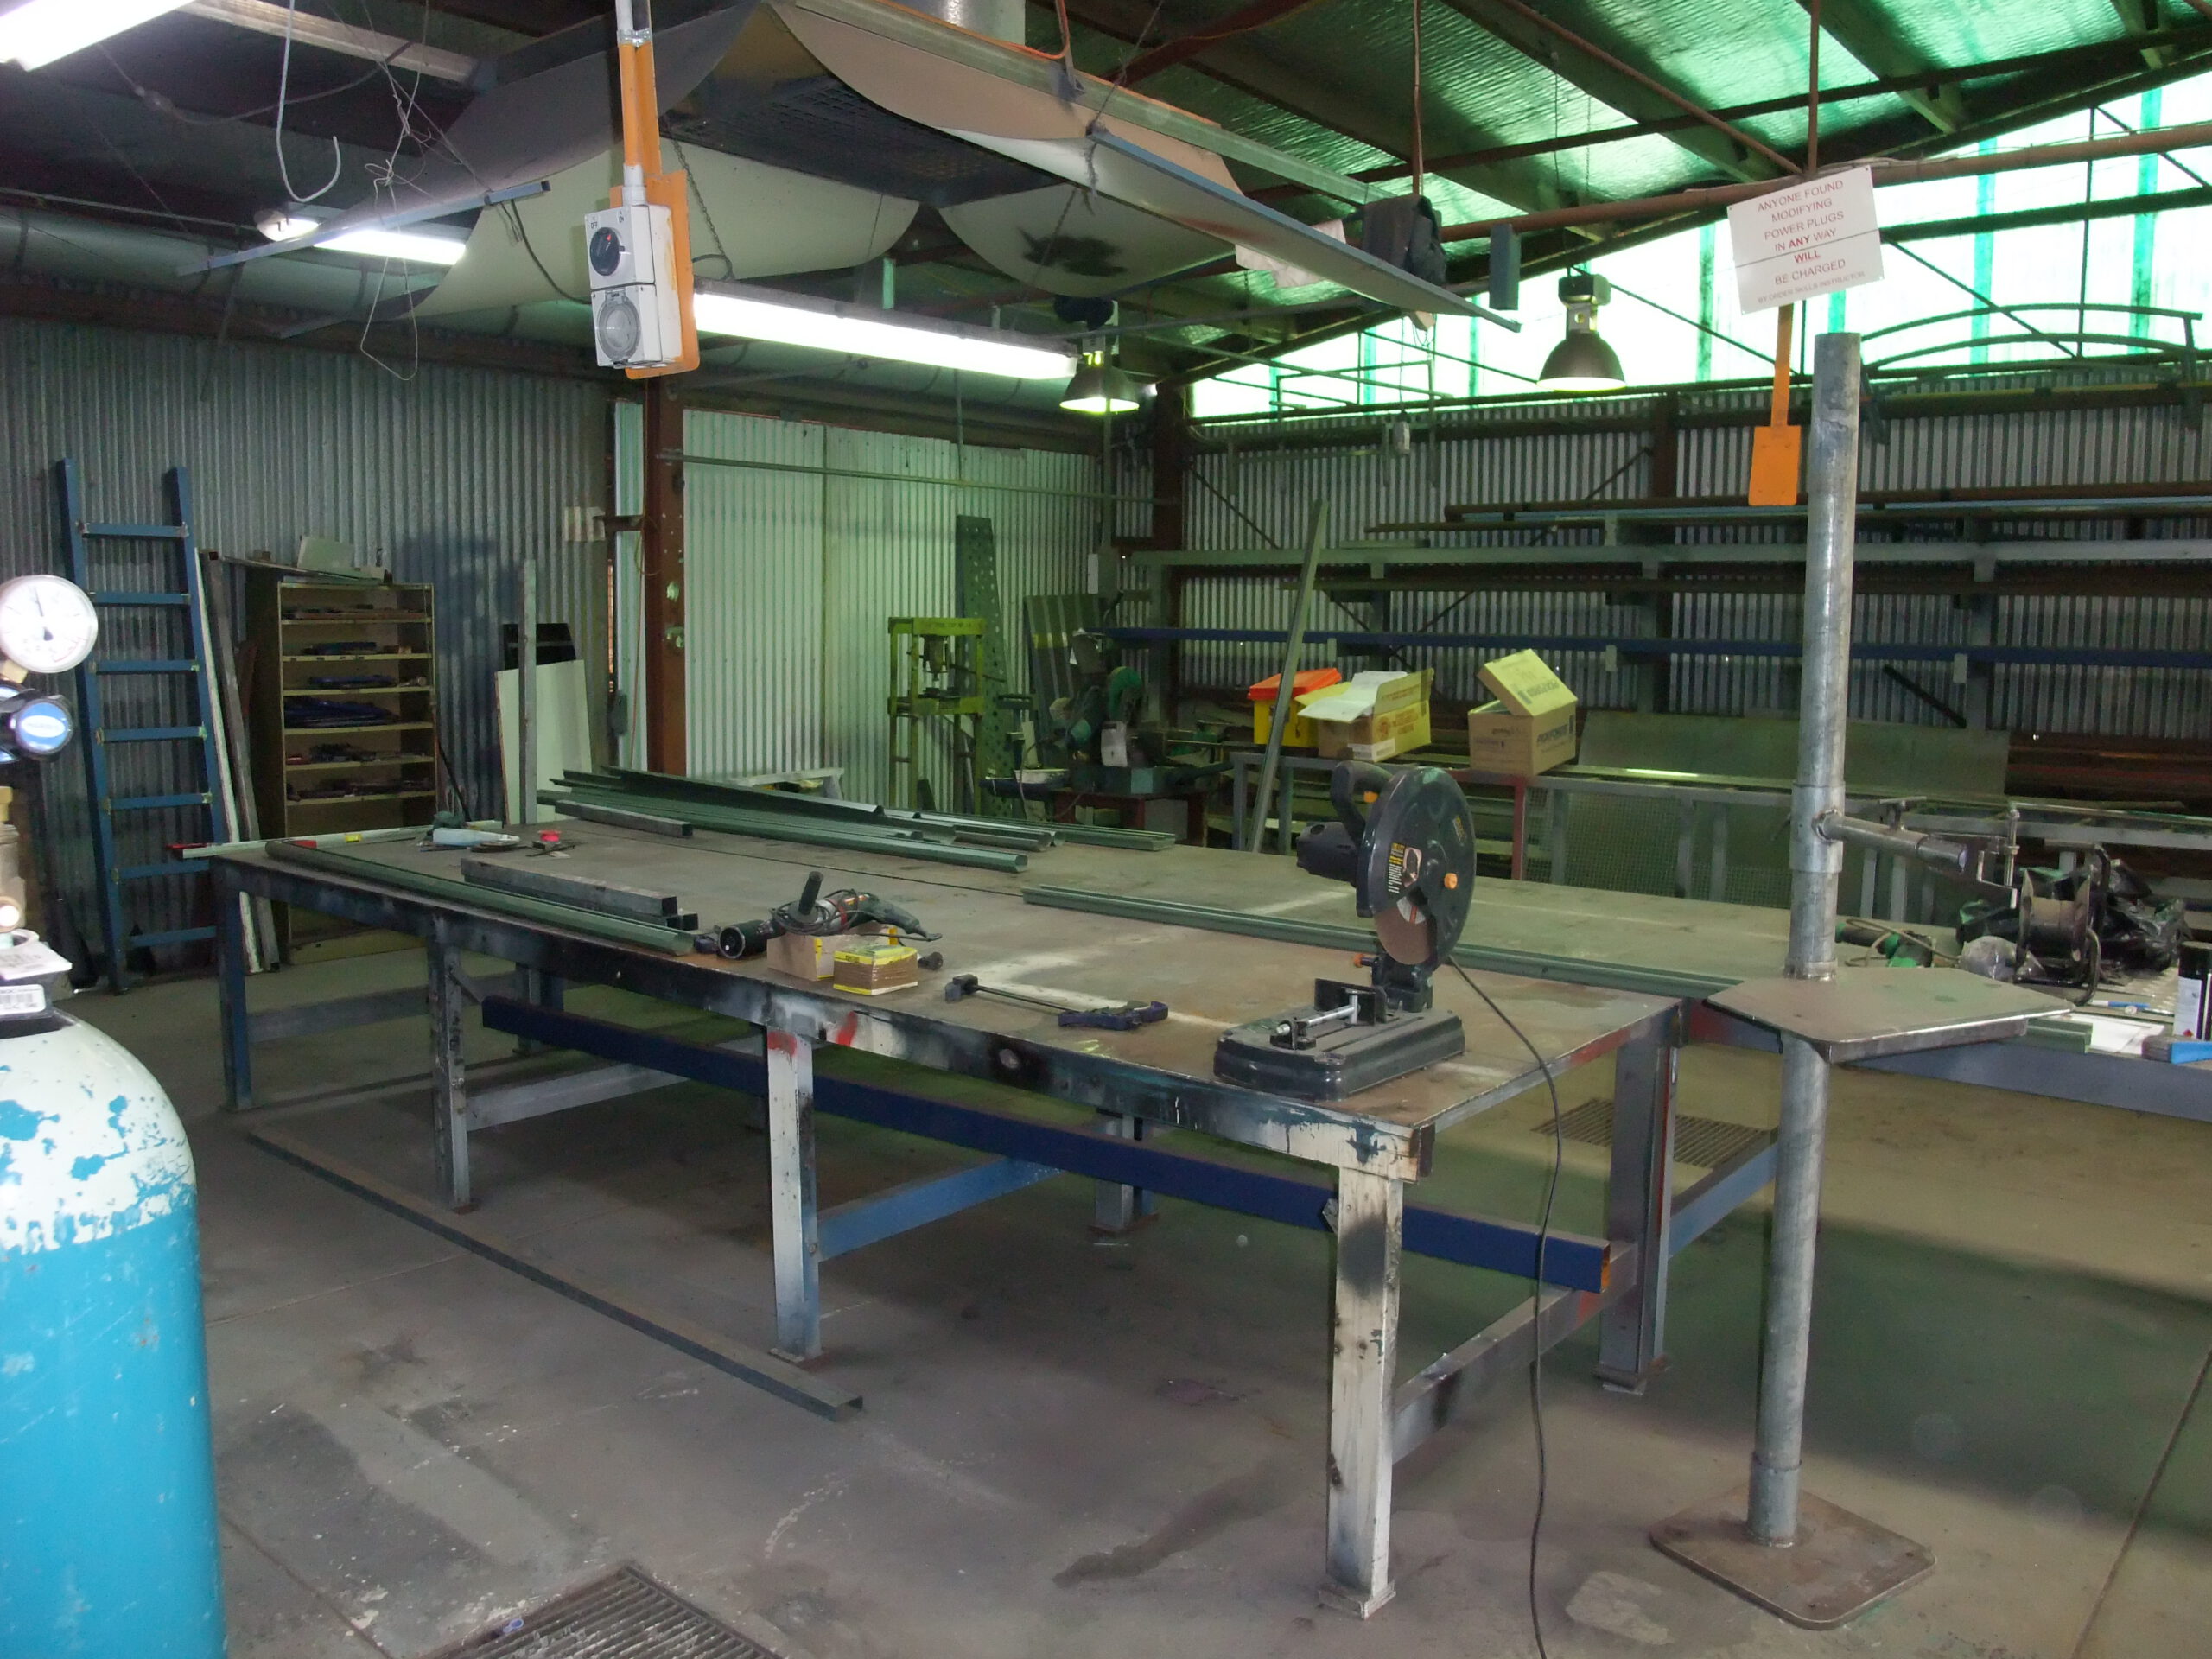
As Skills Development Officer at Karnet Prison Farm in Western Australia, I was responsible for developing practical training opportunities for prisoners.
When I arrived, I inherited a workshop with very limited facilities and resources. I set about developing it into a functional environment where practical skills could be taught, applied and developed through real projects.
Click to enlarge
EARLIEST SURVIVING RECORD
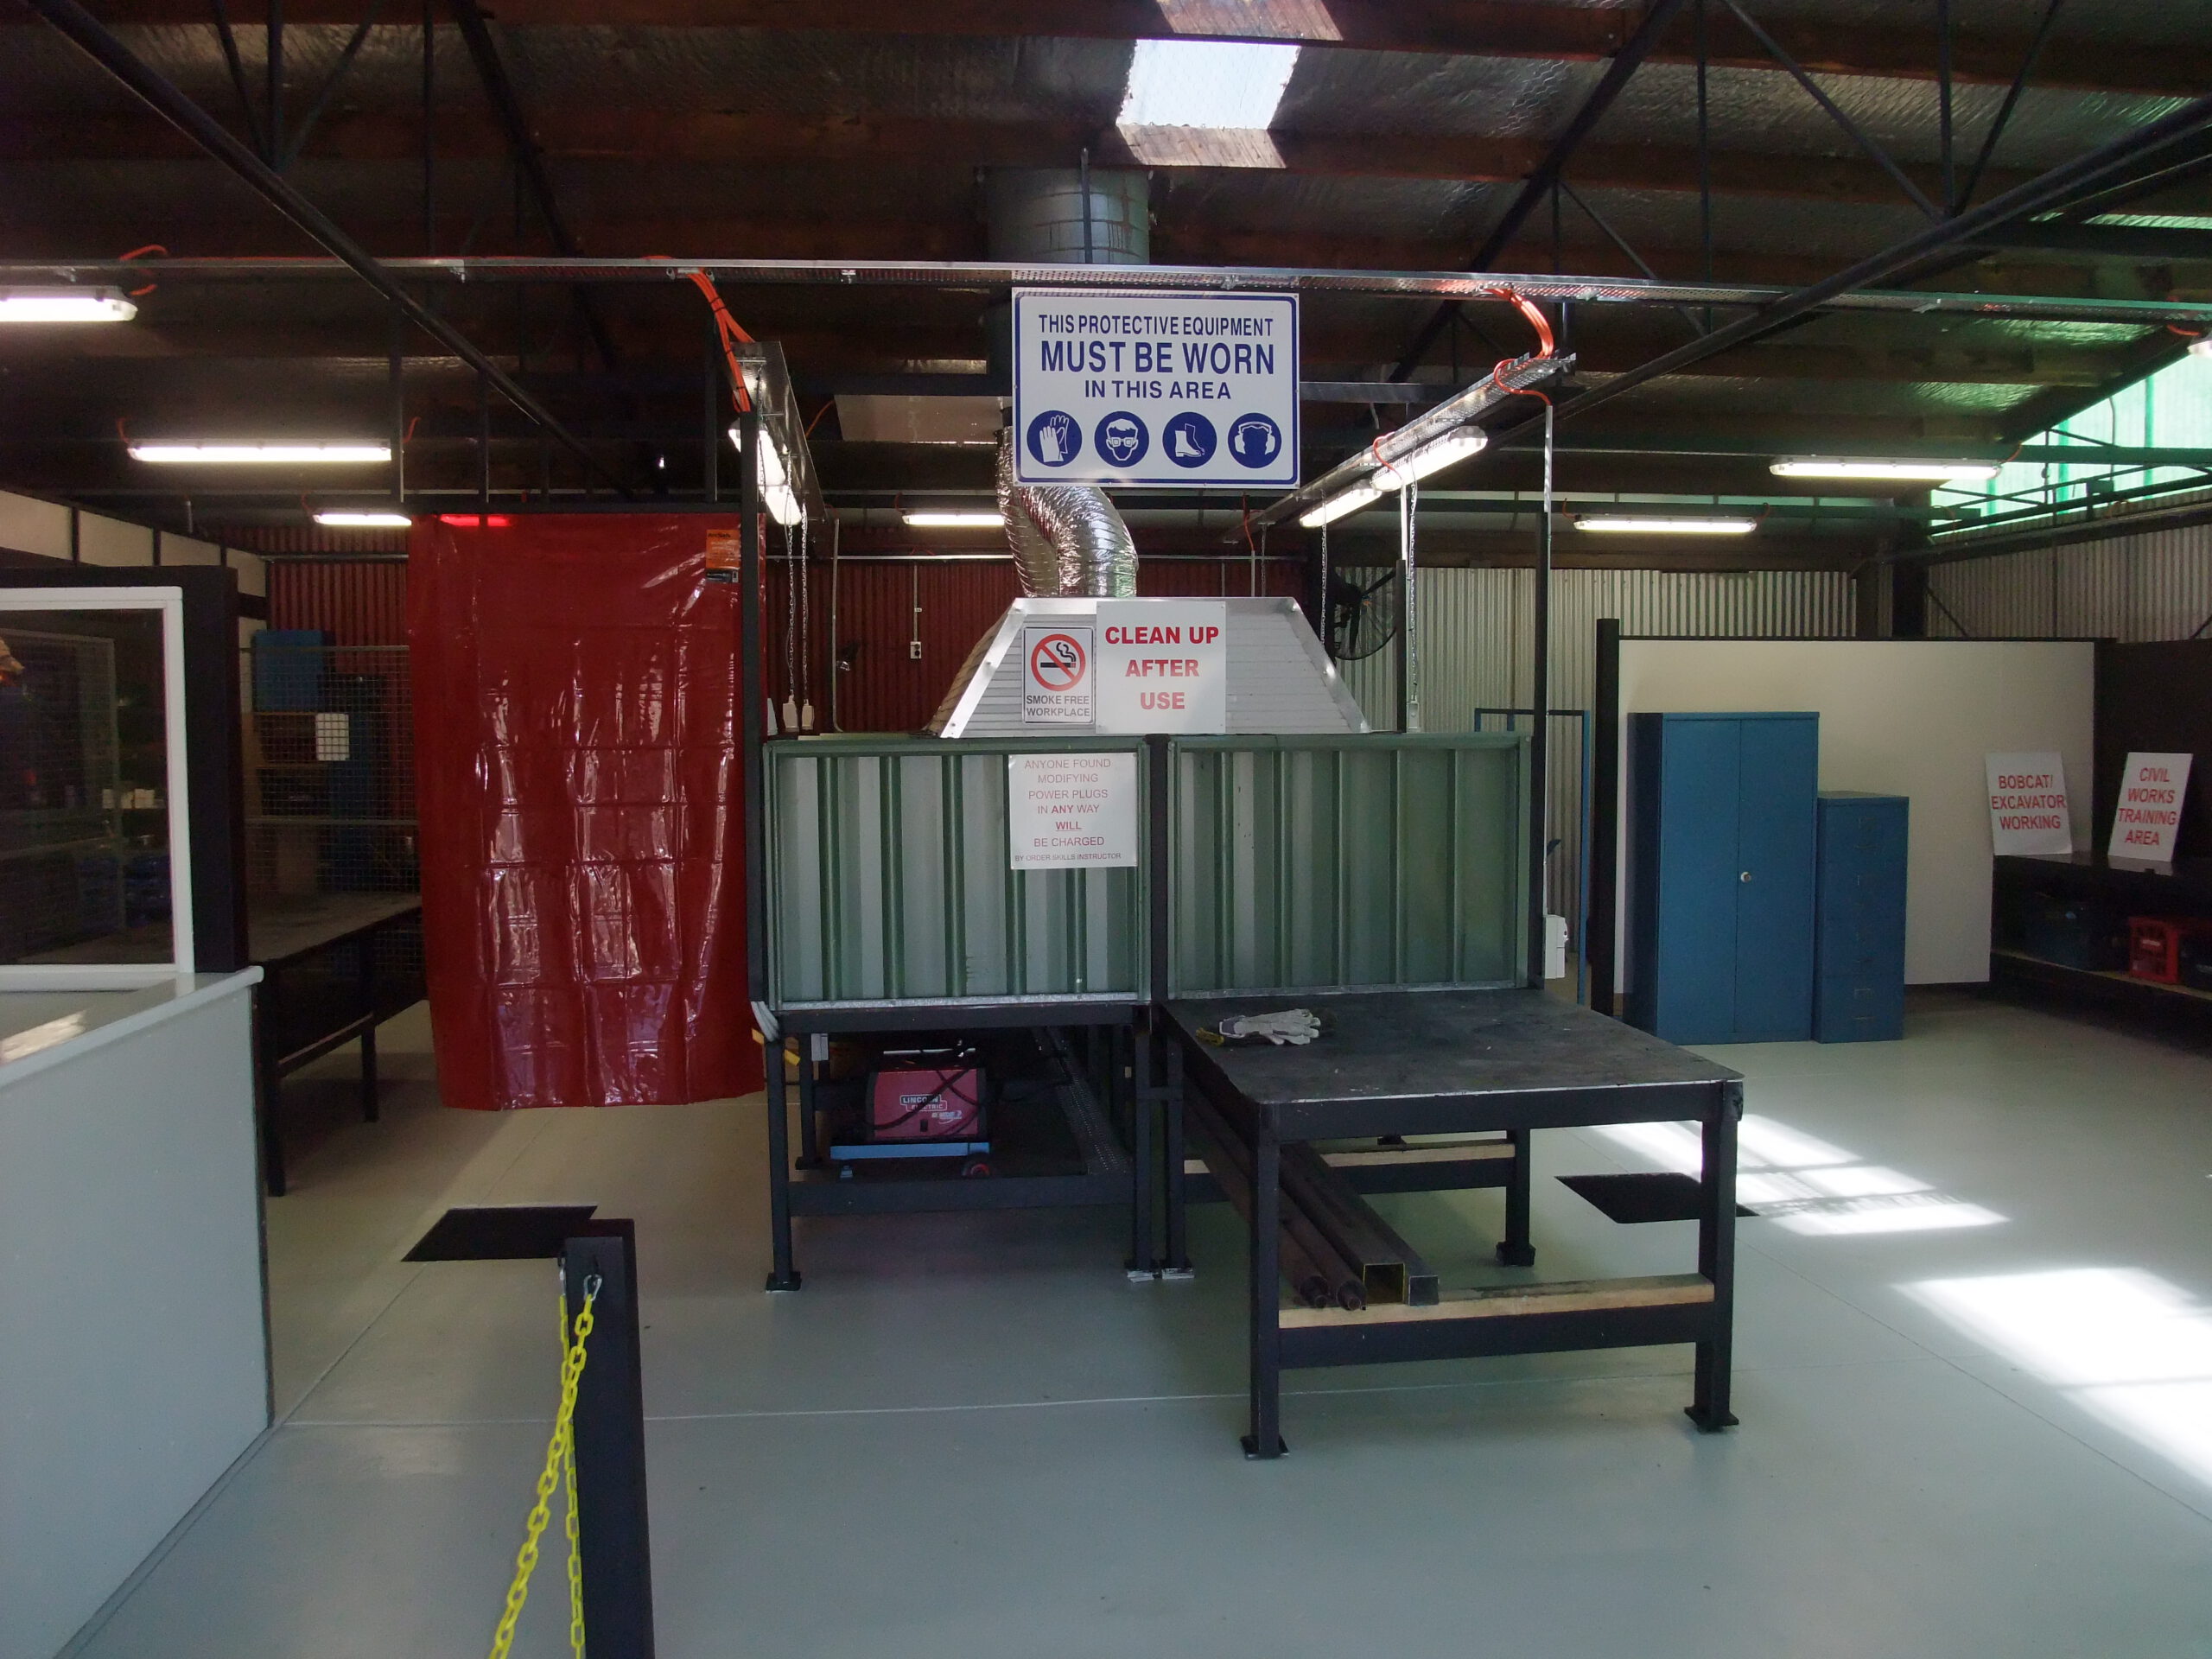
Click to enlarge
DEVELOPED WORKSHOP
DEVELOPMENT
THE WORKSHOP BECAME
PART OF THE LEARNING.
The space was developed progressively around the work being undertaken. Layout, equipment, work areas, storage and systems evolved as capability grew, with practical fabrication and construction becoming part of the learning process itself.
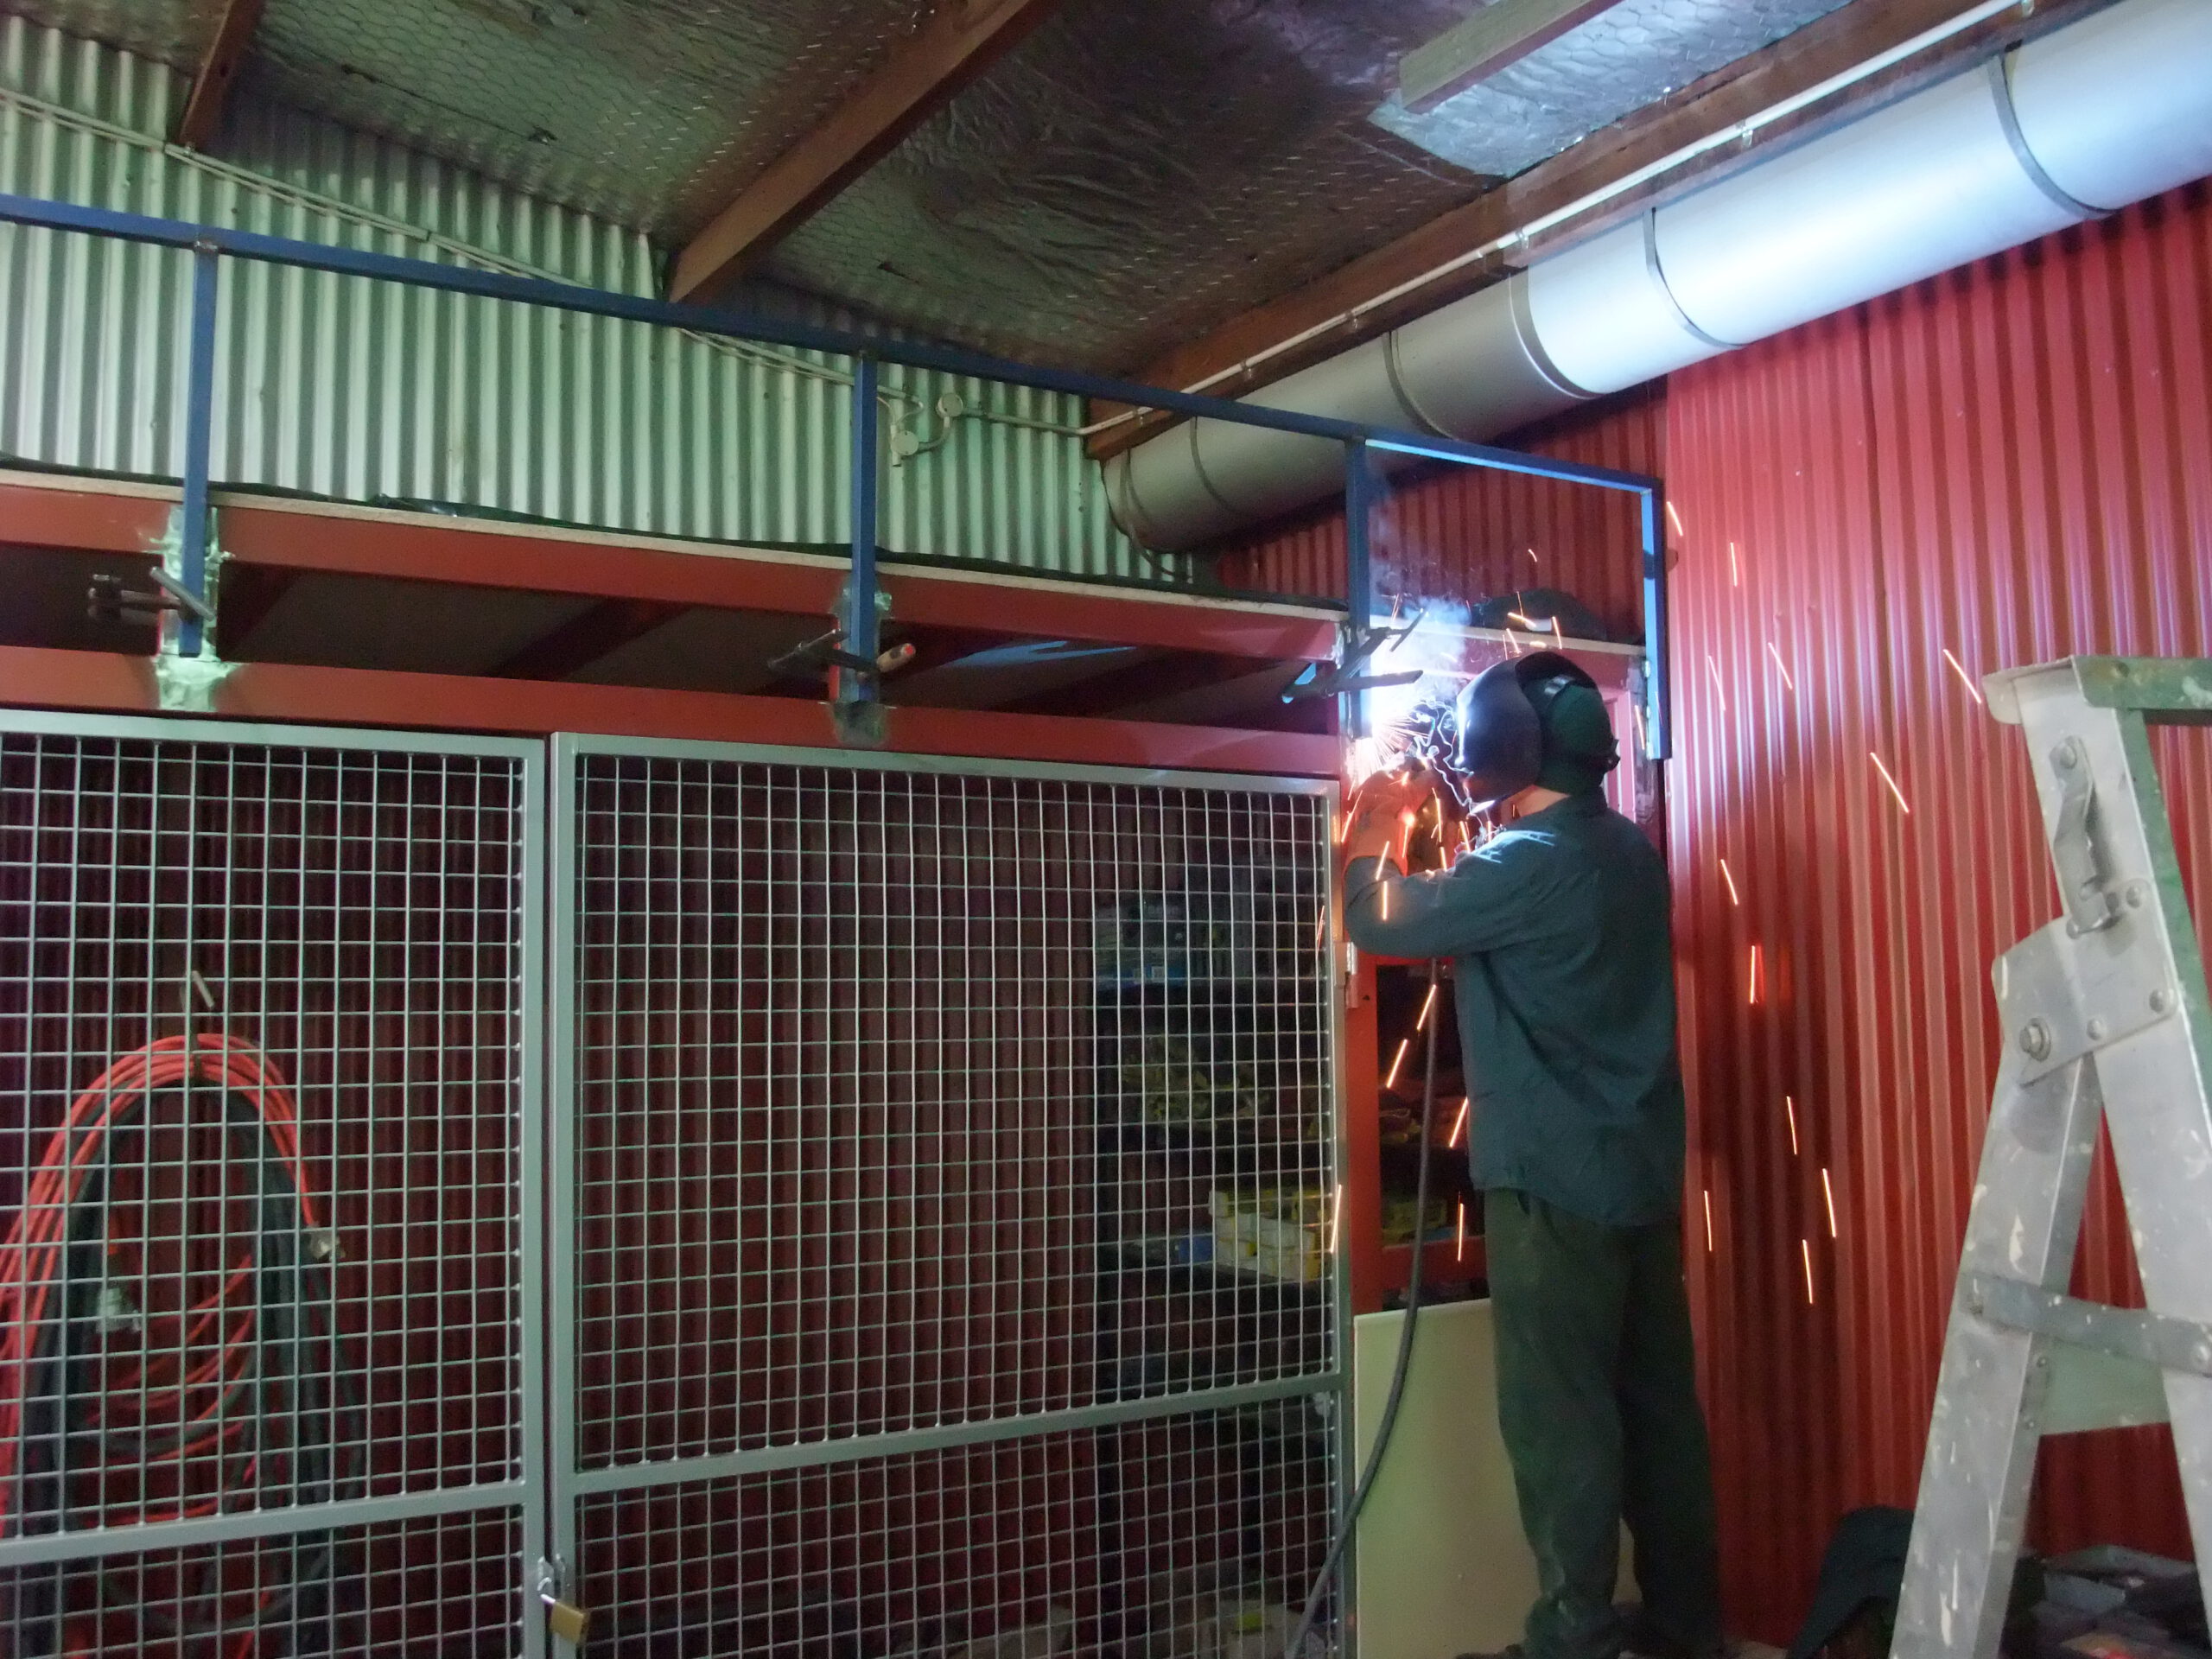
Click to enlarge
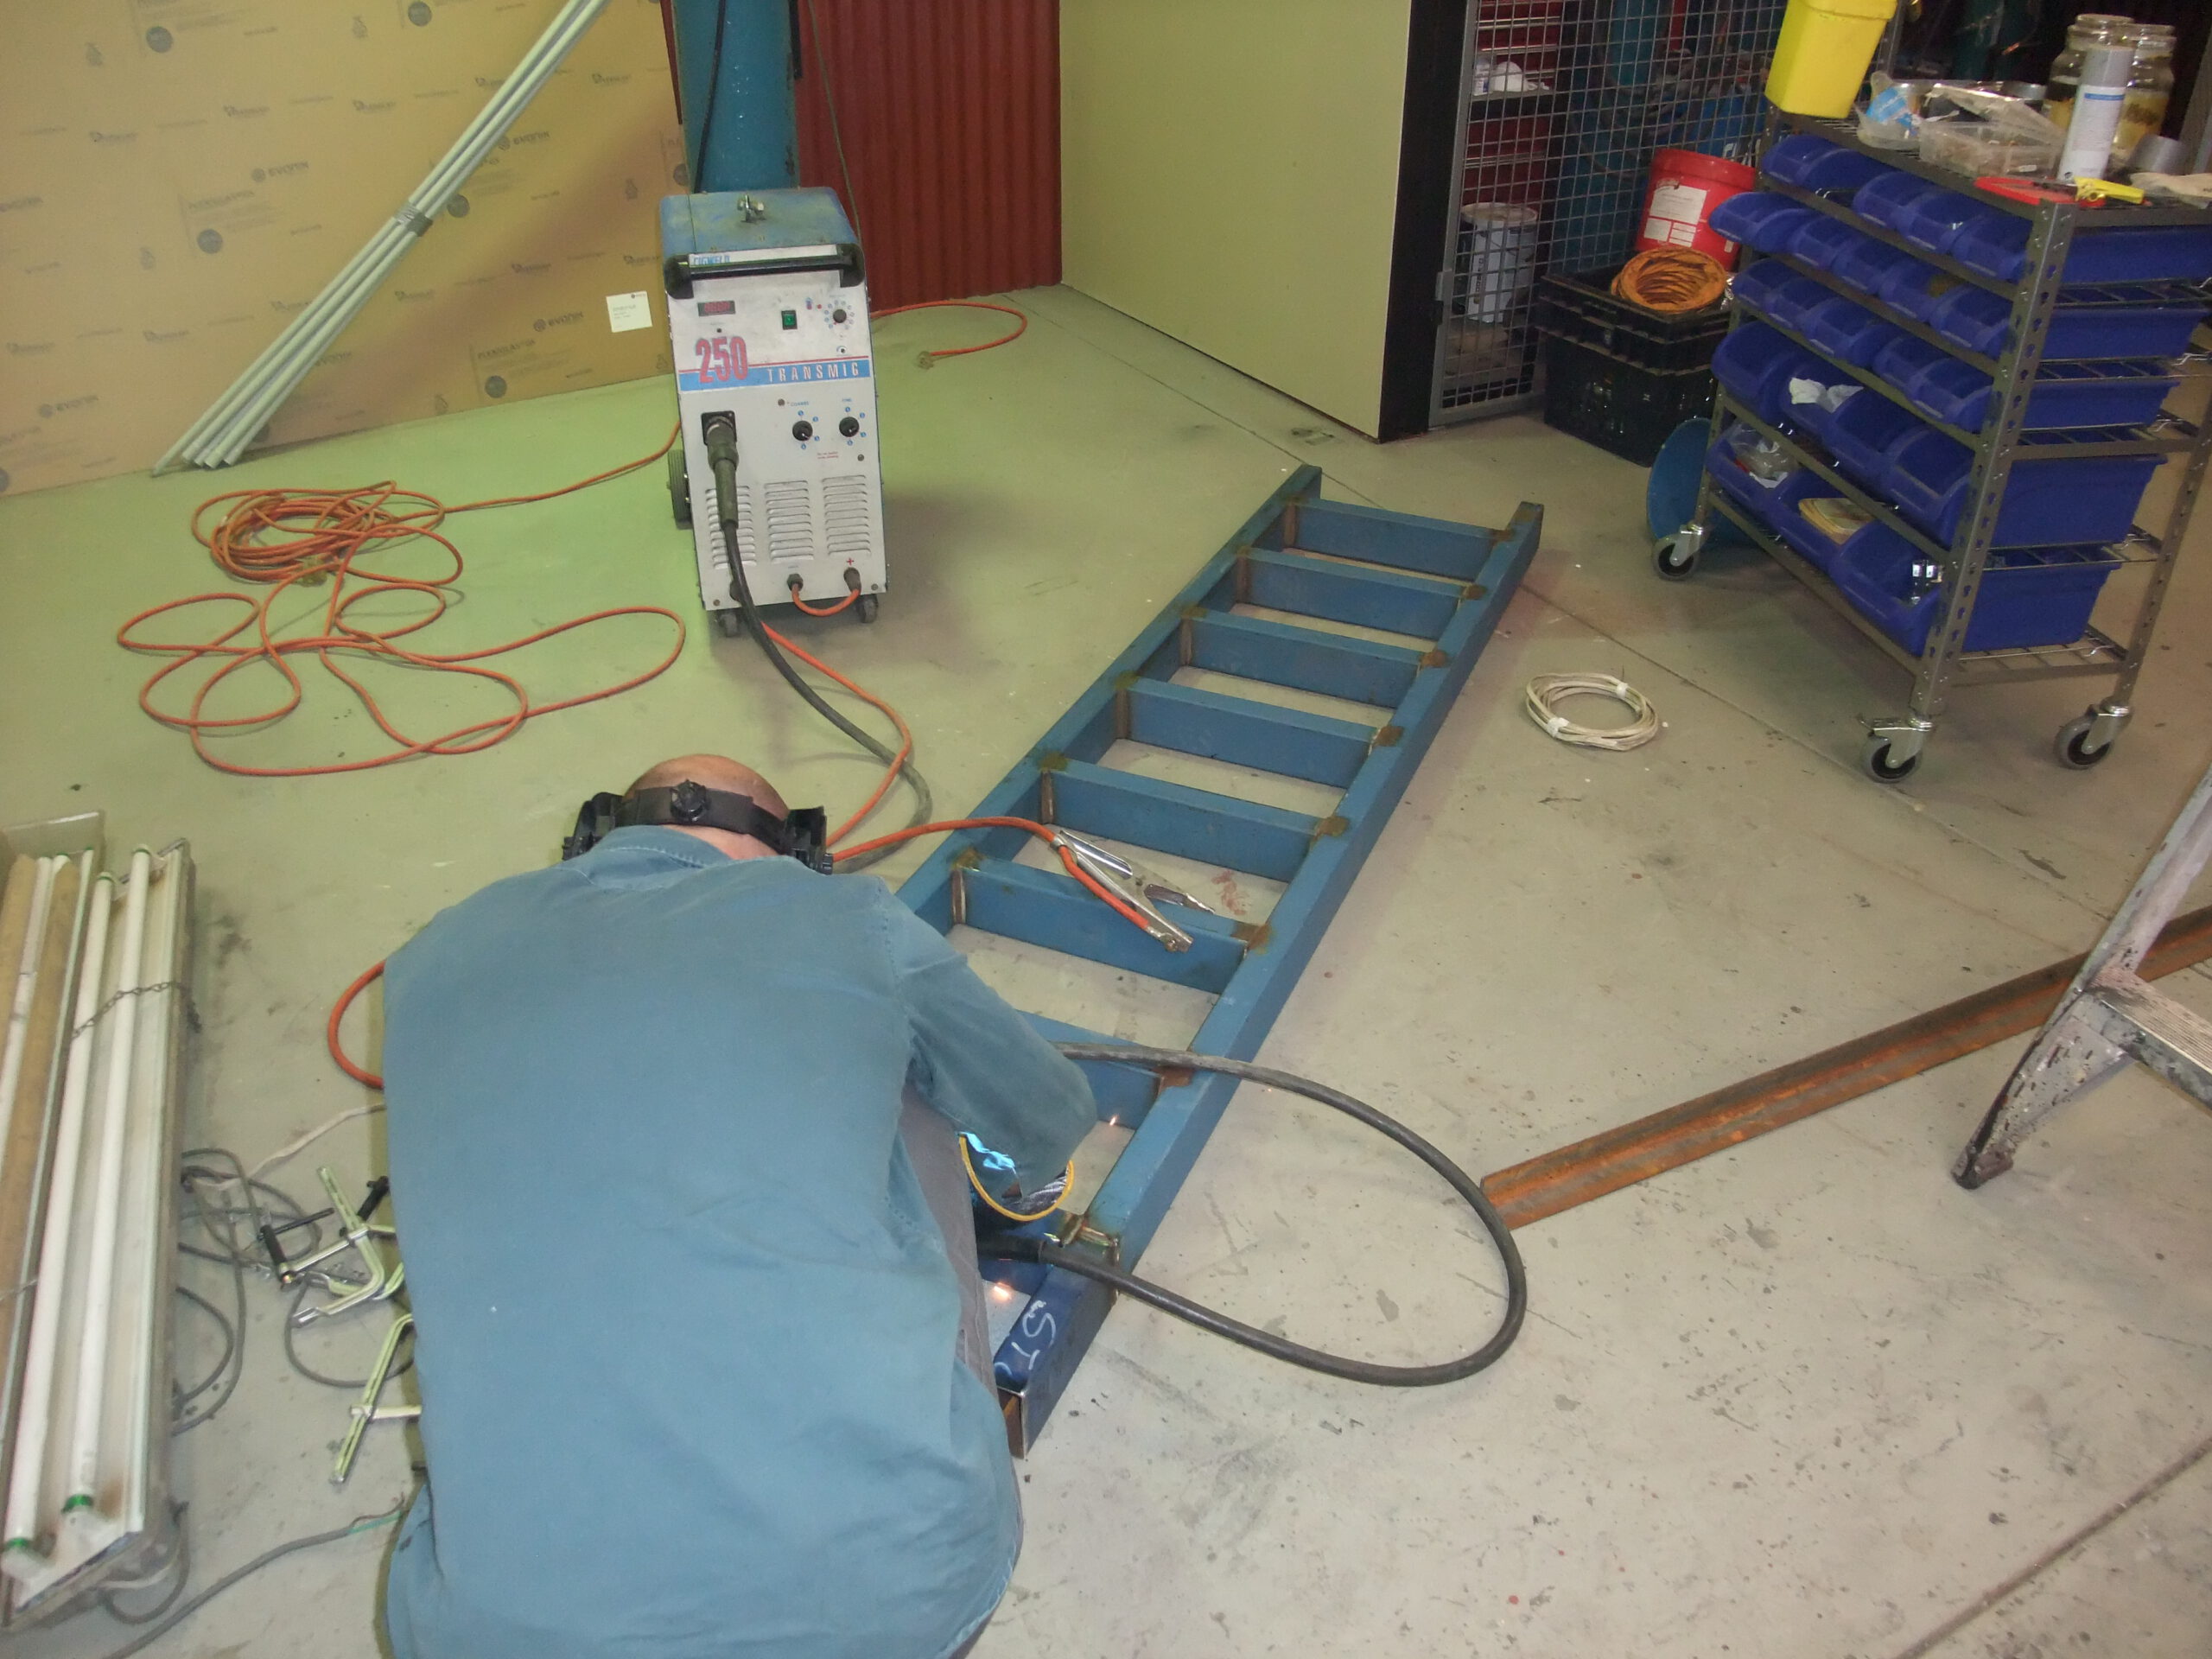
Click to enlarge
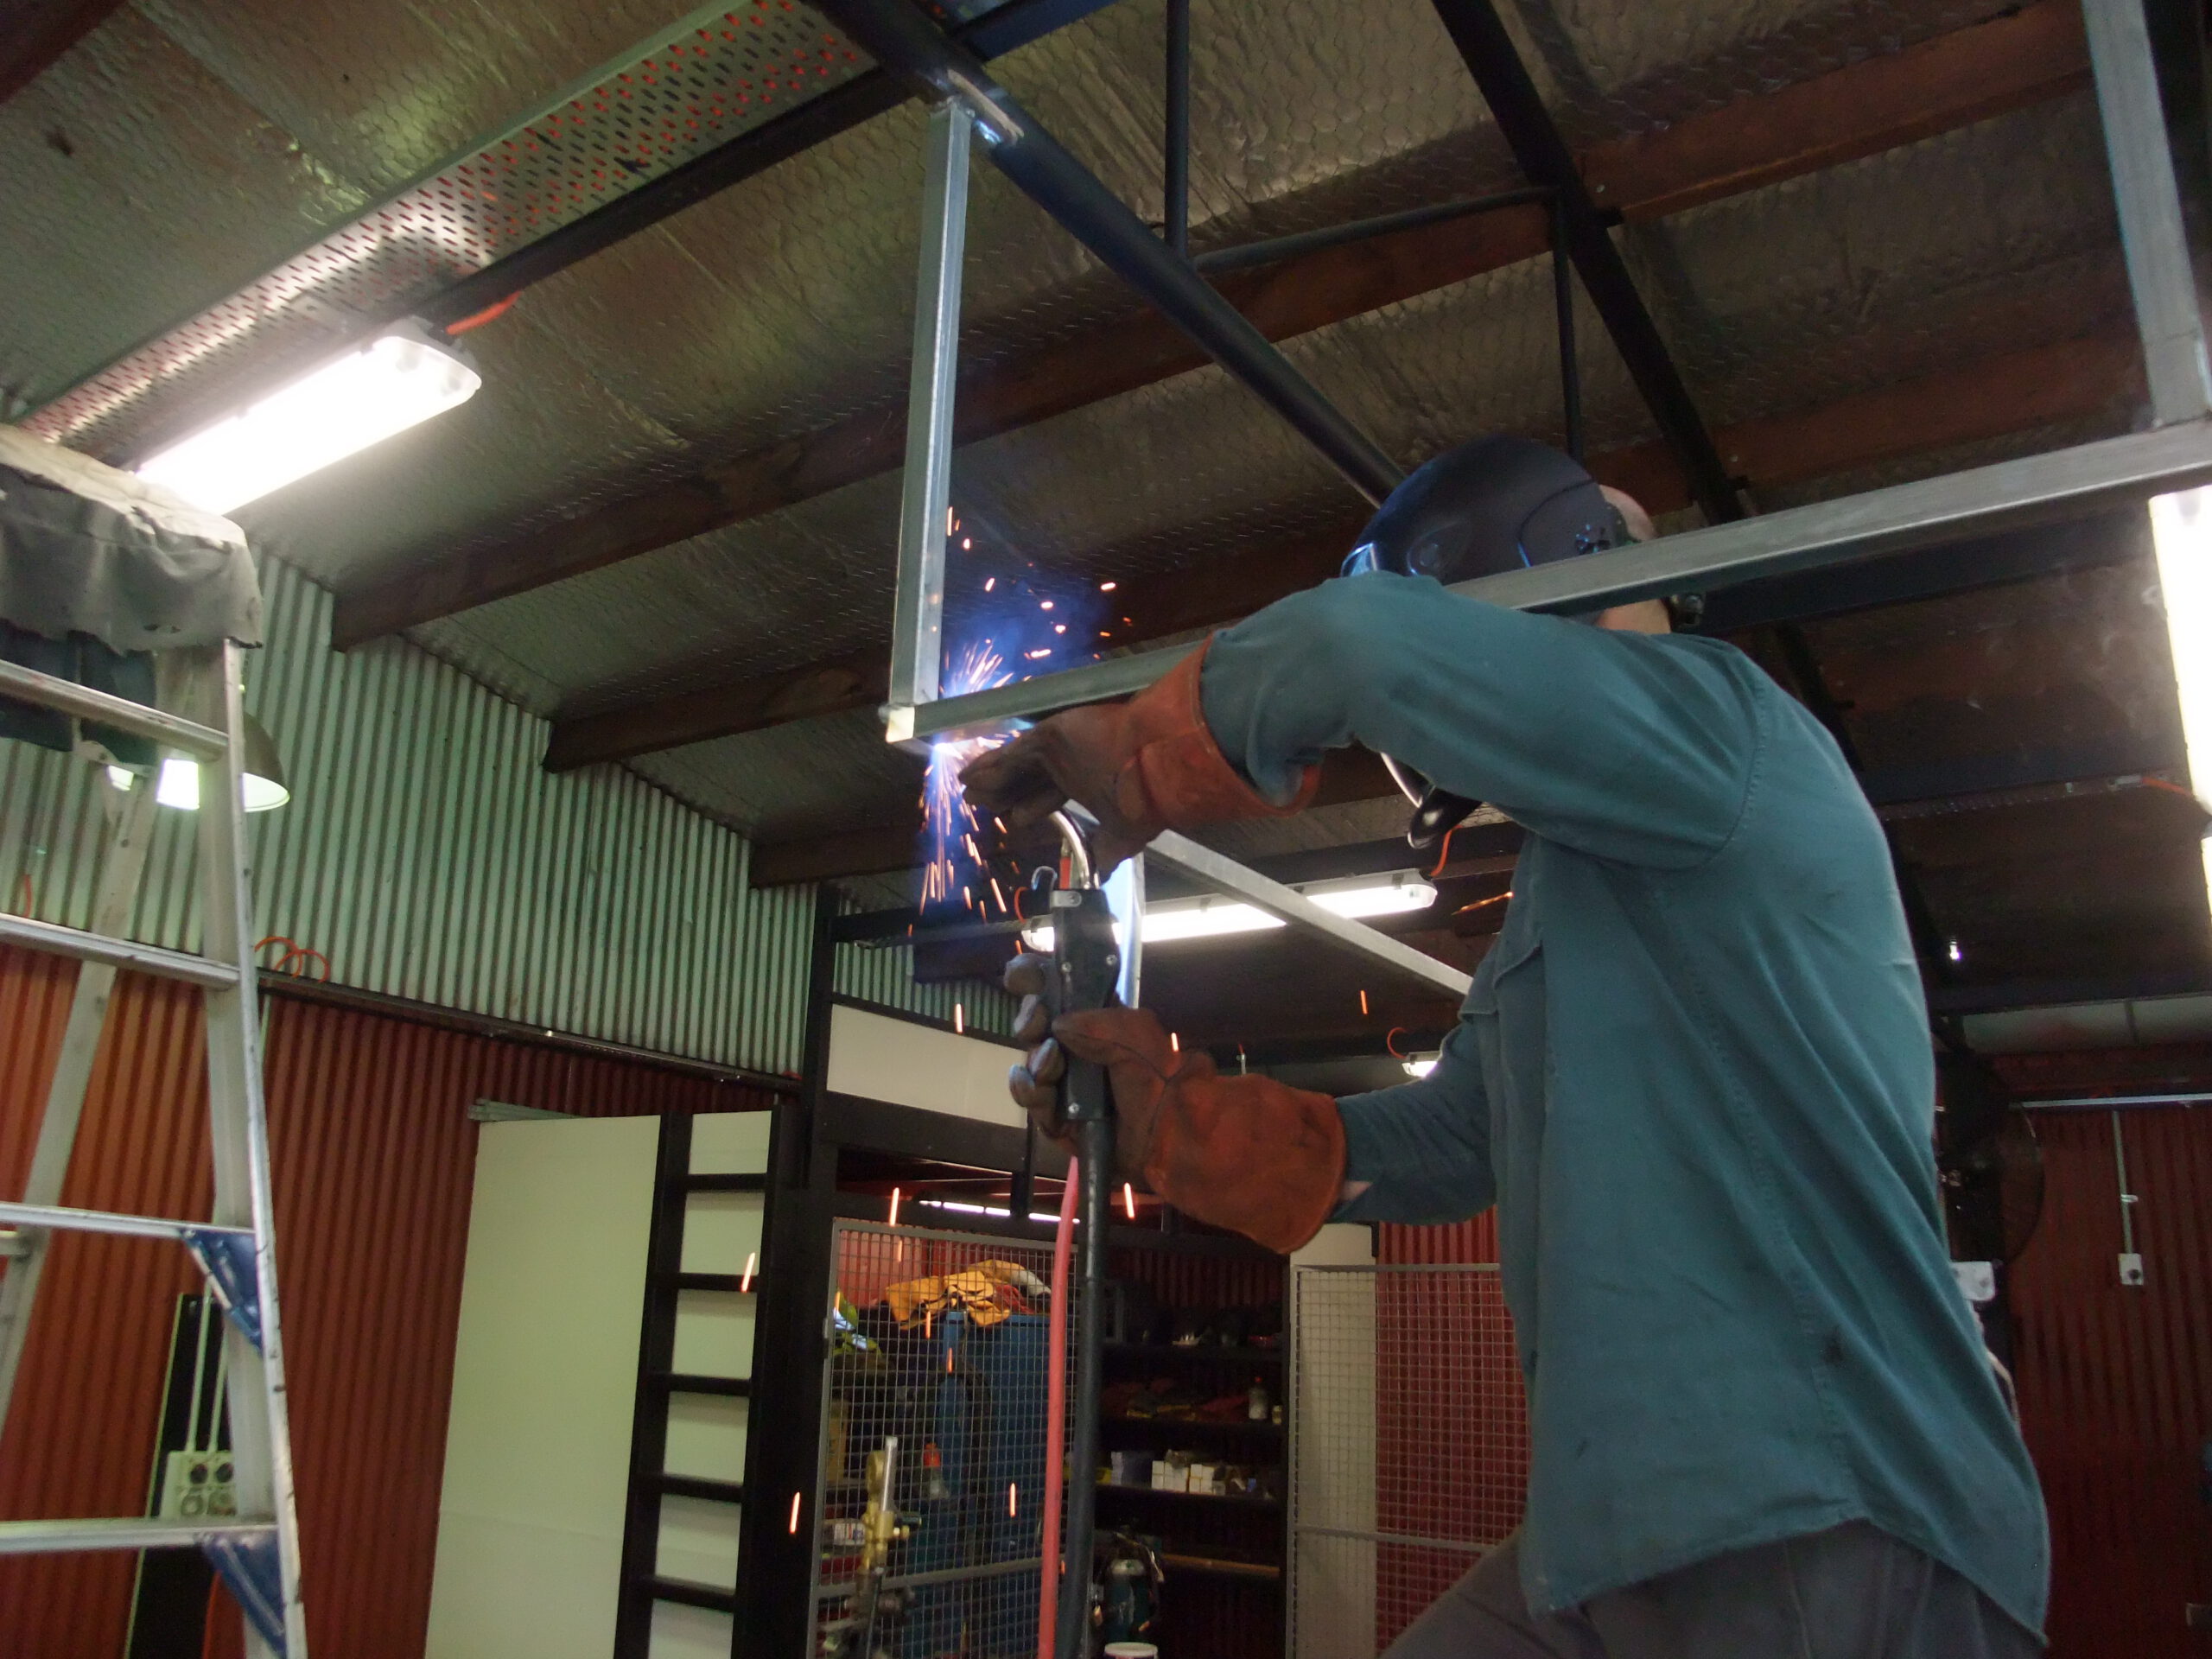
Click to enlarge
PURPOSE
MORE THAN
A WORKSHOP.
The physical environment was only part of the project. The purpose was to create a place where practical work, structured learning and skills development could come together.
Click to enlarge
Click to enlarge
Click to enlarge
03 / DRONE SYSTEMS
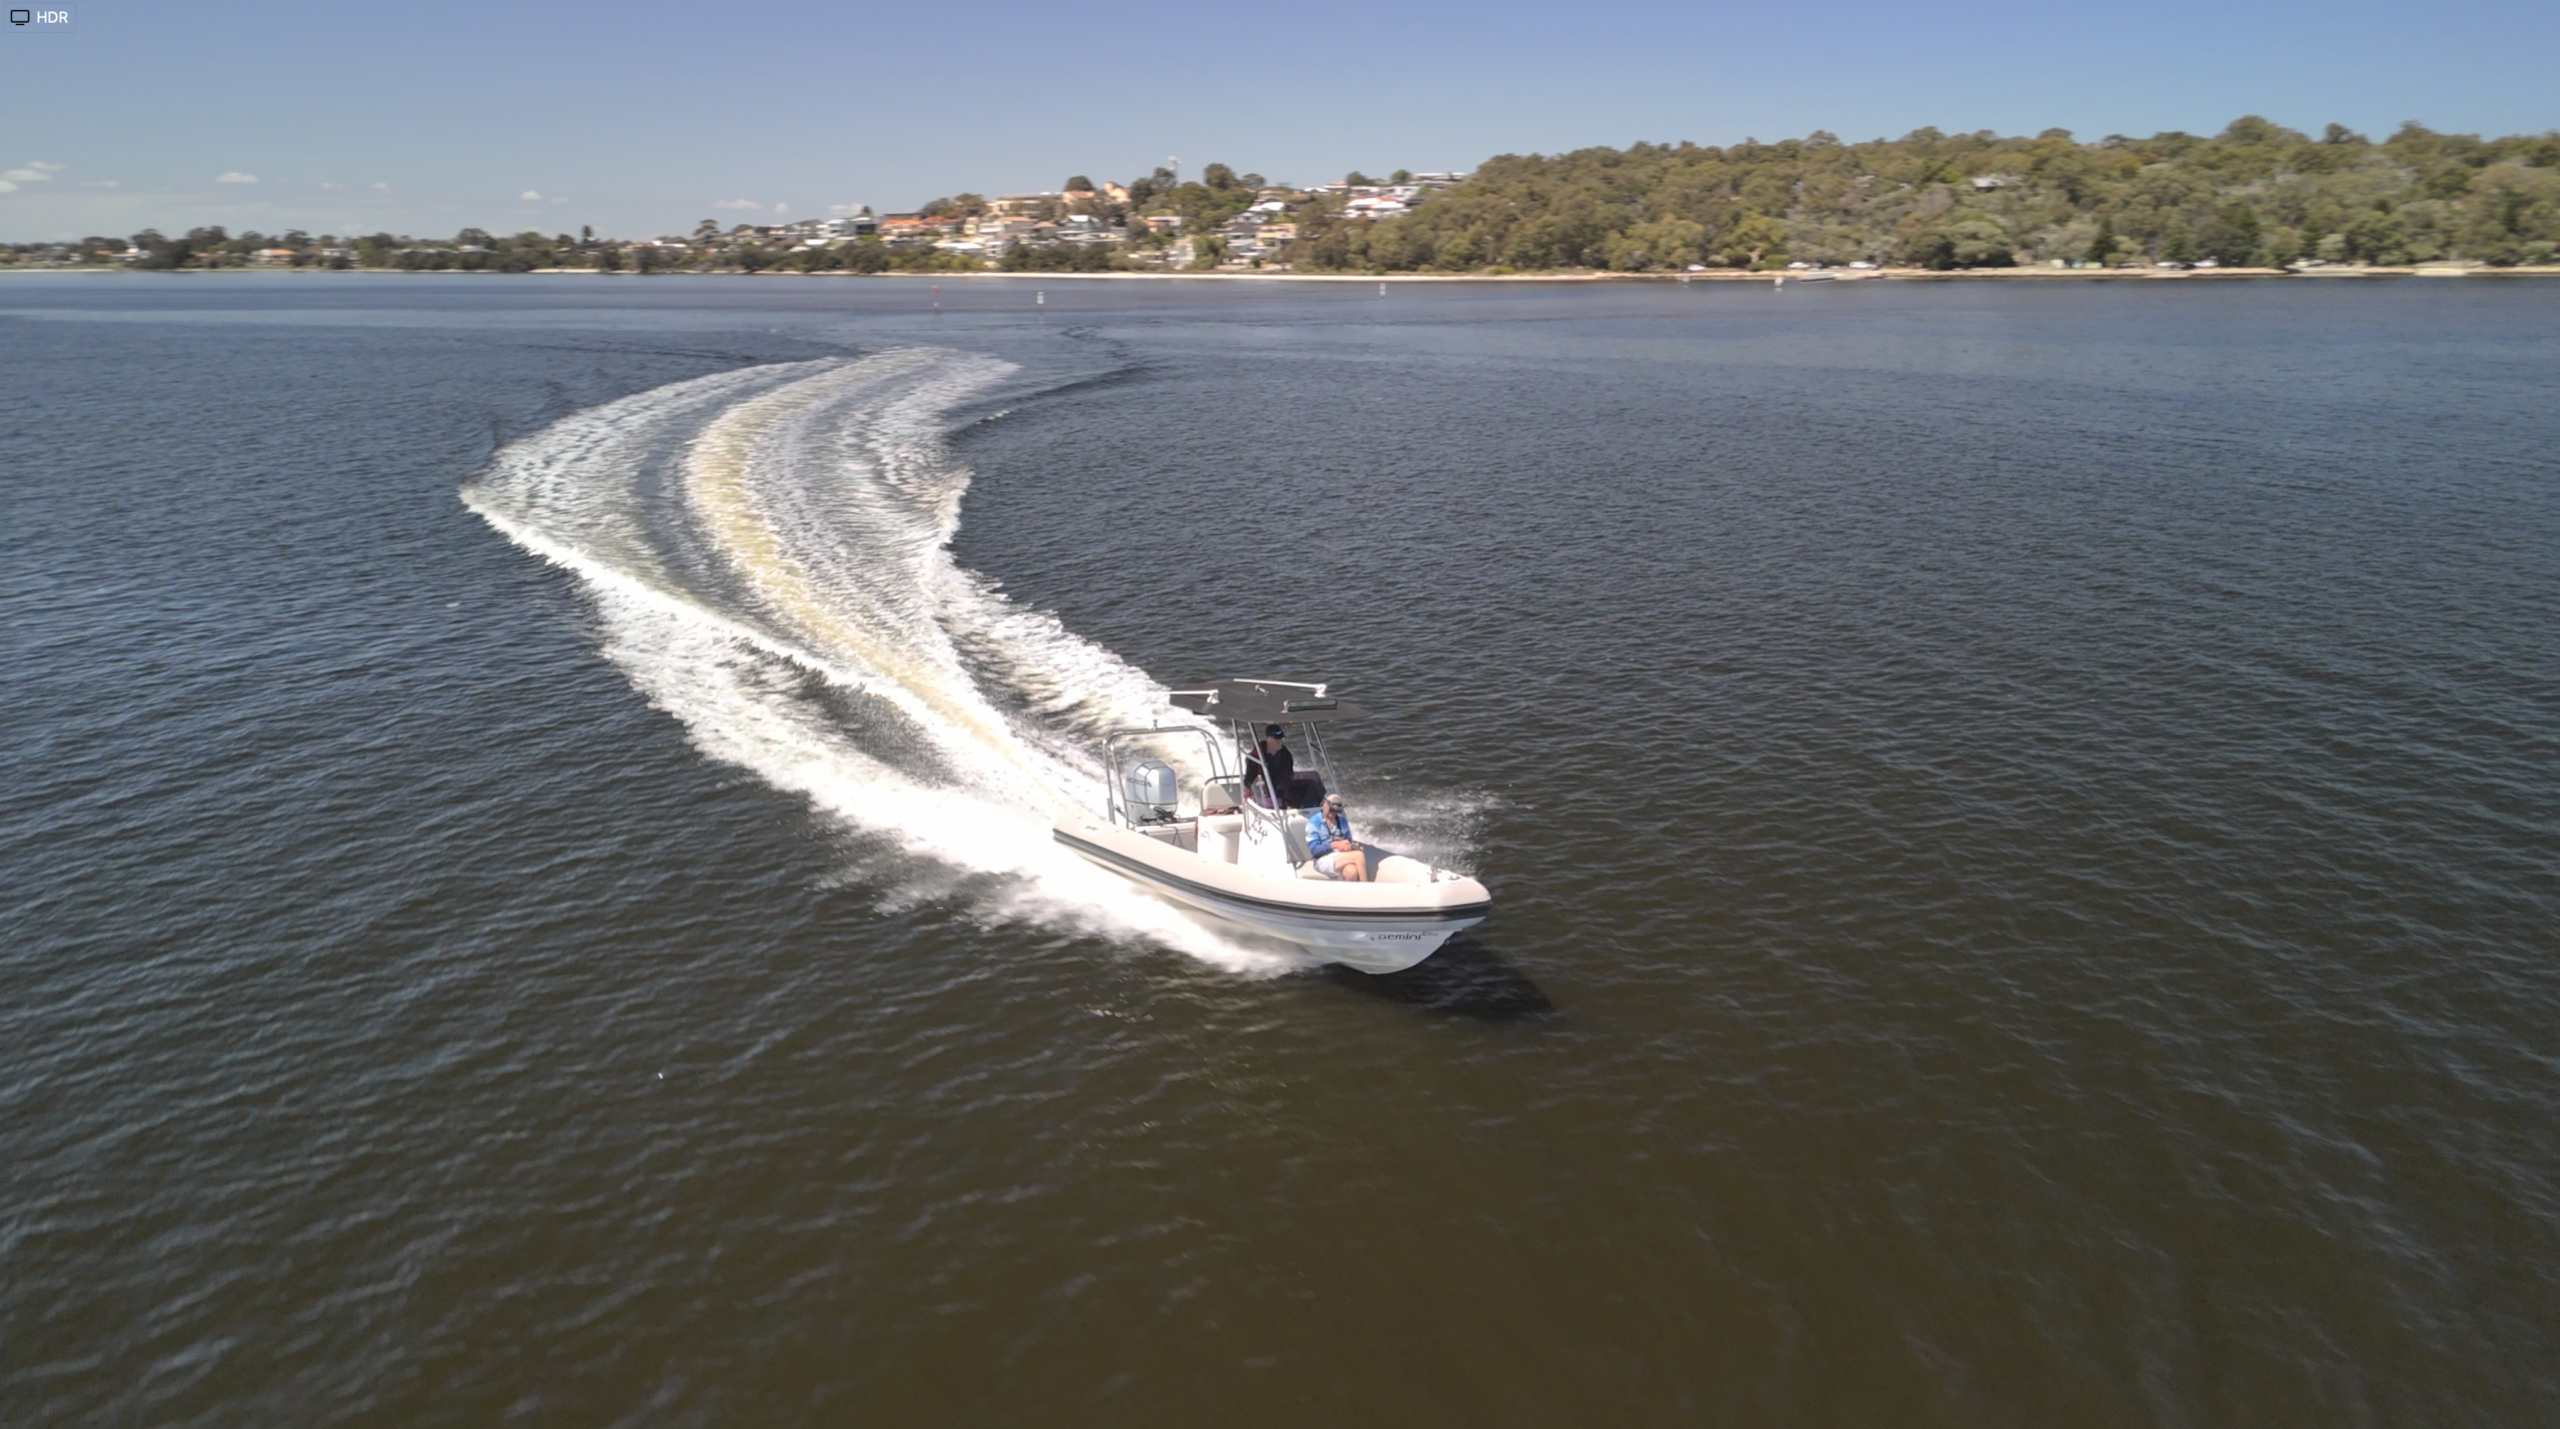
Navman Nautical Training
Aerial filming in an active marine training environment.
Click to enlarge
VESSEL TRACKING / SWAN RIVER
OPERATION
MORE THAN
GETTING THE SHOT.
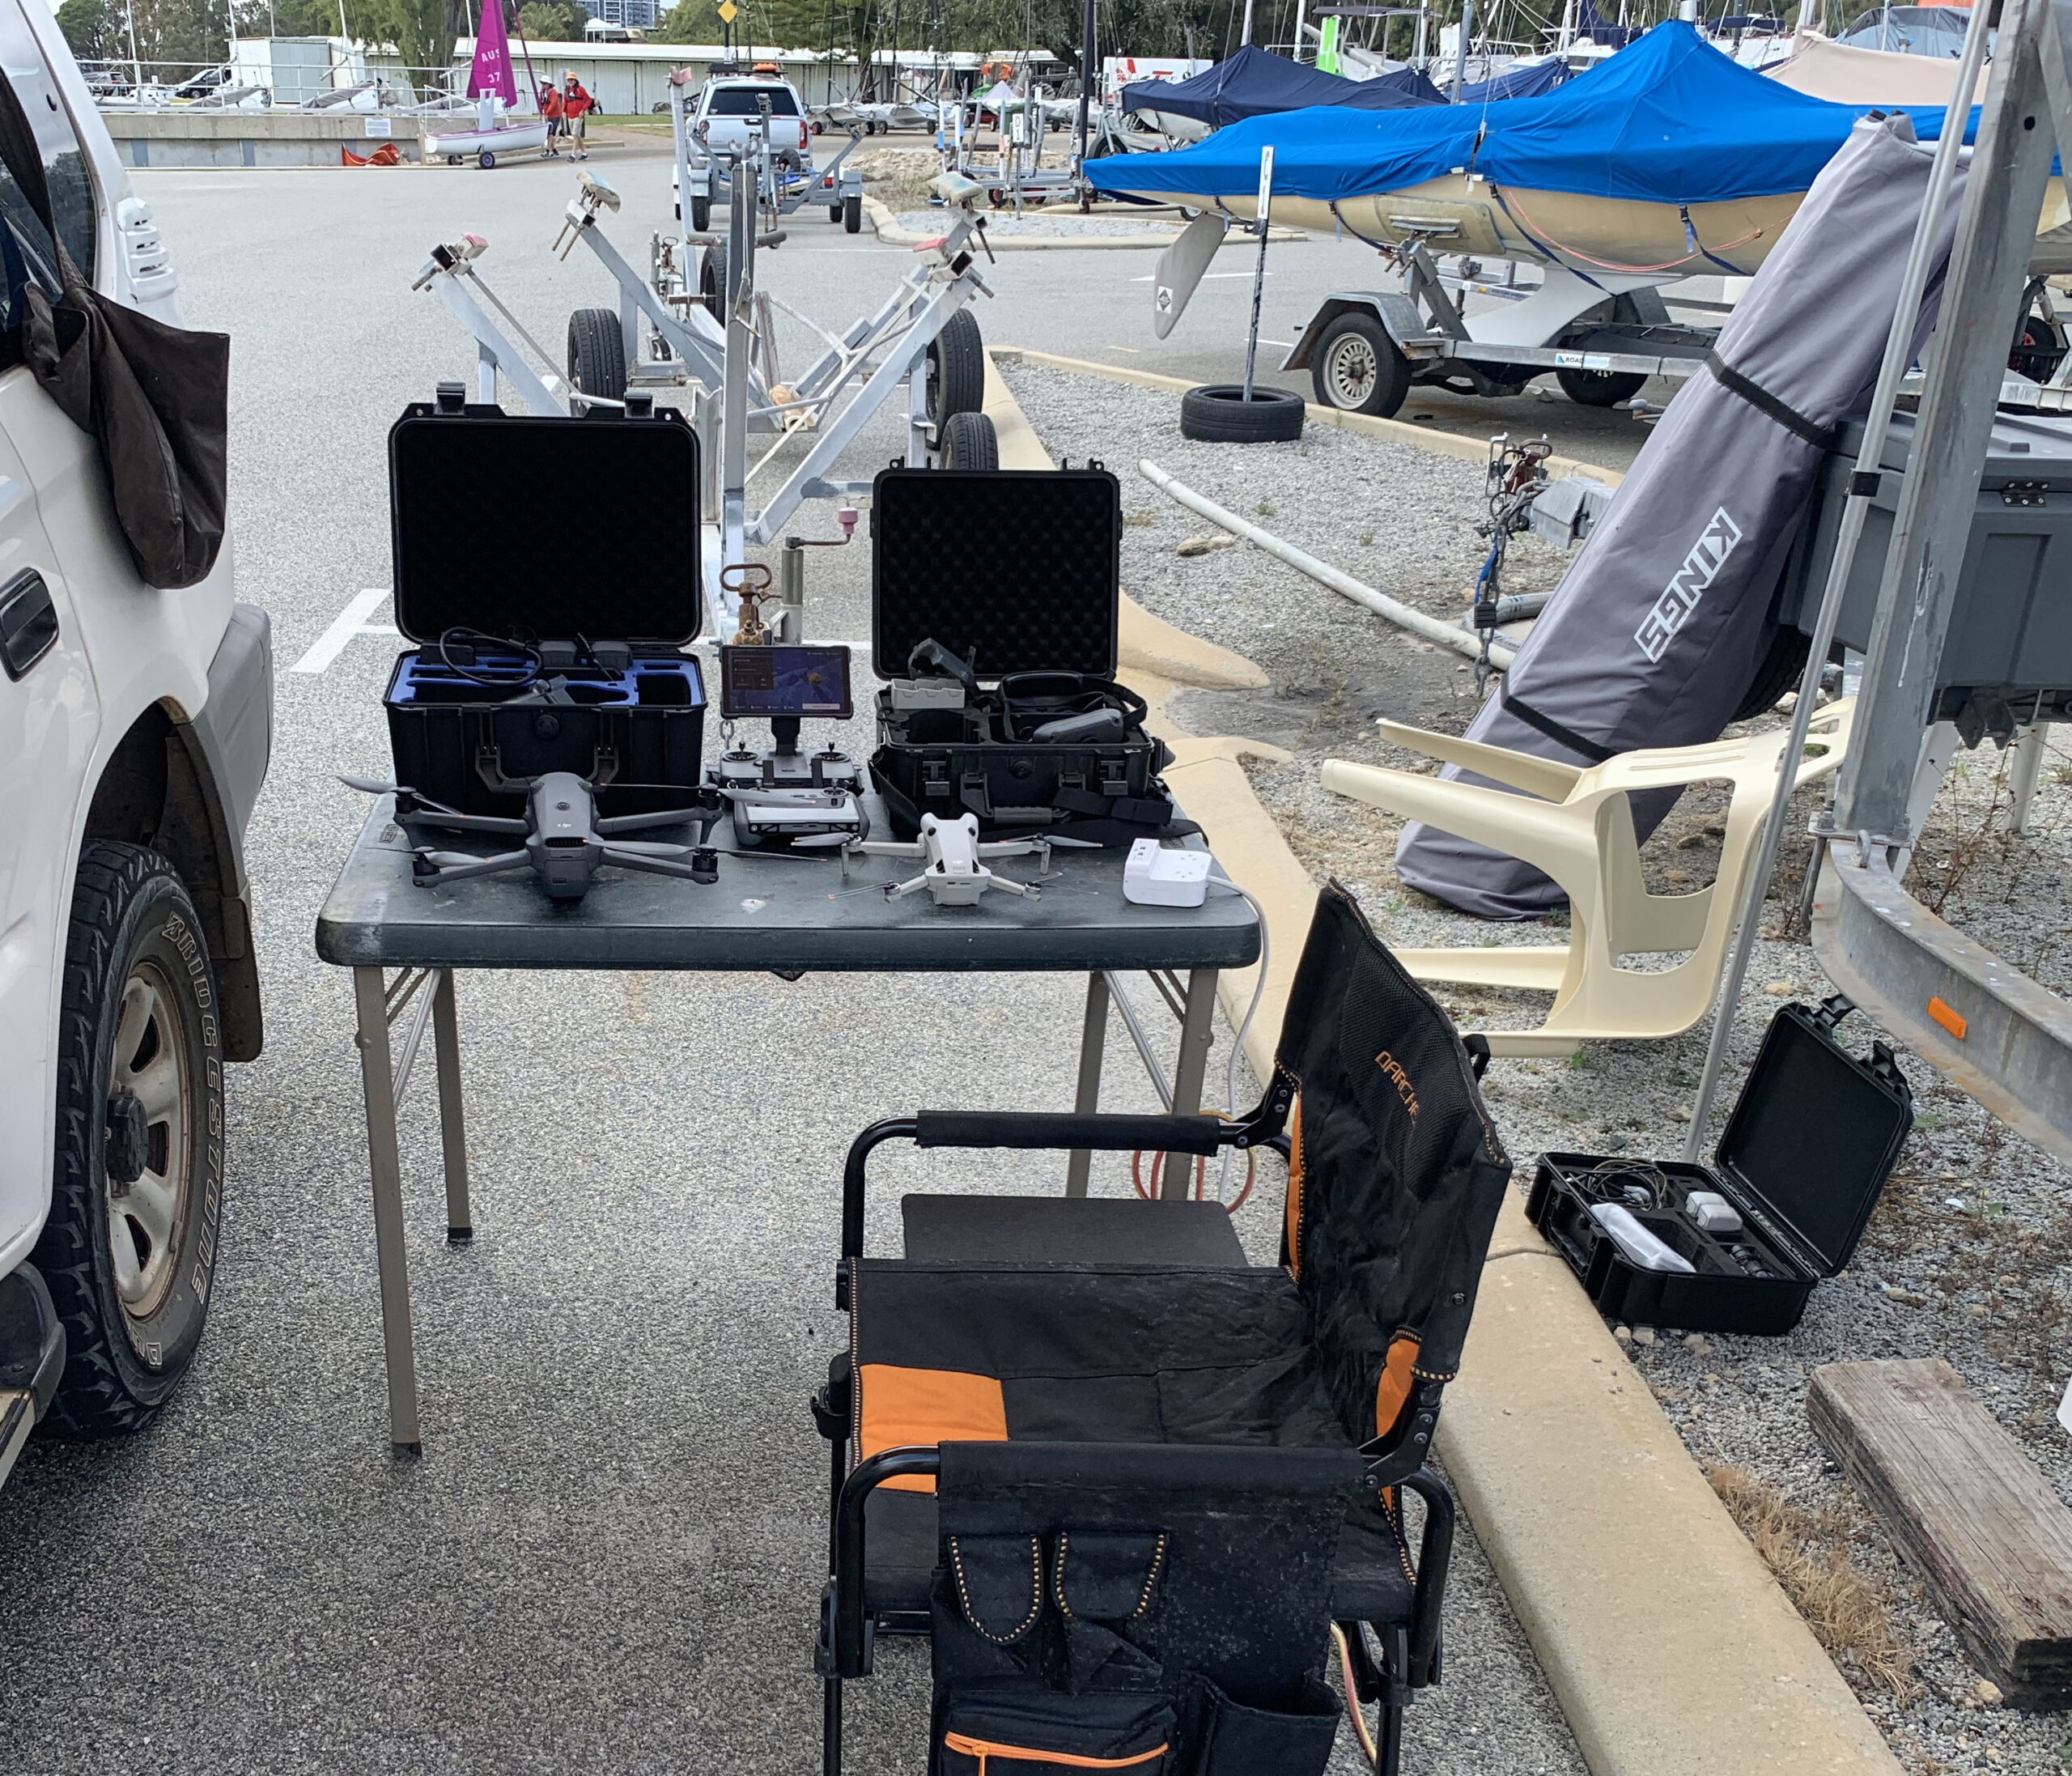
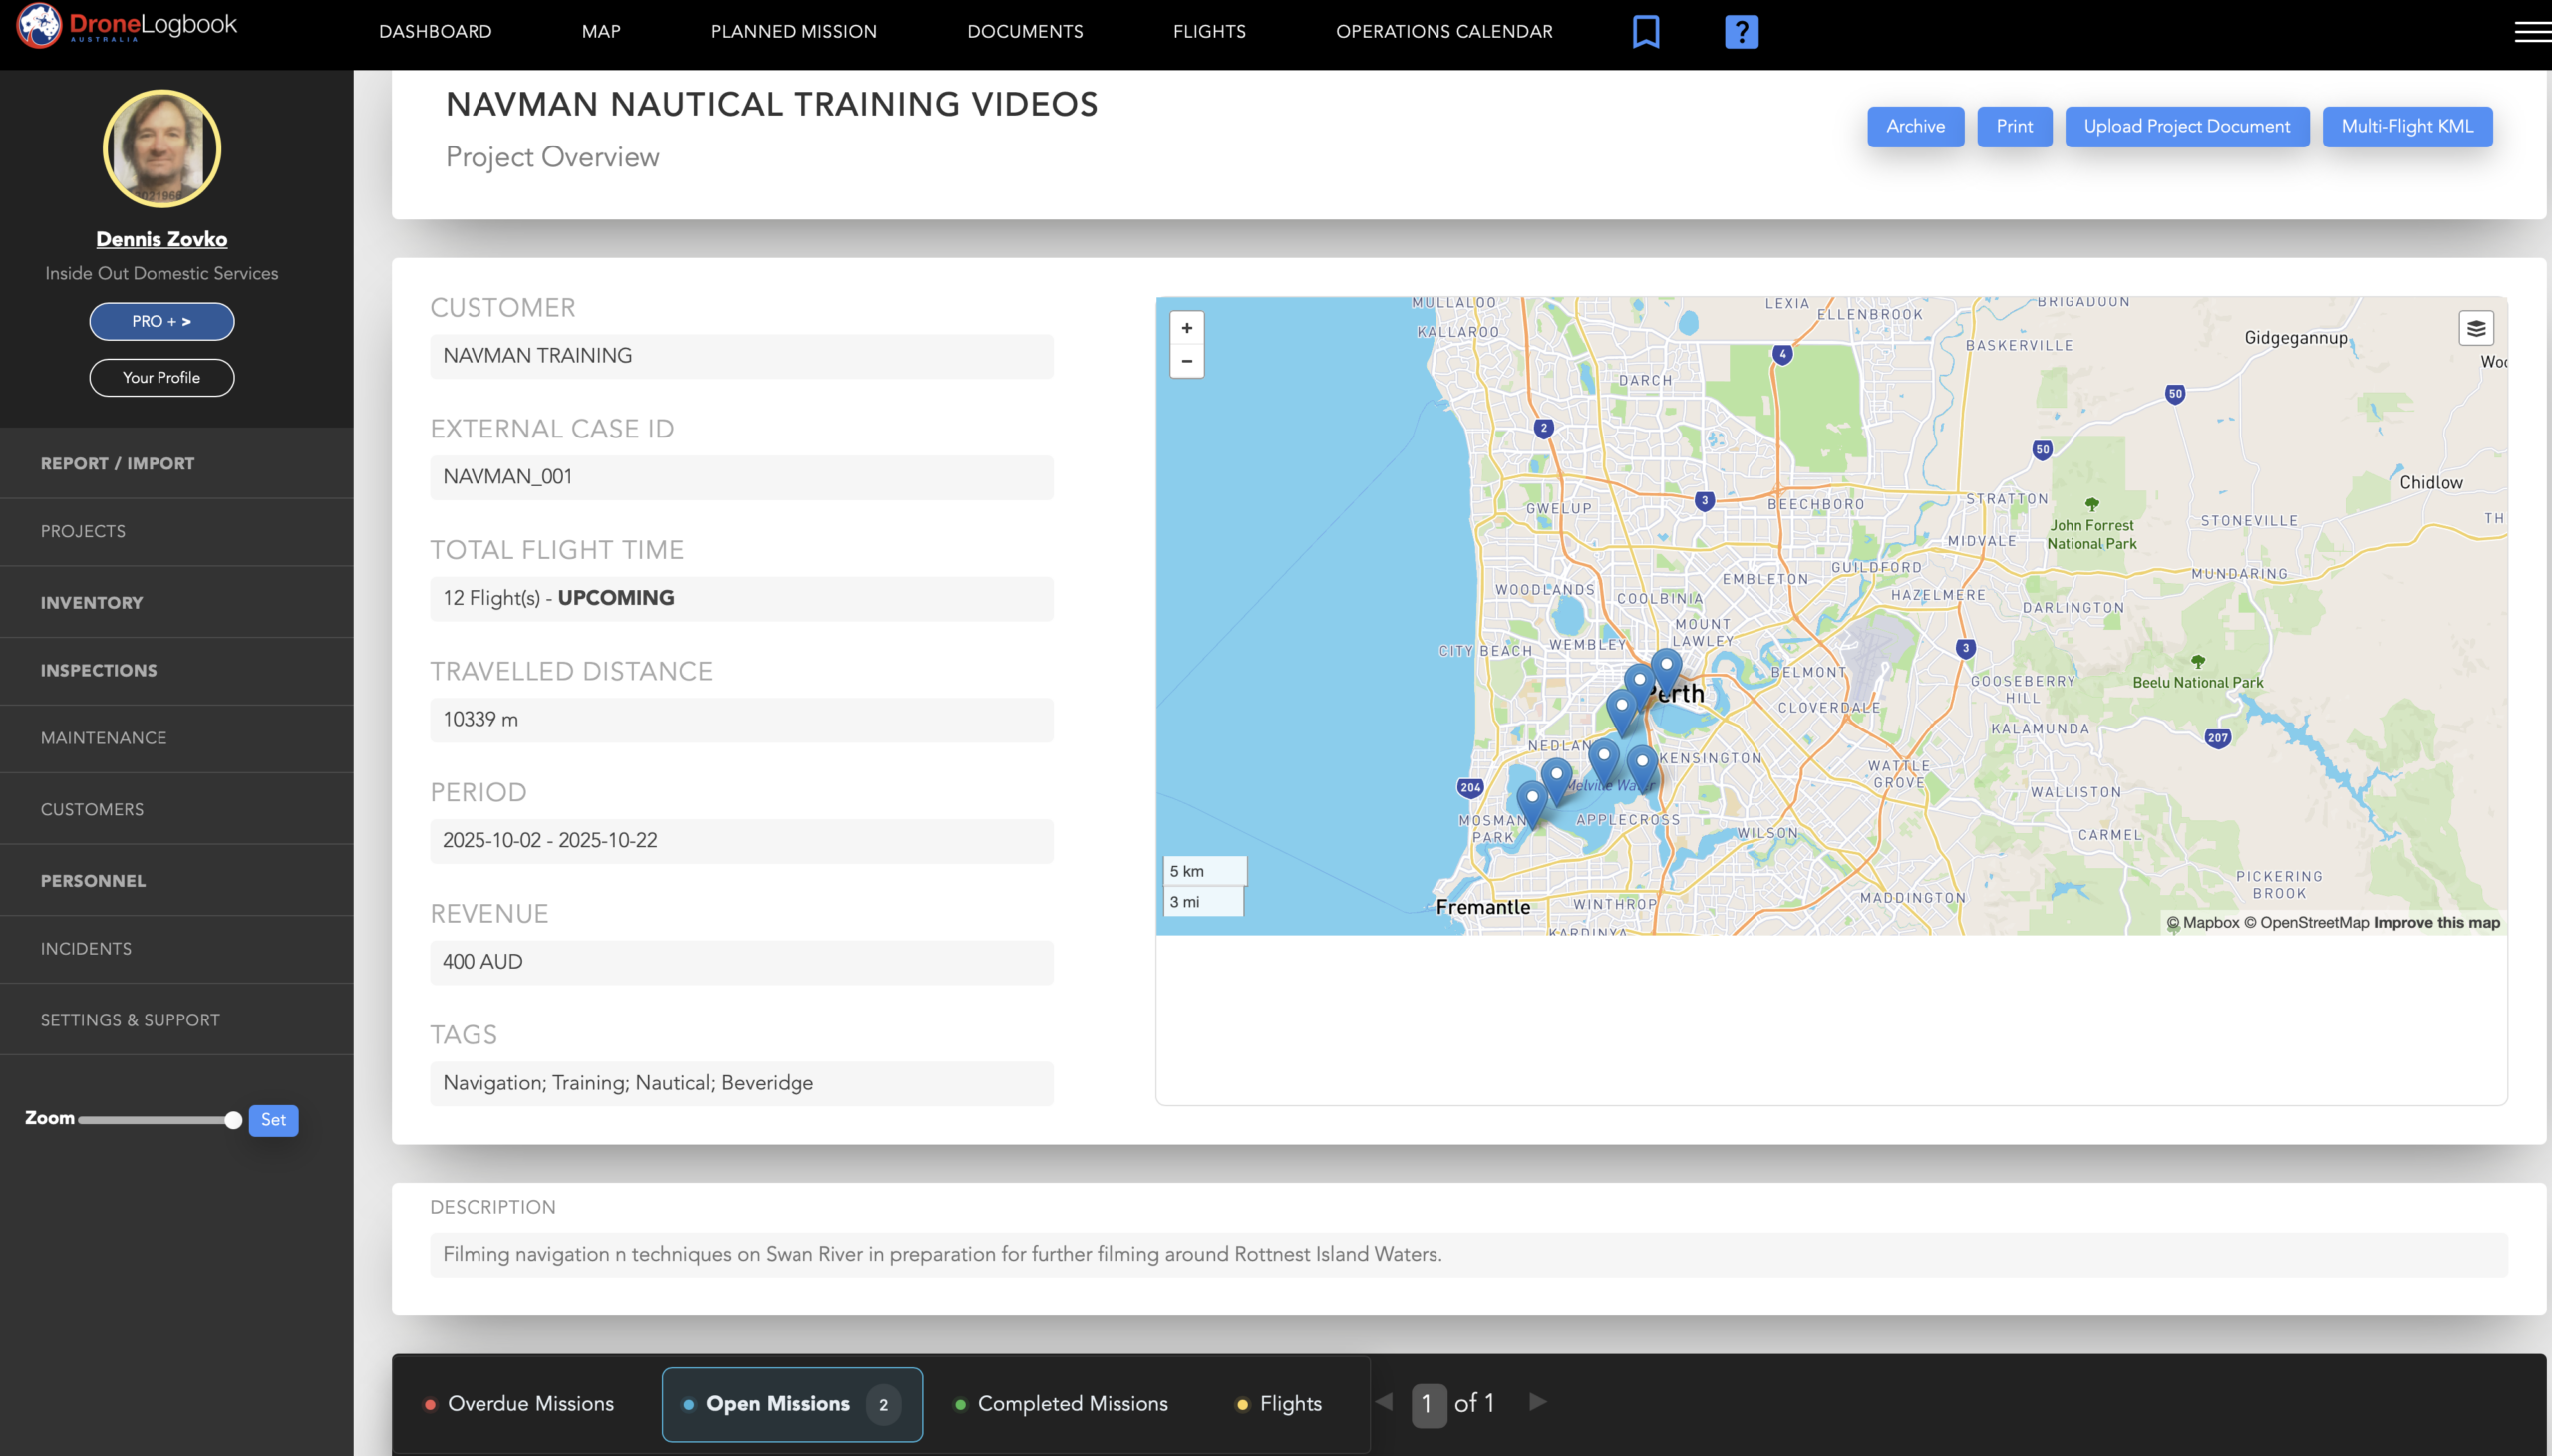
The work combined flight planning, equipment preparation and repeated vessel-tracking flights in an active marine environment. Operations were logged throughout the project, with twelve flights and more than 10 km of flight activity recorded across the training program.
Click to enlarge
Click to enlarge
FLIGHT + RECOVERY
THE CHALLENGE ISN'T JUST THE FLIGHT
IT'S THE RECOVERY.
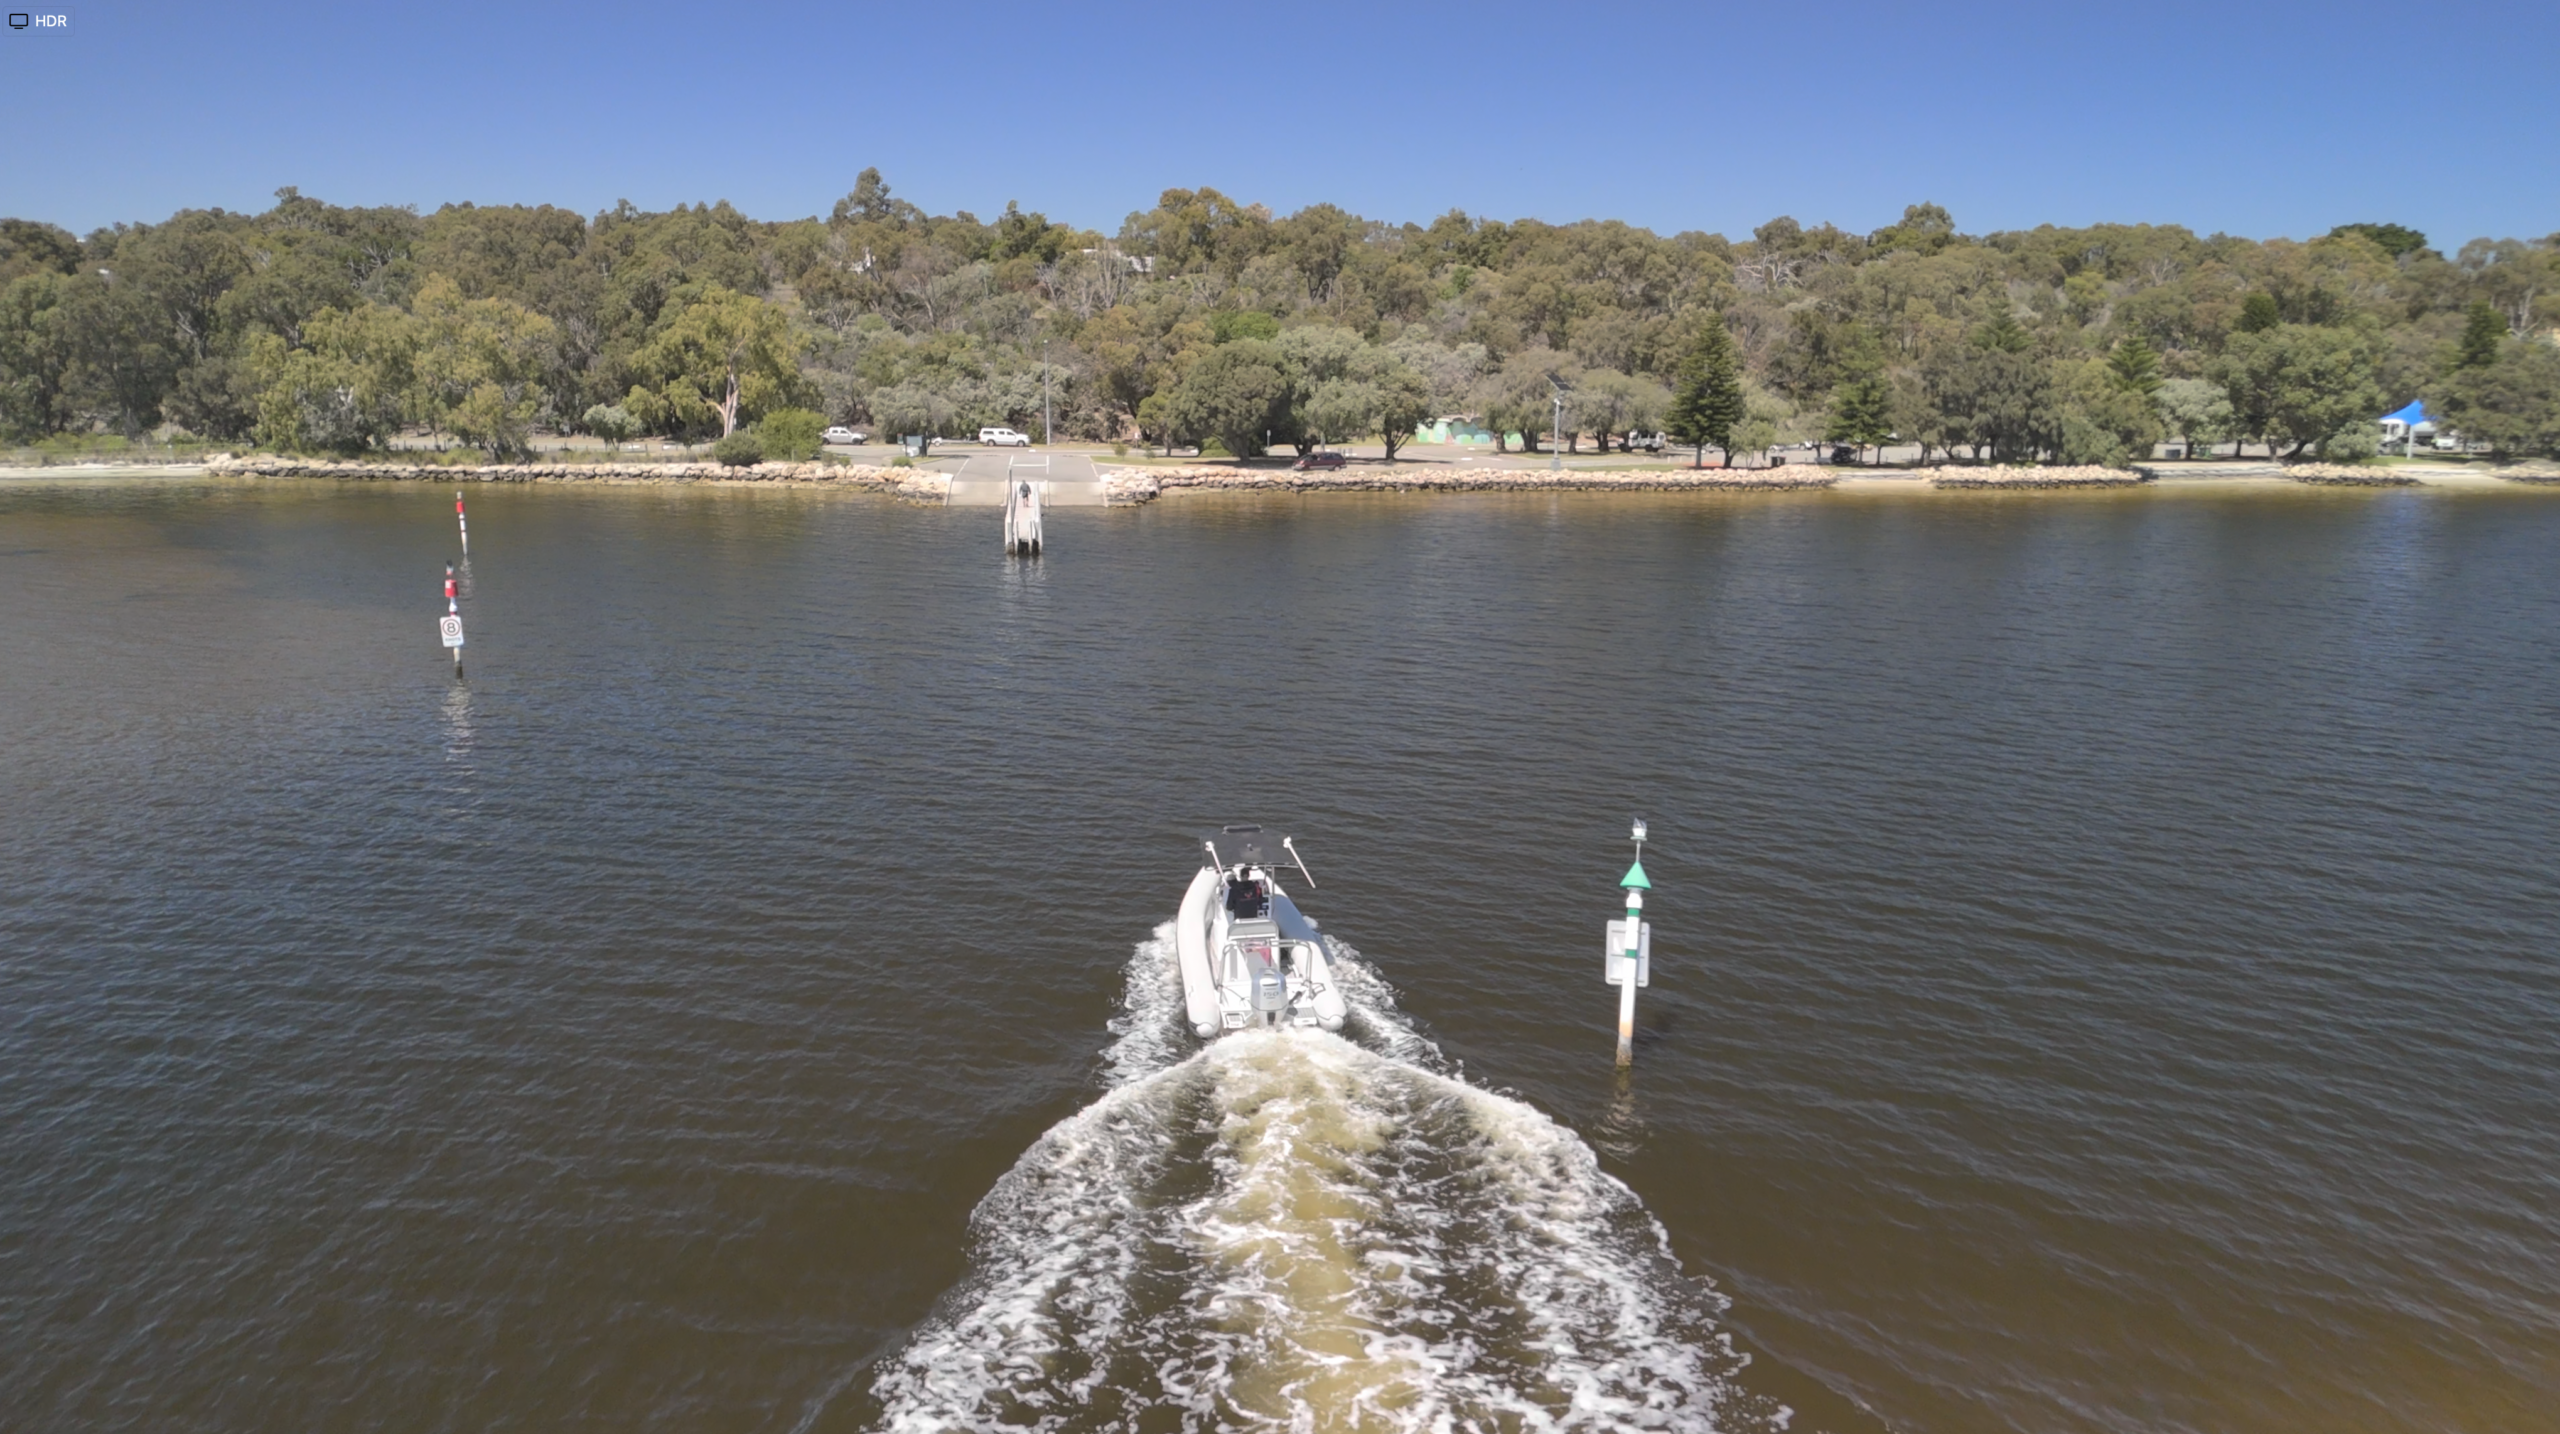
Tracking a moving vessel requires constant adjustment for speed, direction, wind and the surrounding environment. Recovery adds another challenge: the landing area is small, moving and changing beneath the aircraft as the vessel pitches and rolls. The approach and recovery have to be considered before the aircraft ever leaves the deck.
Click to enlarge
CHANNEL TRANSIT / VESSEL TRACKING
PROJECT / NAVMAN TRAINING
Marine training and practical boating education on the Swan River.
VISIT NAVMAN TRAINING ↗02 / DESIGN + FABRICATION
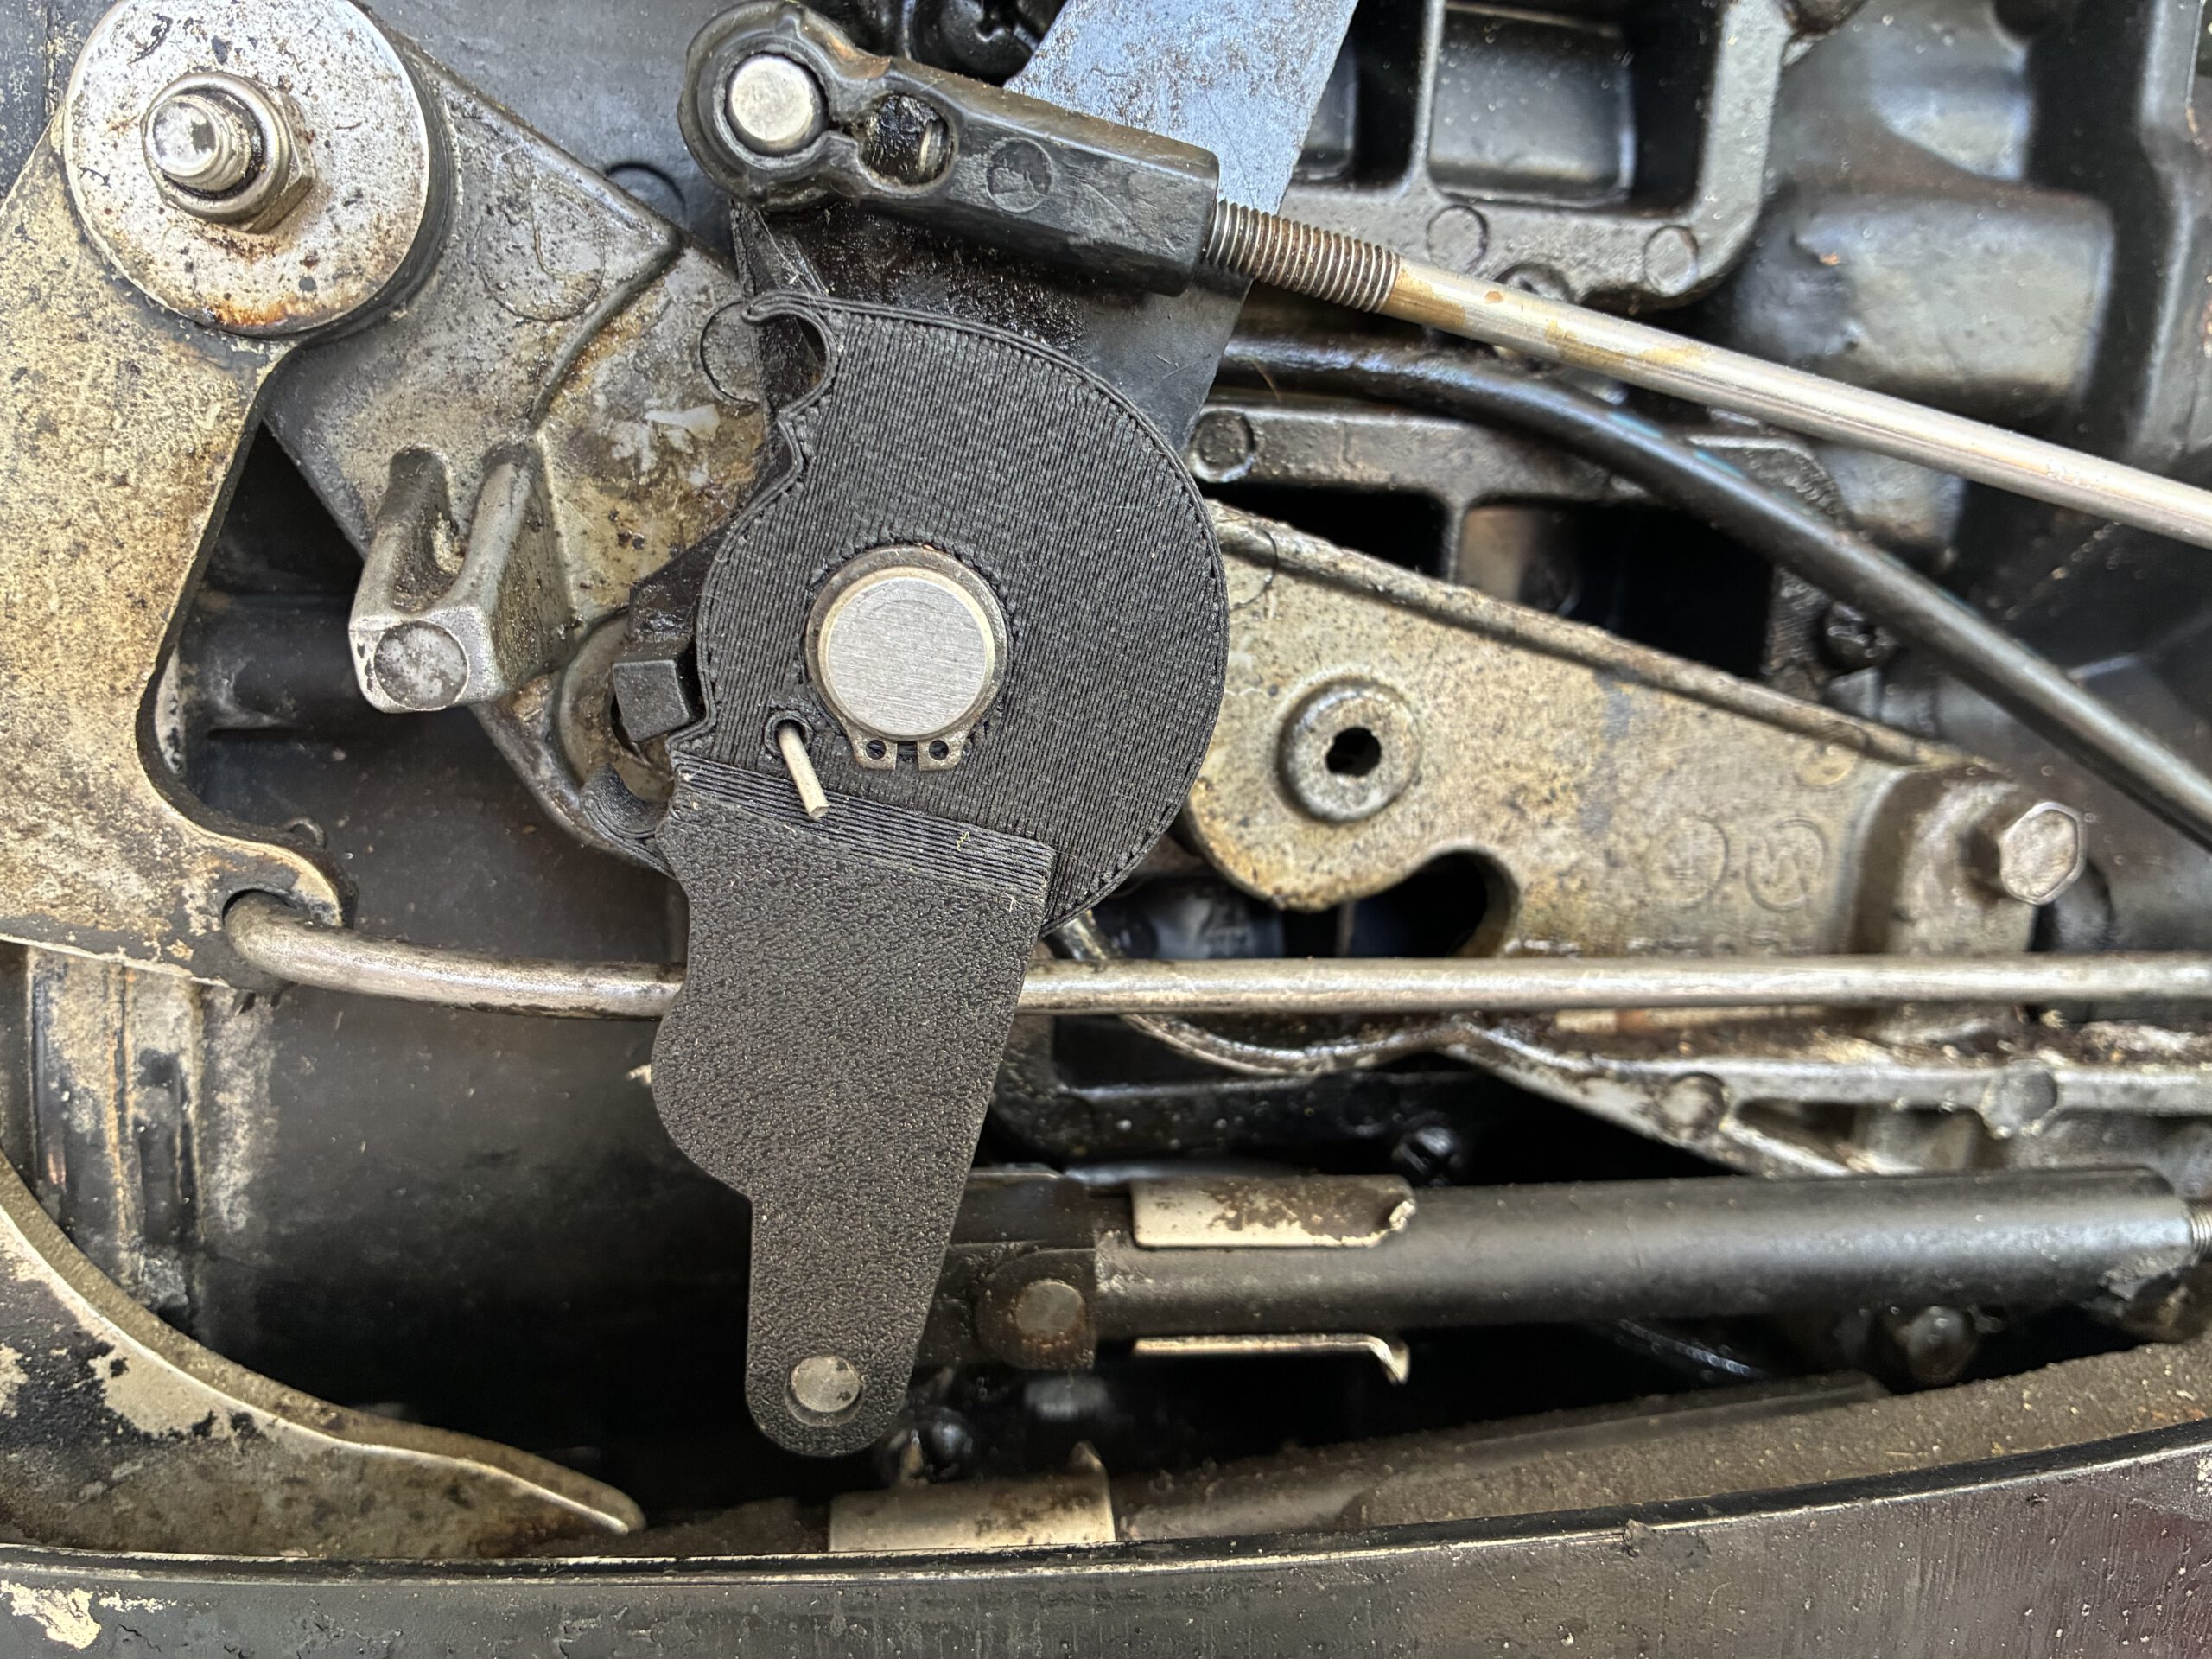
Mercury Outboard Throttle Lever
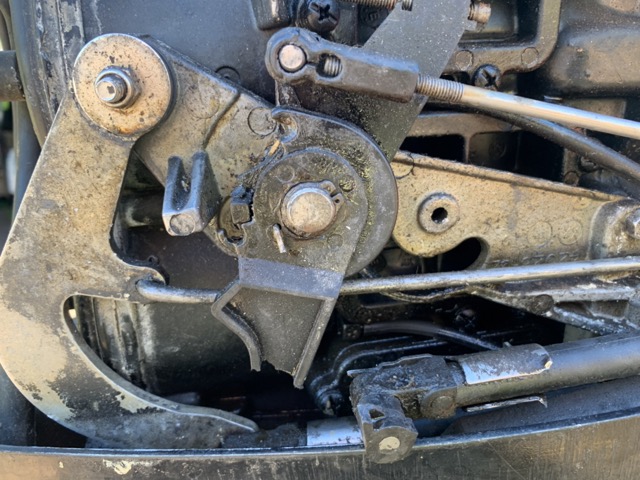
Reverse-engineering a failed component and manufacturing a functional replacement.
Click to enlarge
FAILED ORIGINAL COMPONENT
Click to enlarge
INSTALLED REPLACEMENT
DEVELOPMENT
From failed part to workable replacement.
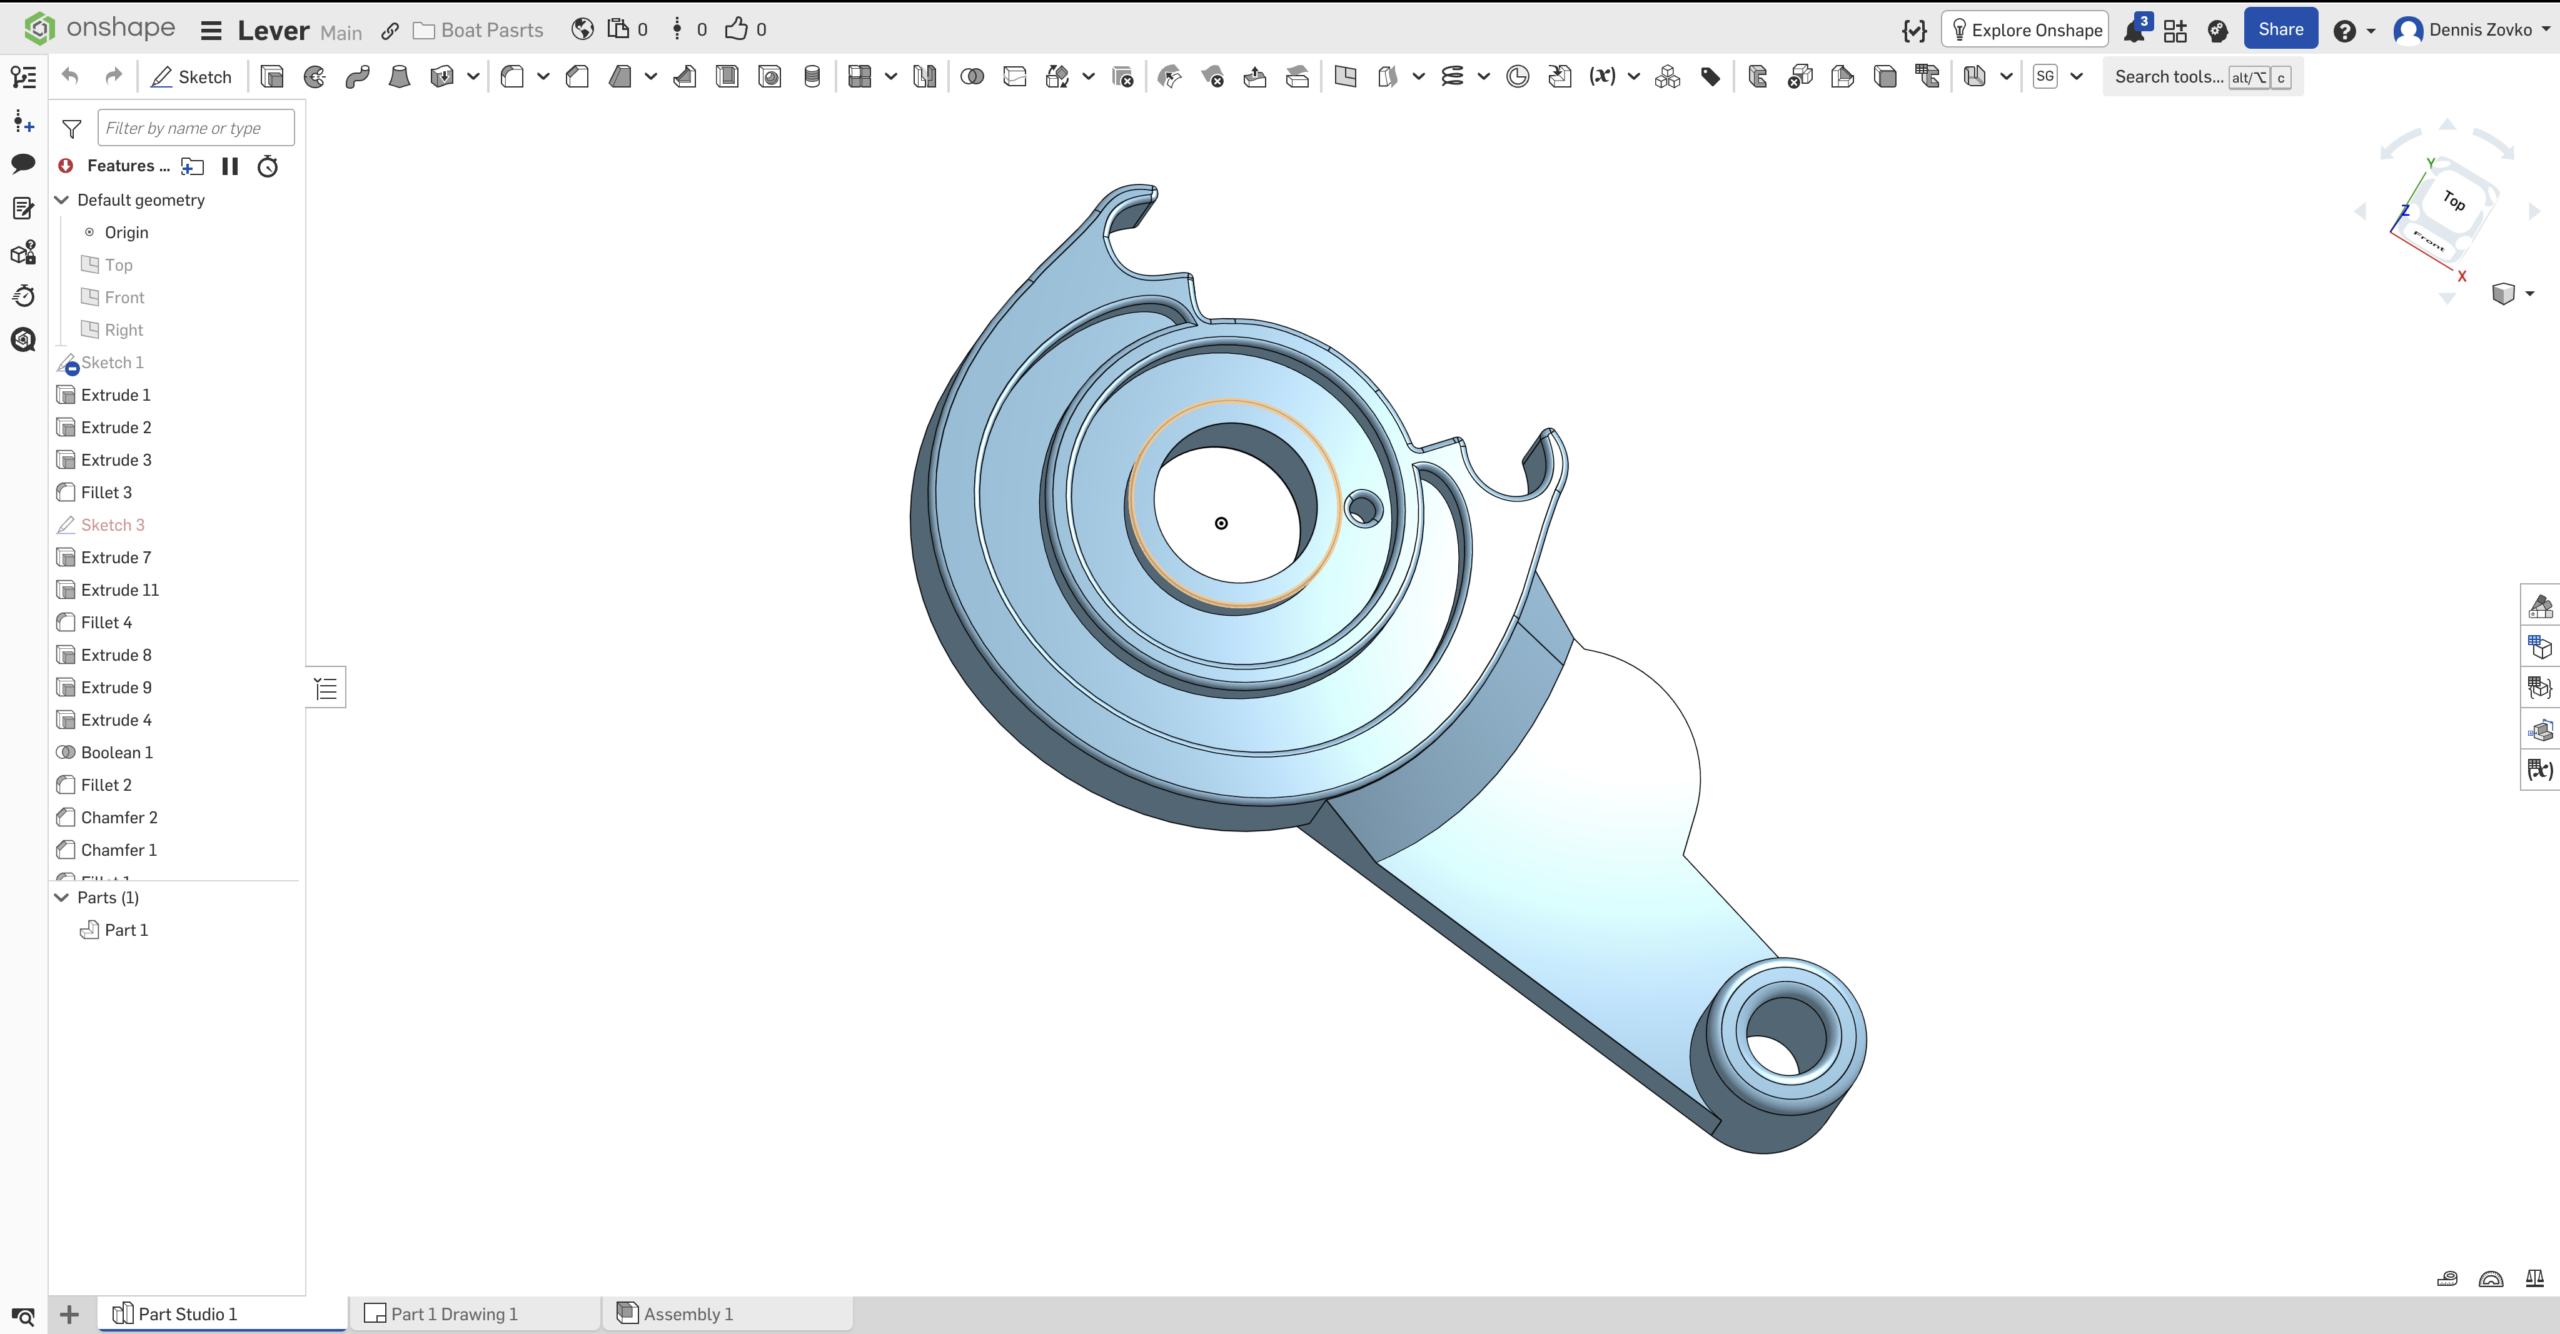
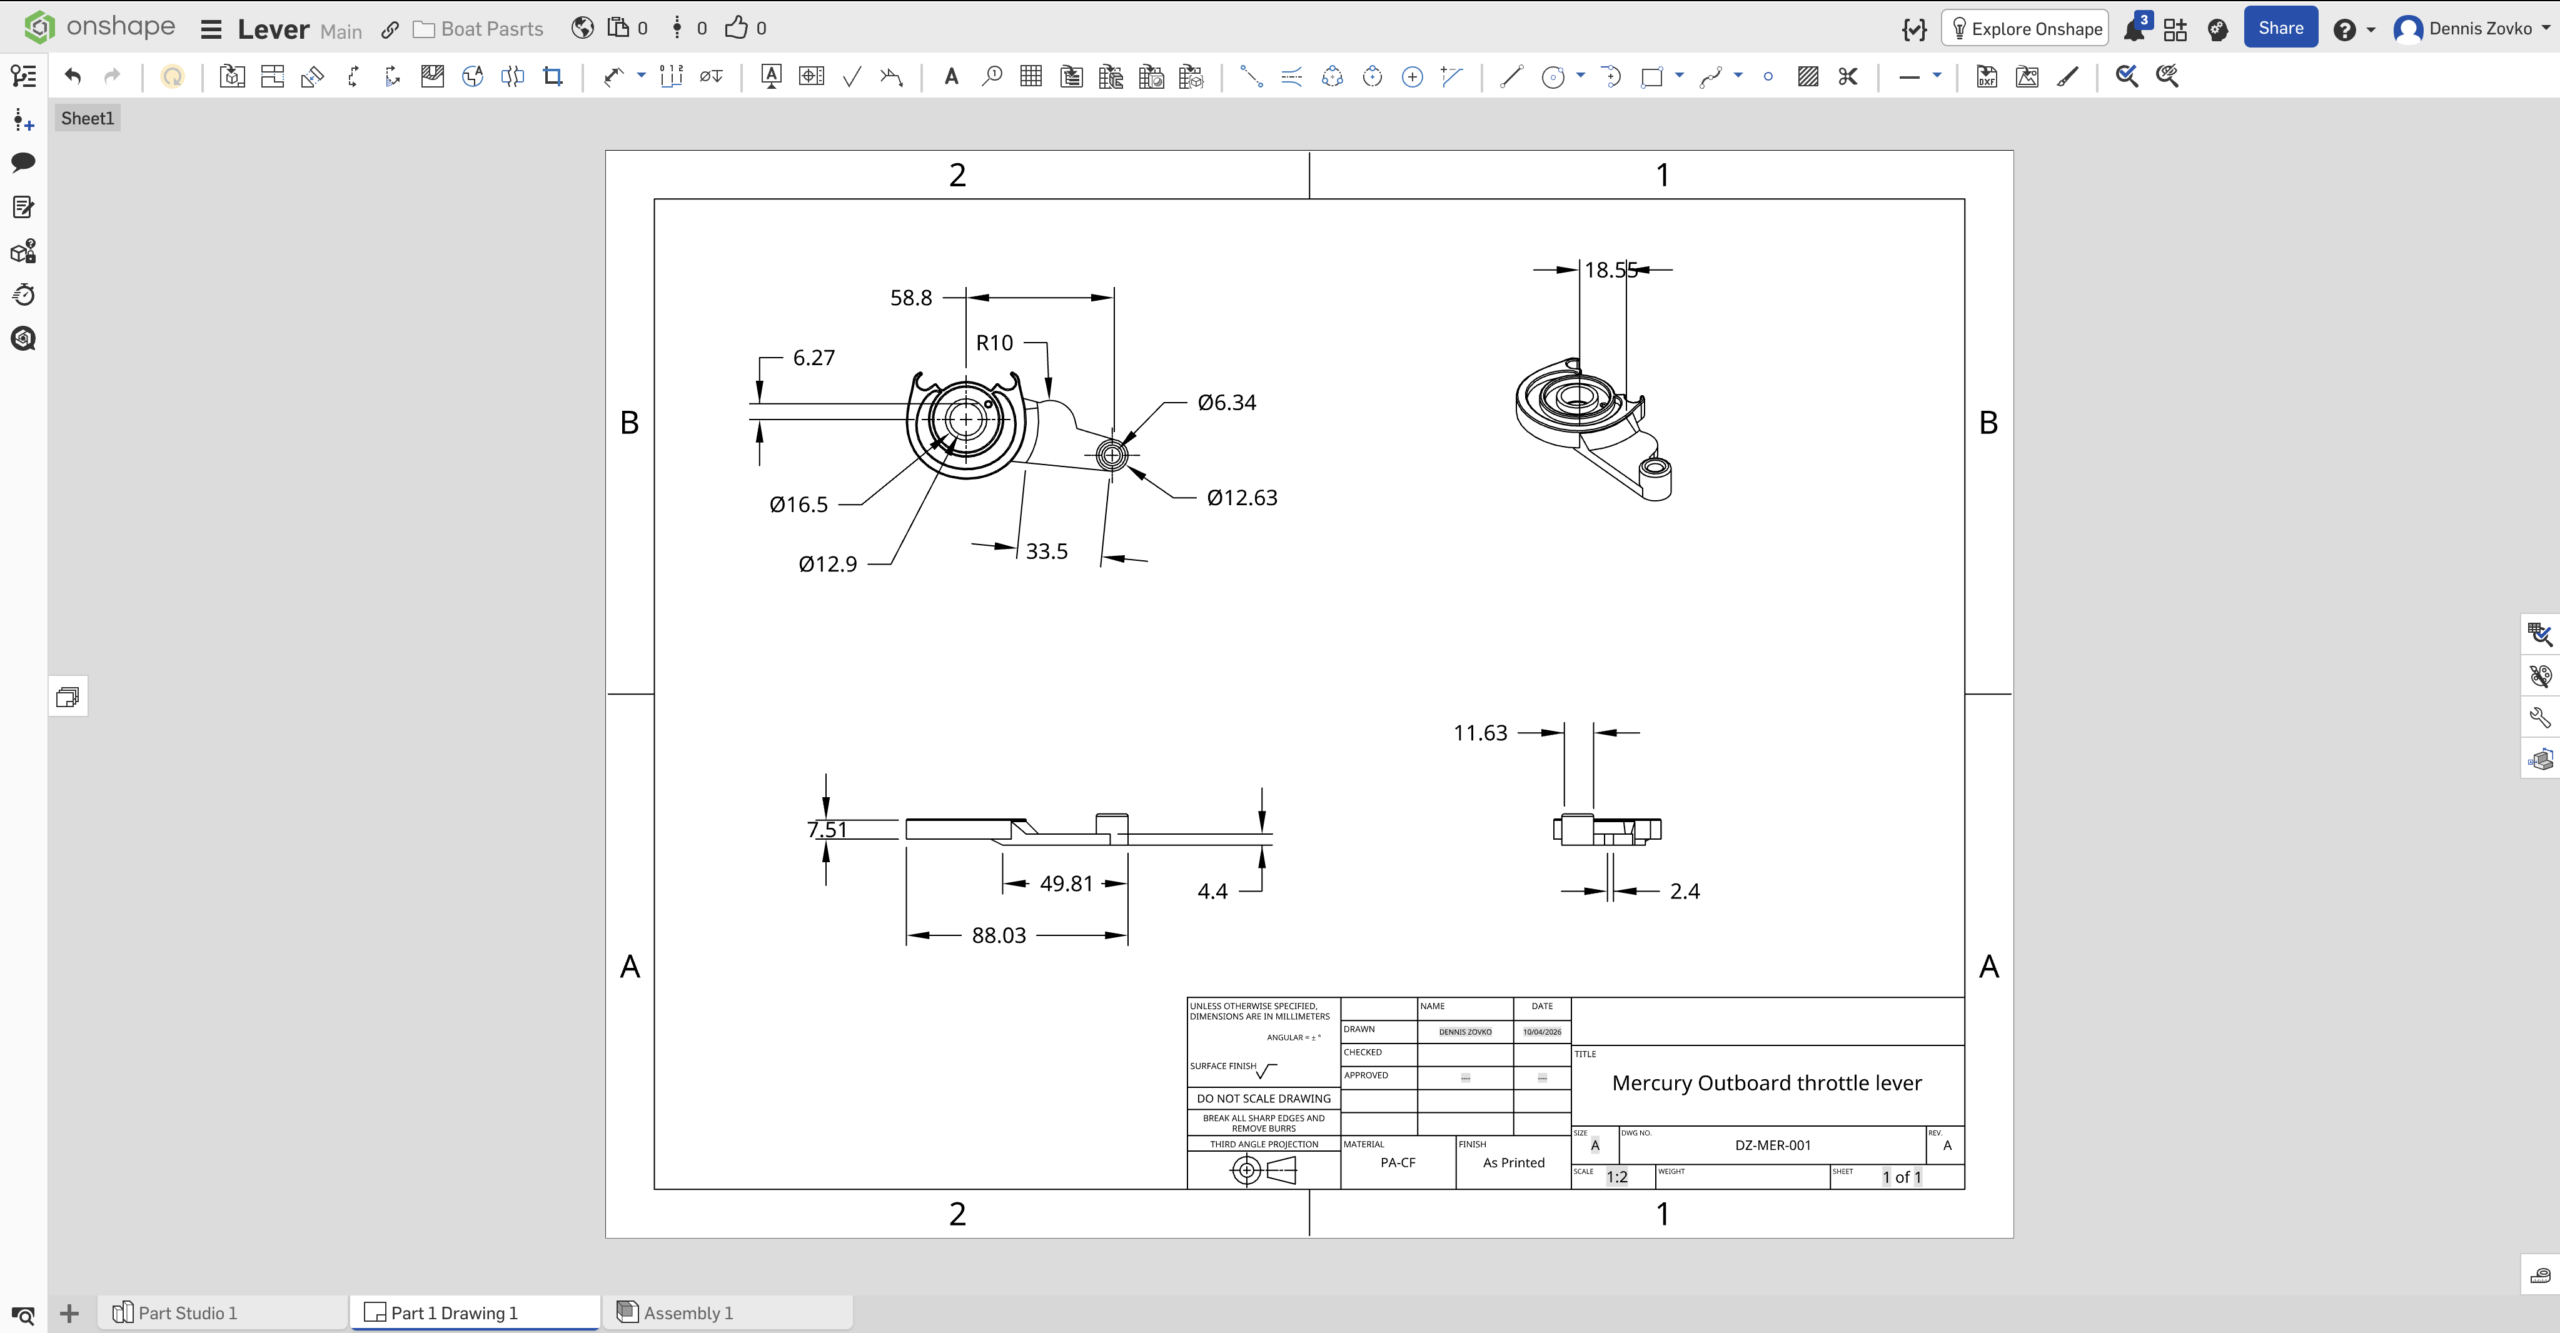
The failed component was measured and reverse-engineered around the existing mechanism, then recreated in CAD and documented before manufacture.
Click to enlarge
CAD MODEL
Click to enlarge
DIMENSIONED DRAWING
MANUFACTURE
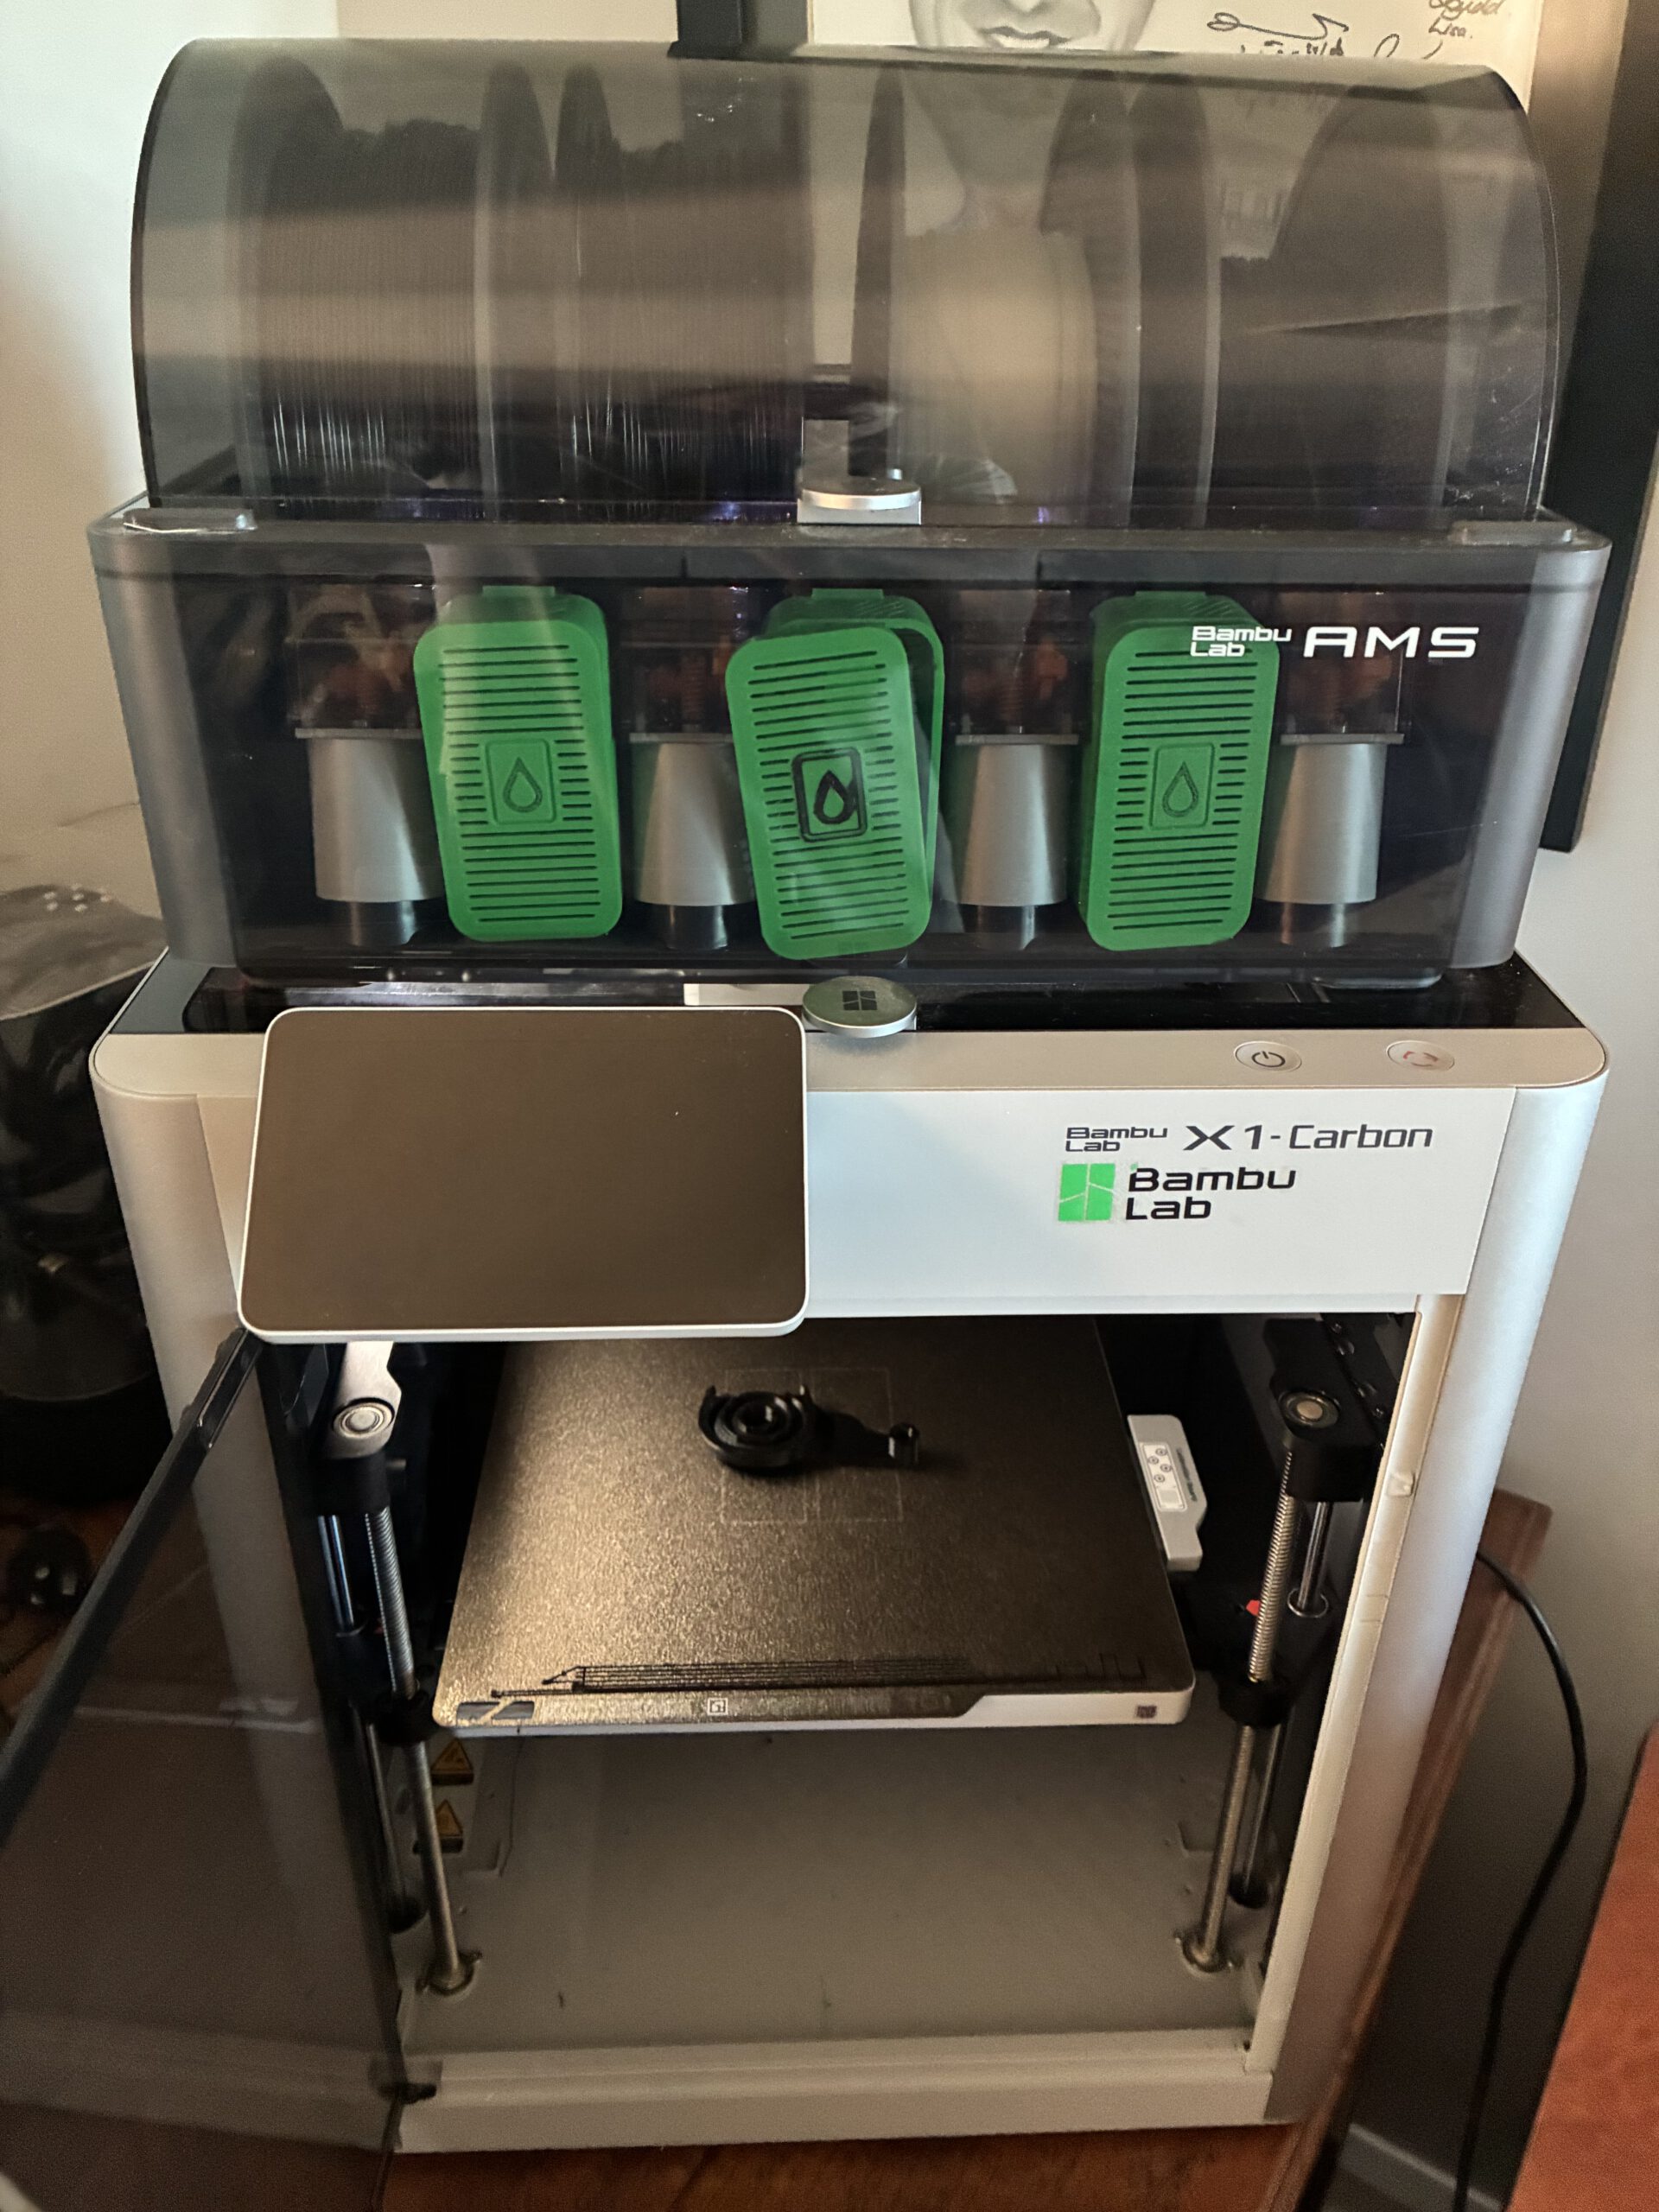
From digital model to physical part.
The replacement was produced in PA-CF as a functional working component rather than a display prototype. Once printed, it was fitted back into the original mechanism and tested in use.
Click to enlarge
04 / DESIGN + FABRICATION
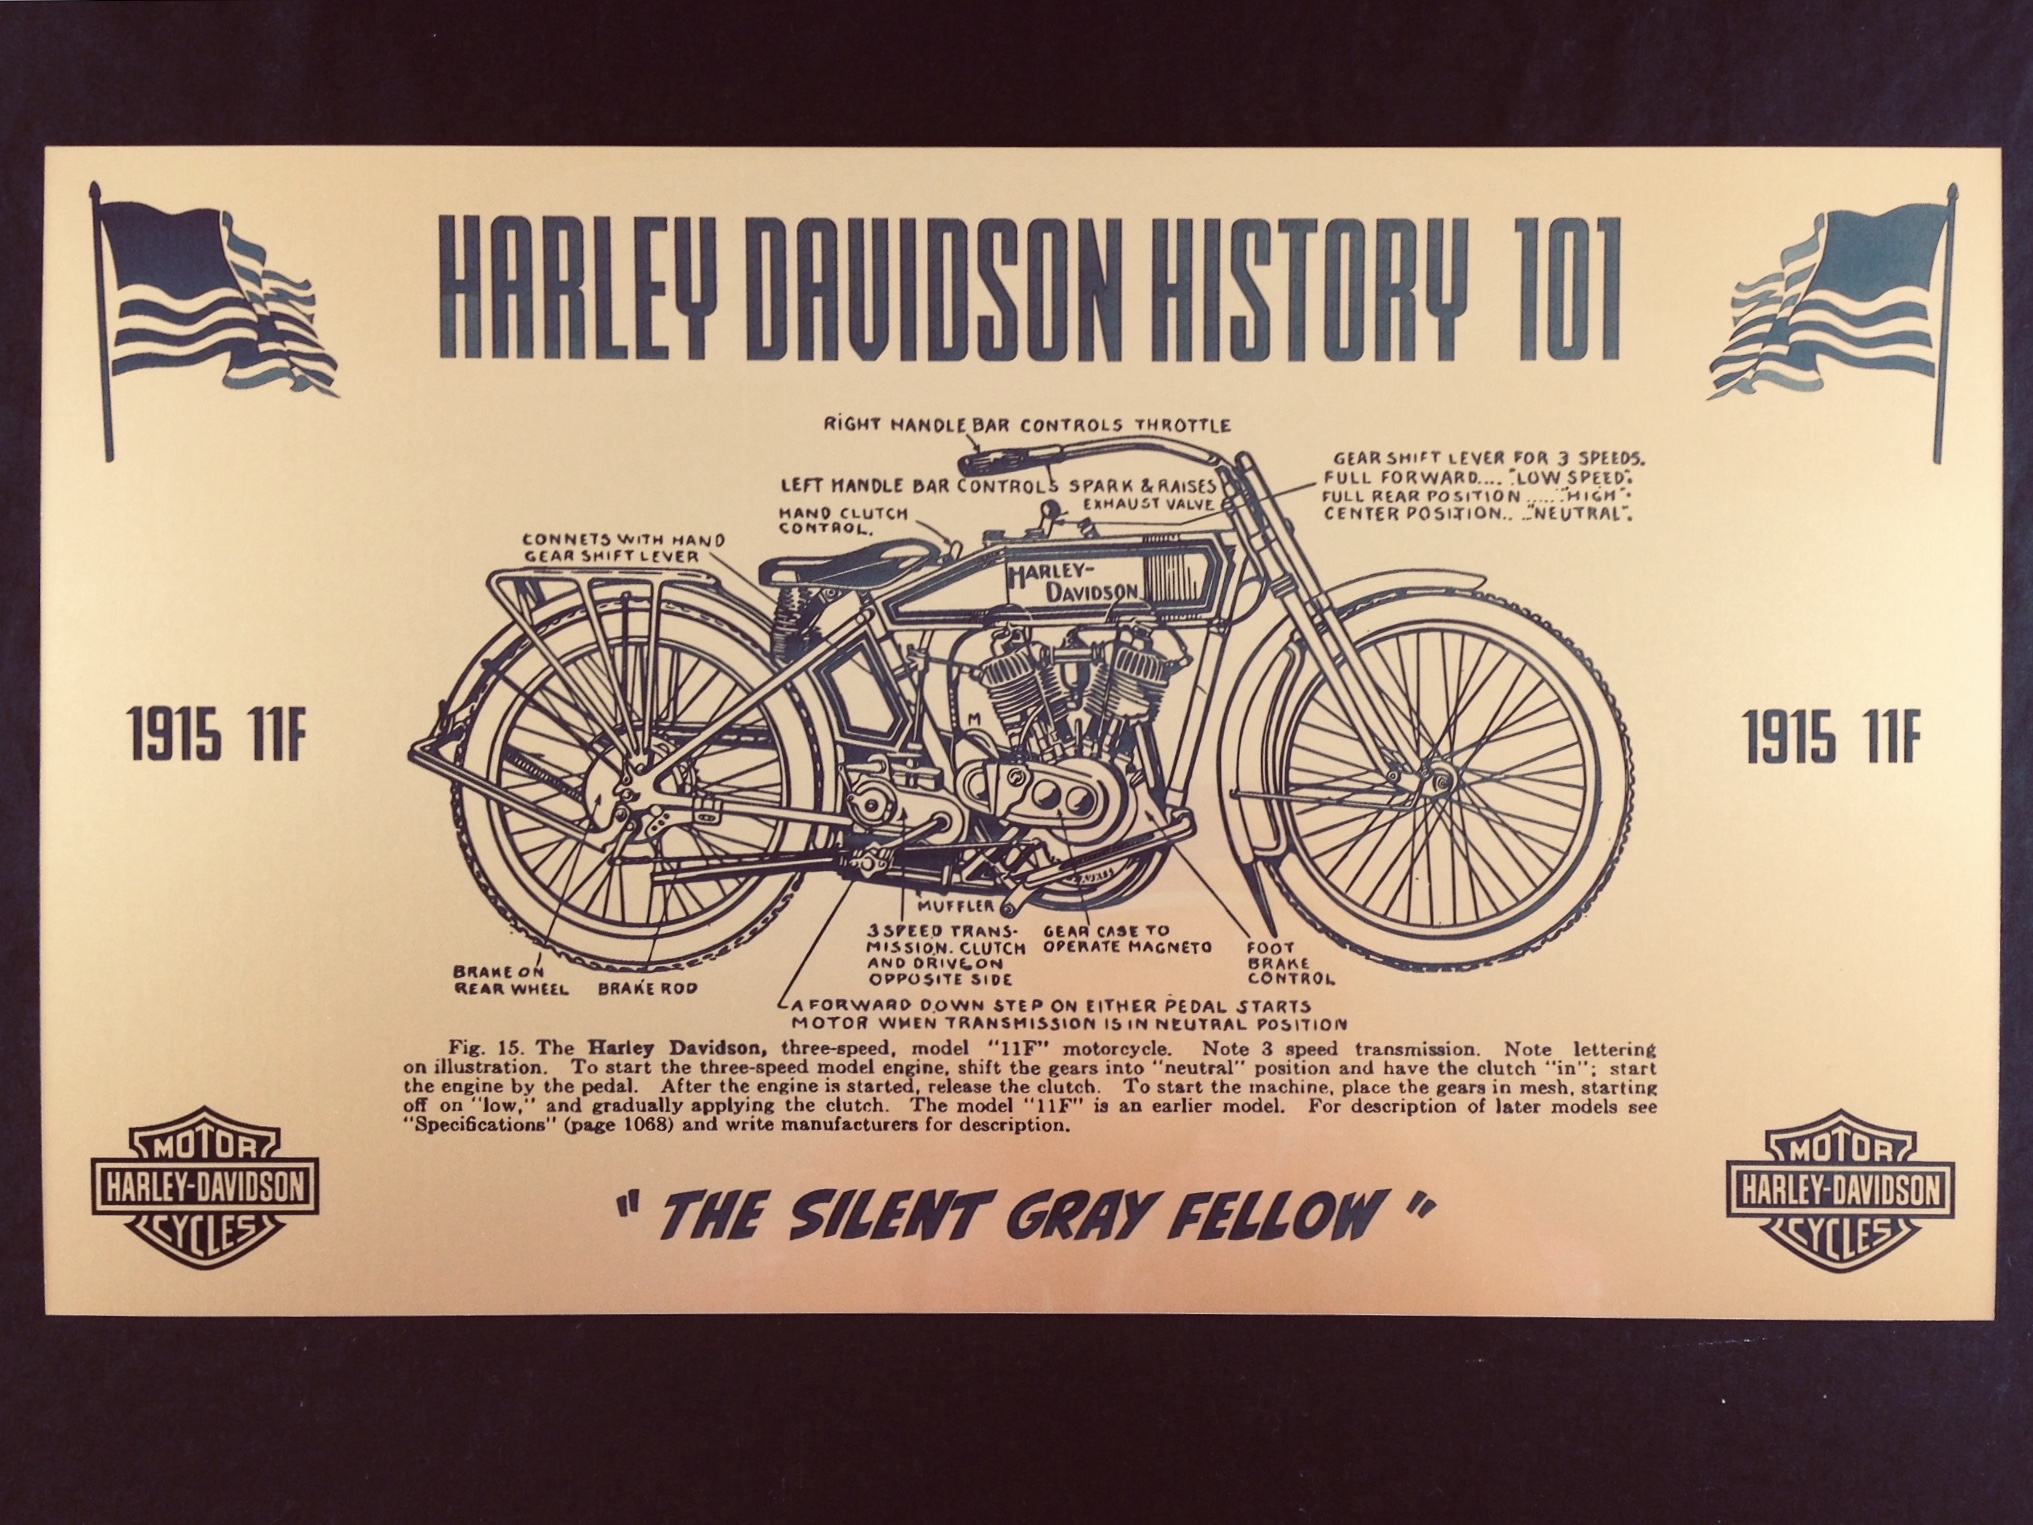
Harley-Davidson History 101
Turning historical reference material into vector artwork and a finished laser-engraved piece.
Click to enlarge
FINISHED LASER-ENGRAVED PIECE
REFERENCE + DESIGN
From historical reference to vector artwork.
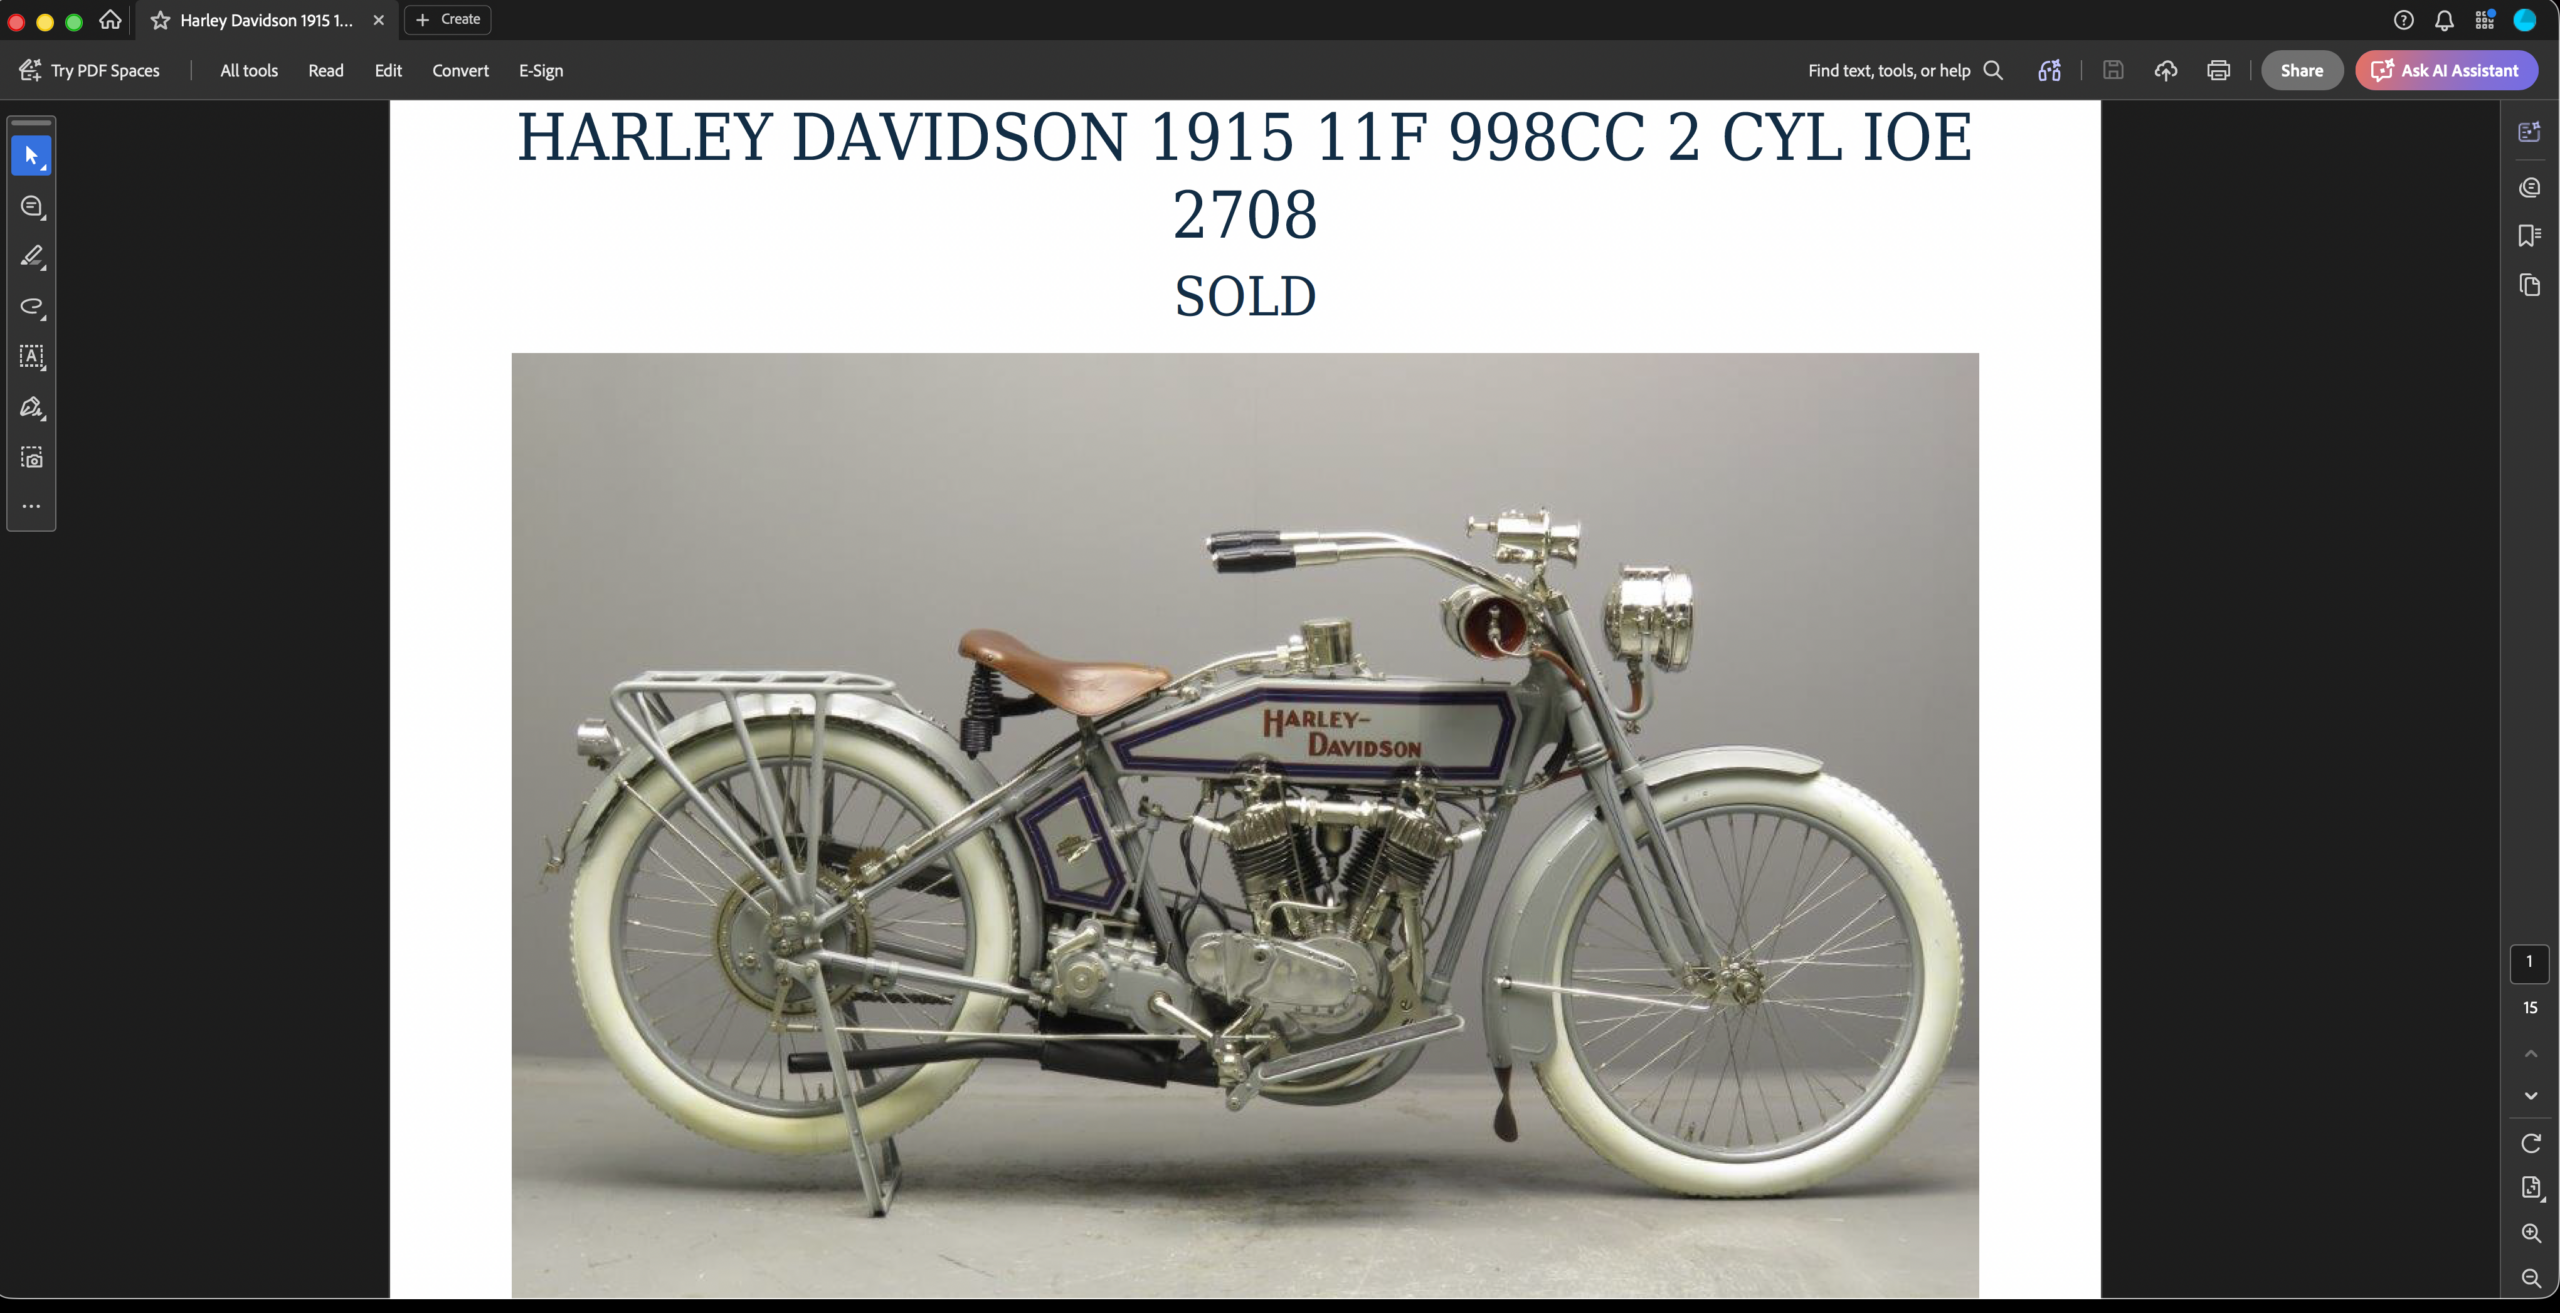
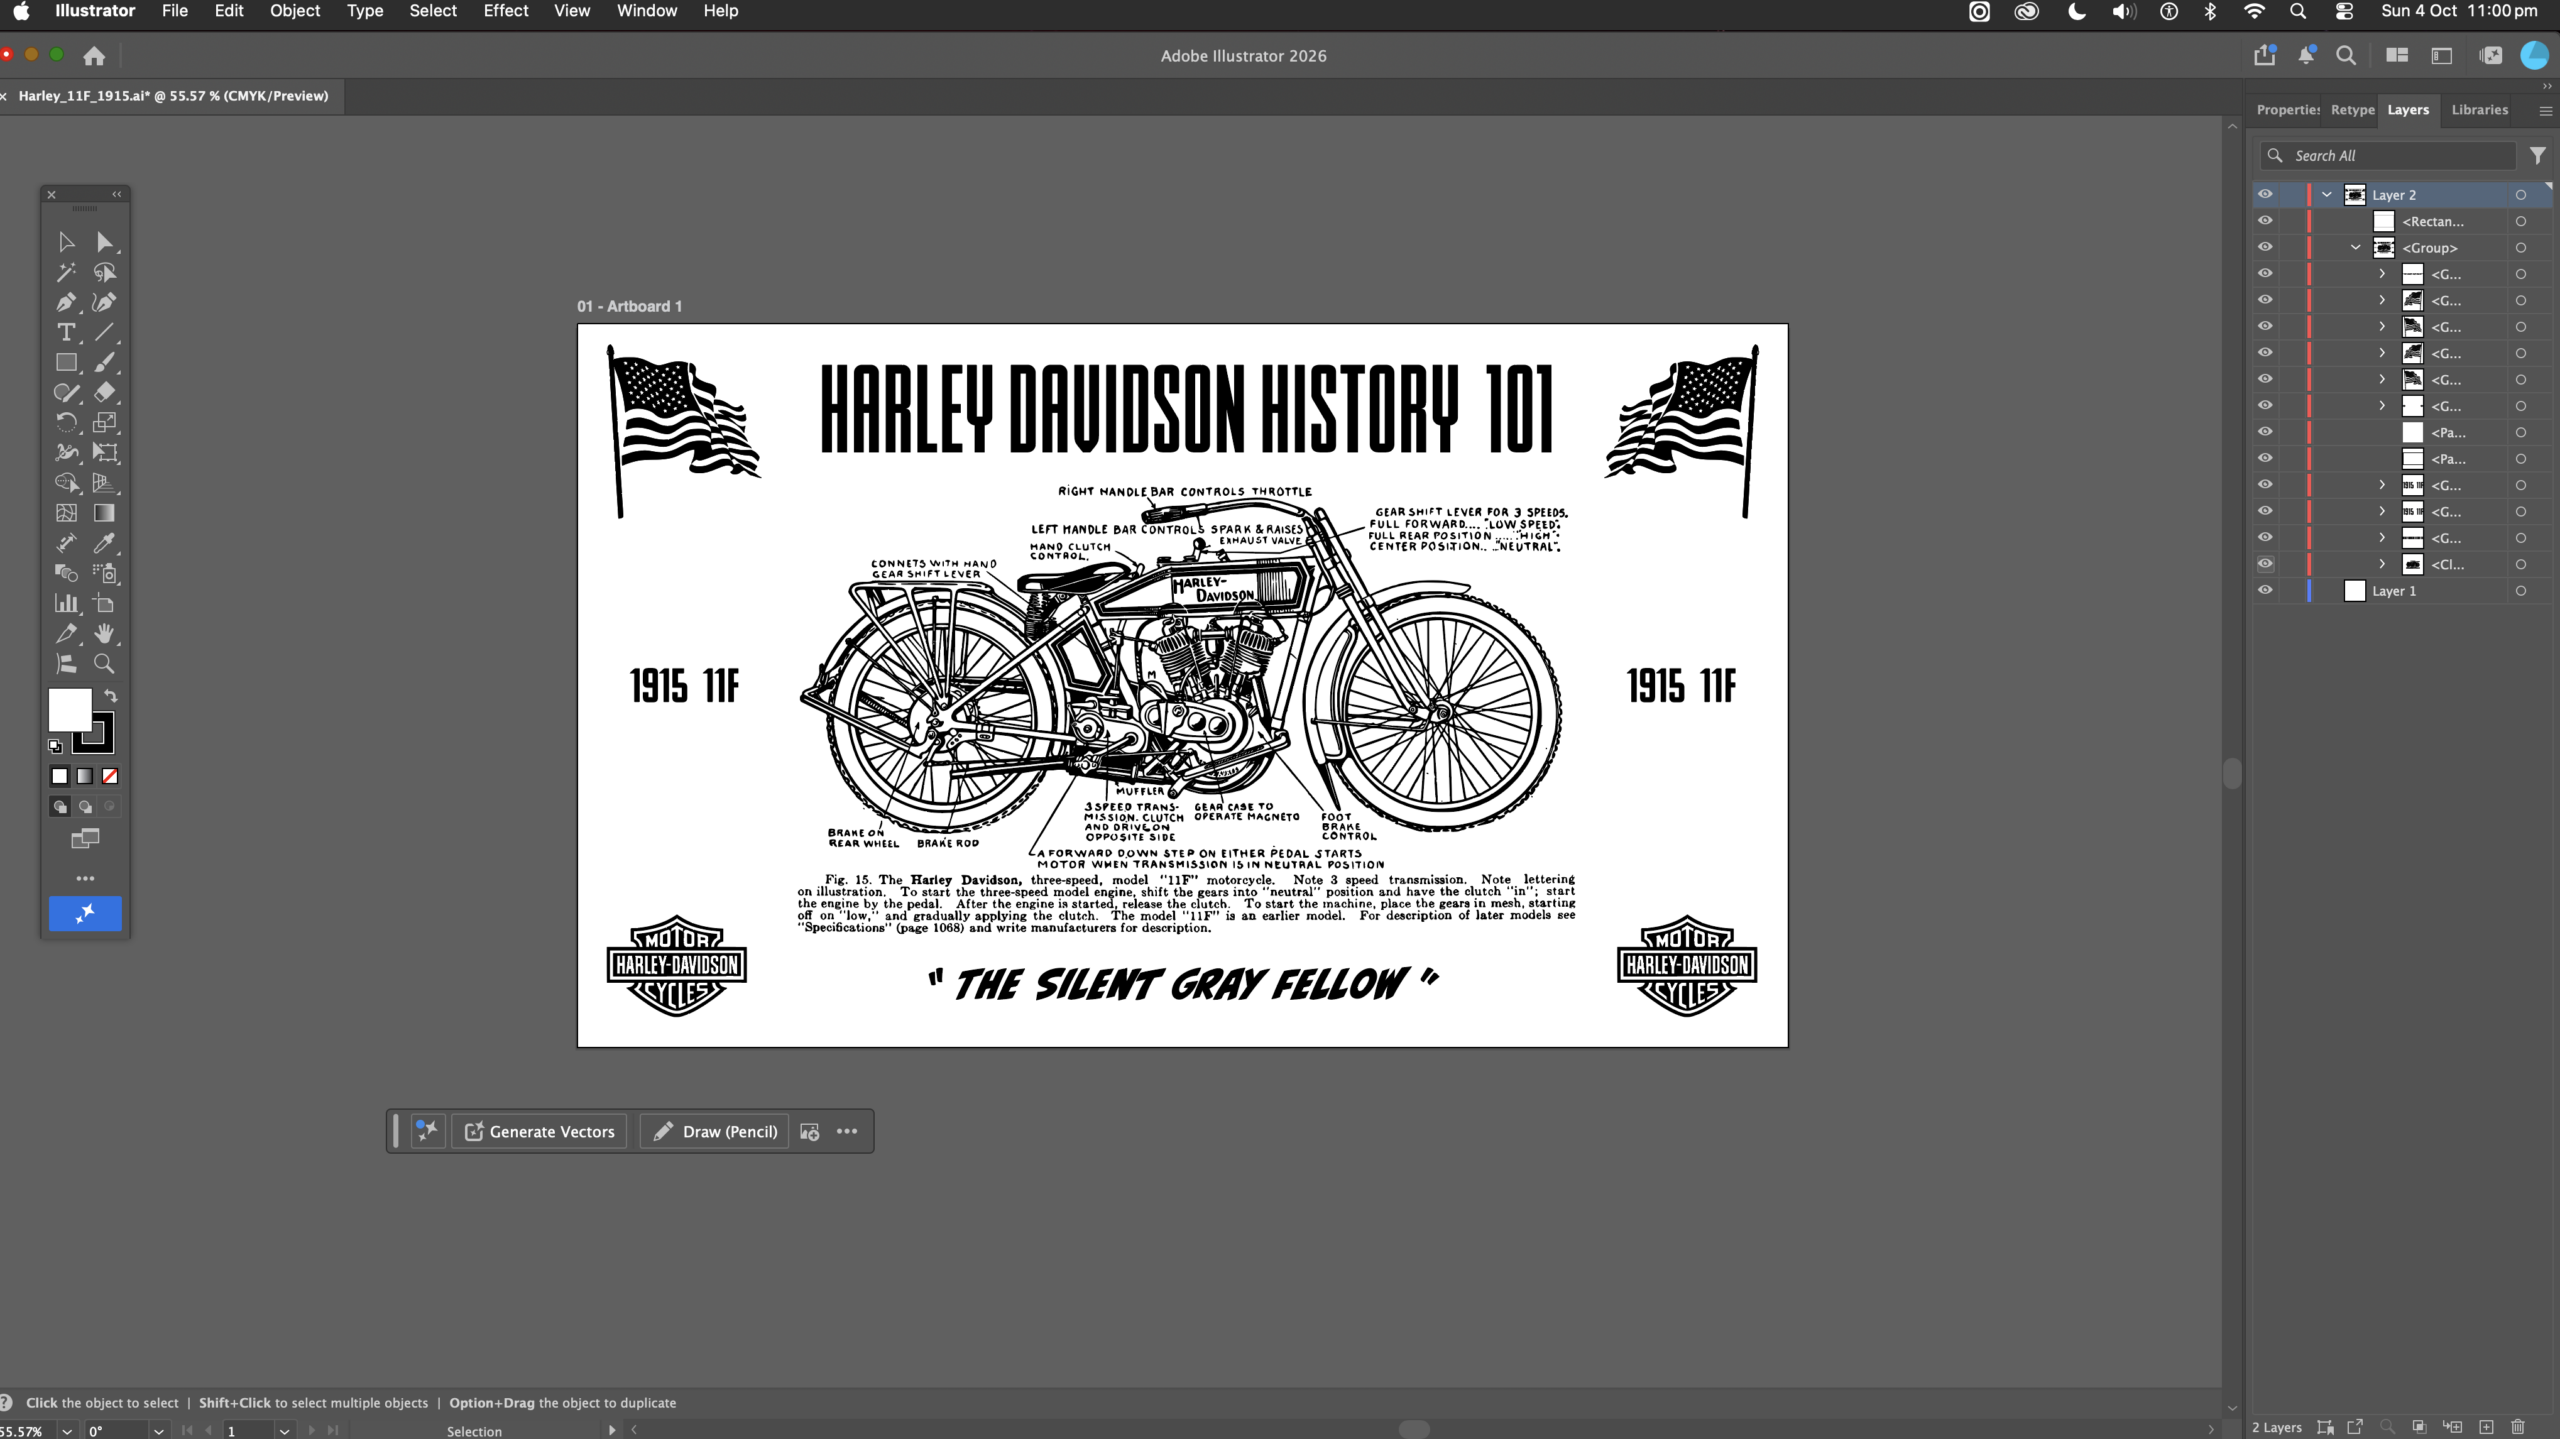
Historical reference material was used to reconstruct the motorcycle and surrounding technical detail as vector artwork, creating a clean production-ready design while retaining the character of the original source.
Click to enlarge
1915 HARLEY-DAVIDSON 11F / HISTORICAL REFERENCE
Click to enlarge
VECTOR ARTWORK / ADOBE ILLUSTRATOR
PRODUCTION
From artwork to machine-ready file.
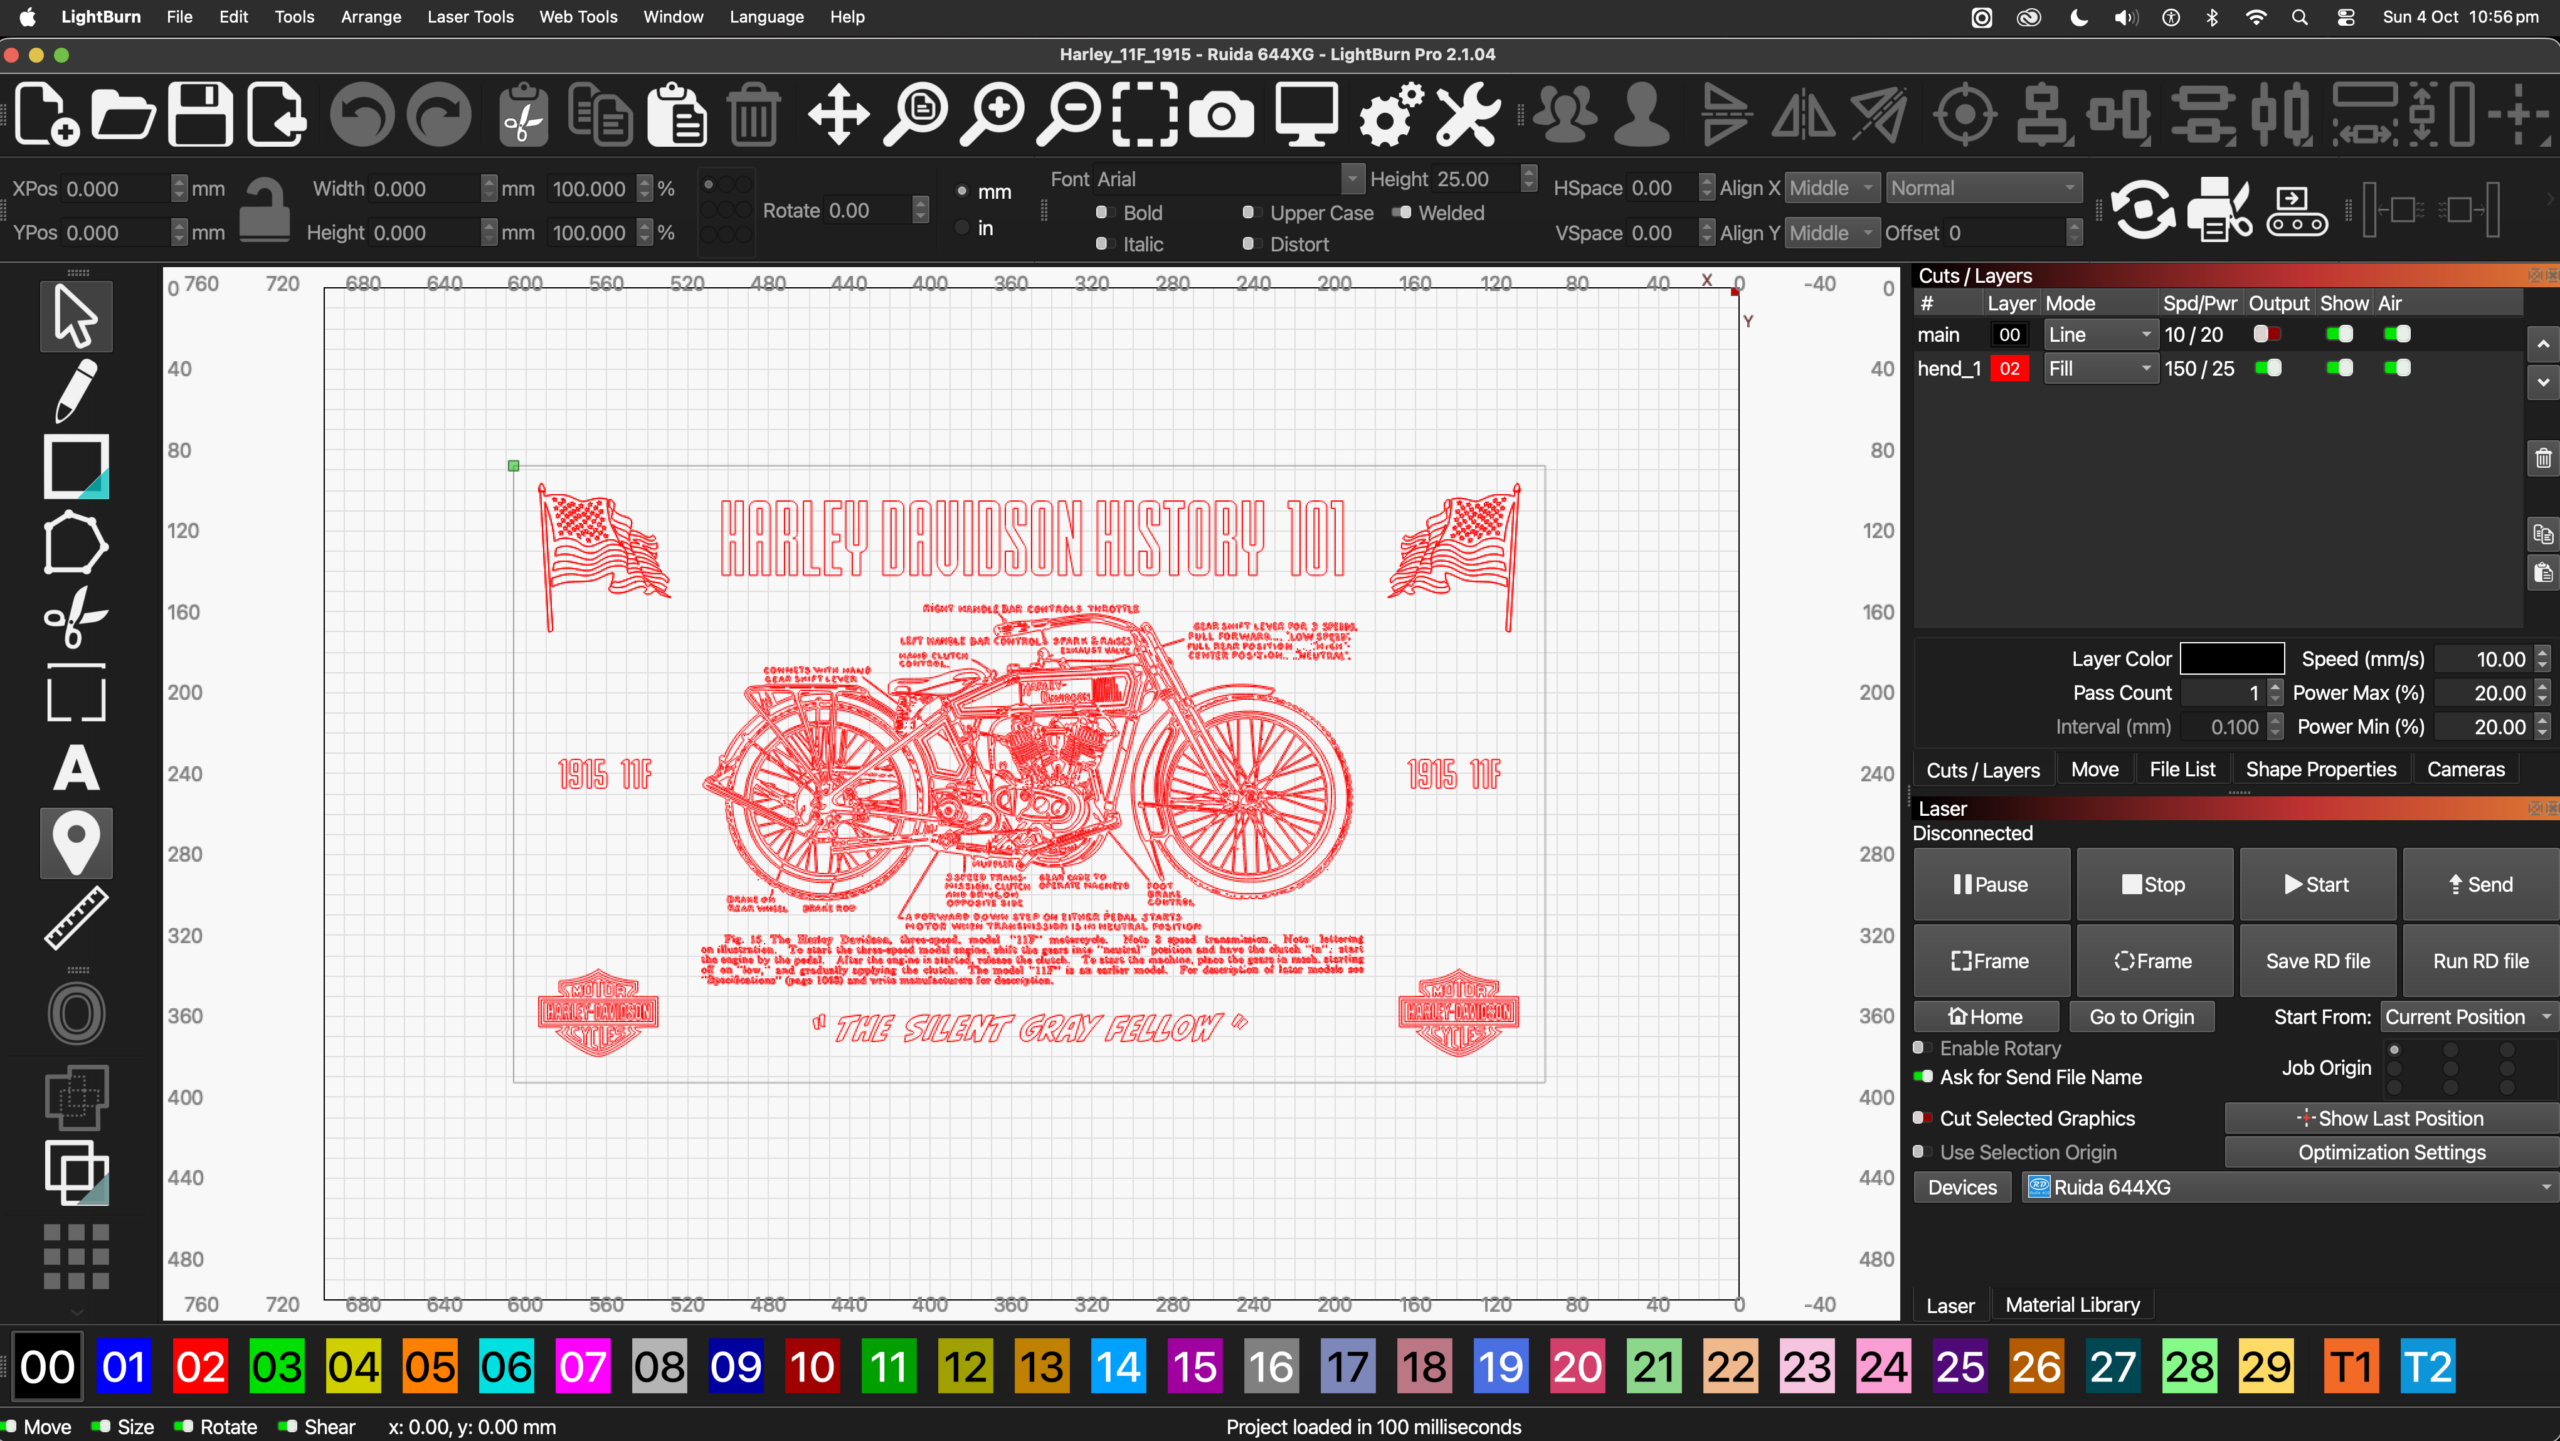
The completed vector artwork was transferred into LightBurn and prepared for laser production, with the design converted into the line and fill operations required to manufacture the finished piece.
Click to enlarge
LASER PRODUCTION / LIGHTBURN
05 / MECHANICAL + TECHNICAL
Suzuki GSX-R750L
A first complete motorcycle rebuild — stripped to individual components and built back from the workshop manuals.
01 / STRIP
Take it apart.
The motorcycle was stripped progressively until the machine had been reduced to individual assemblies, fasteners and components.
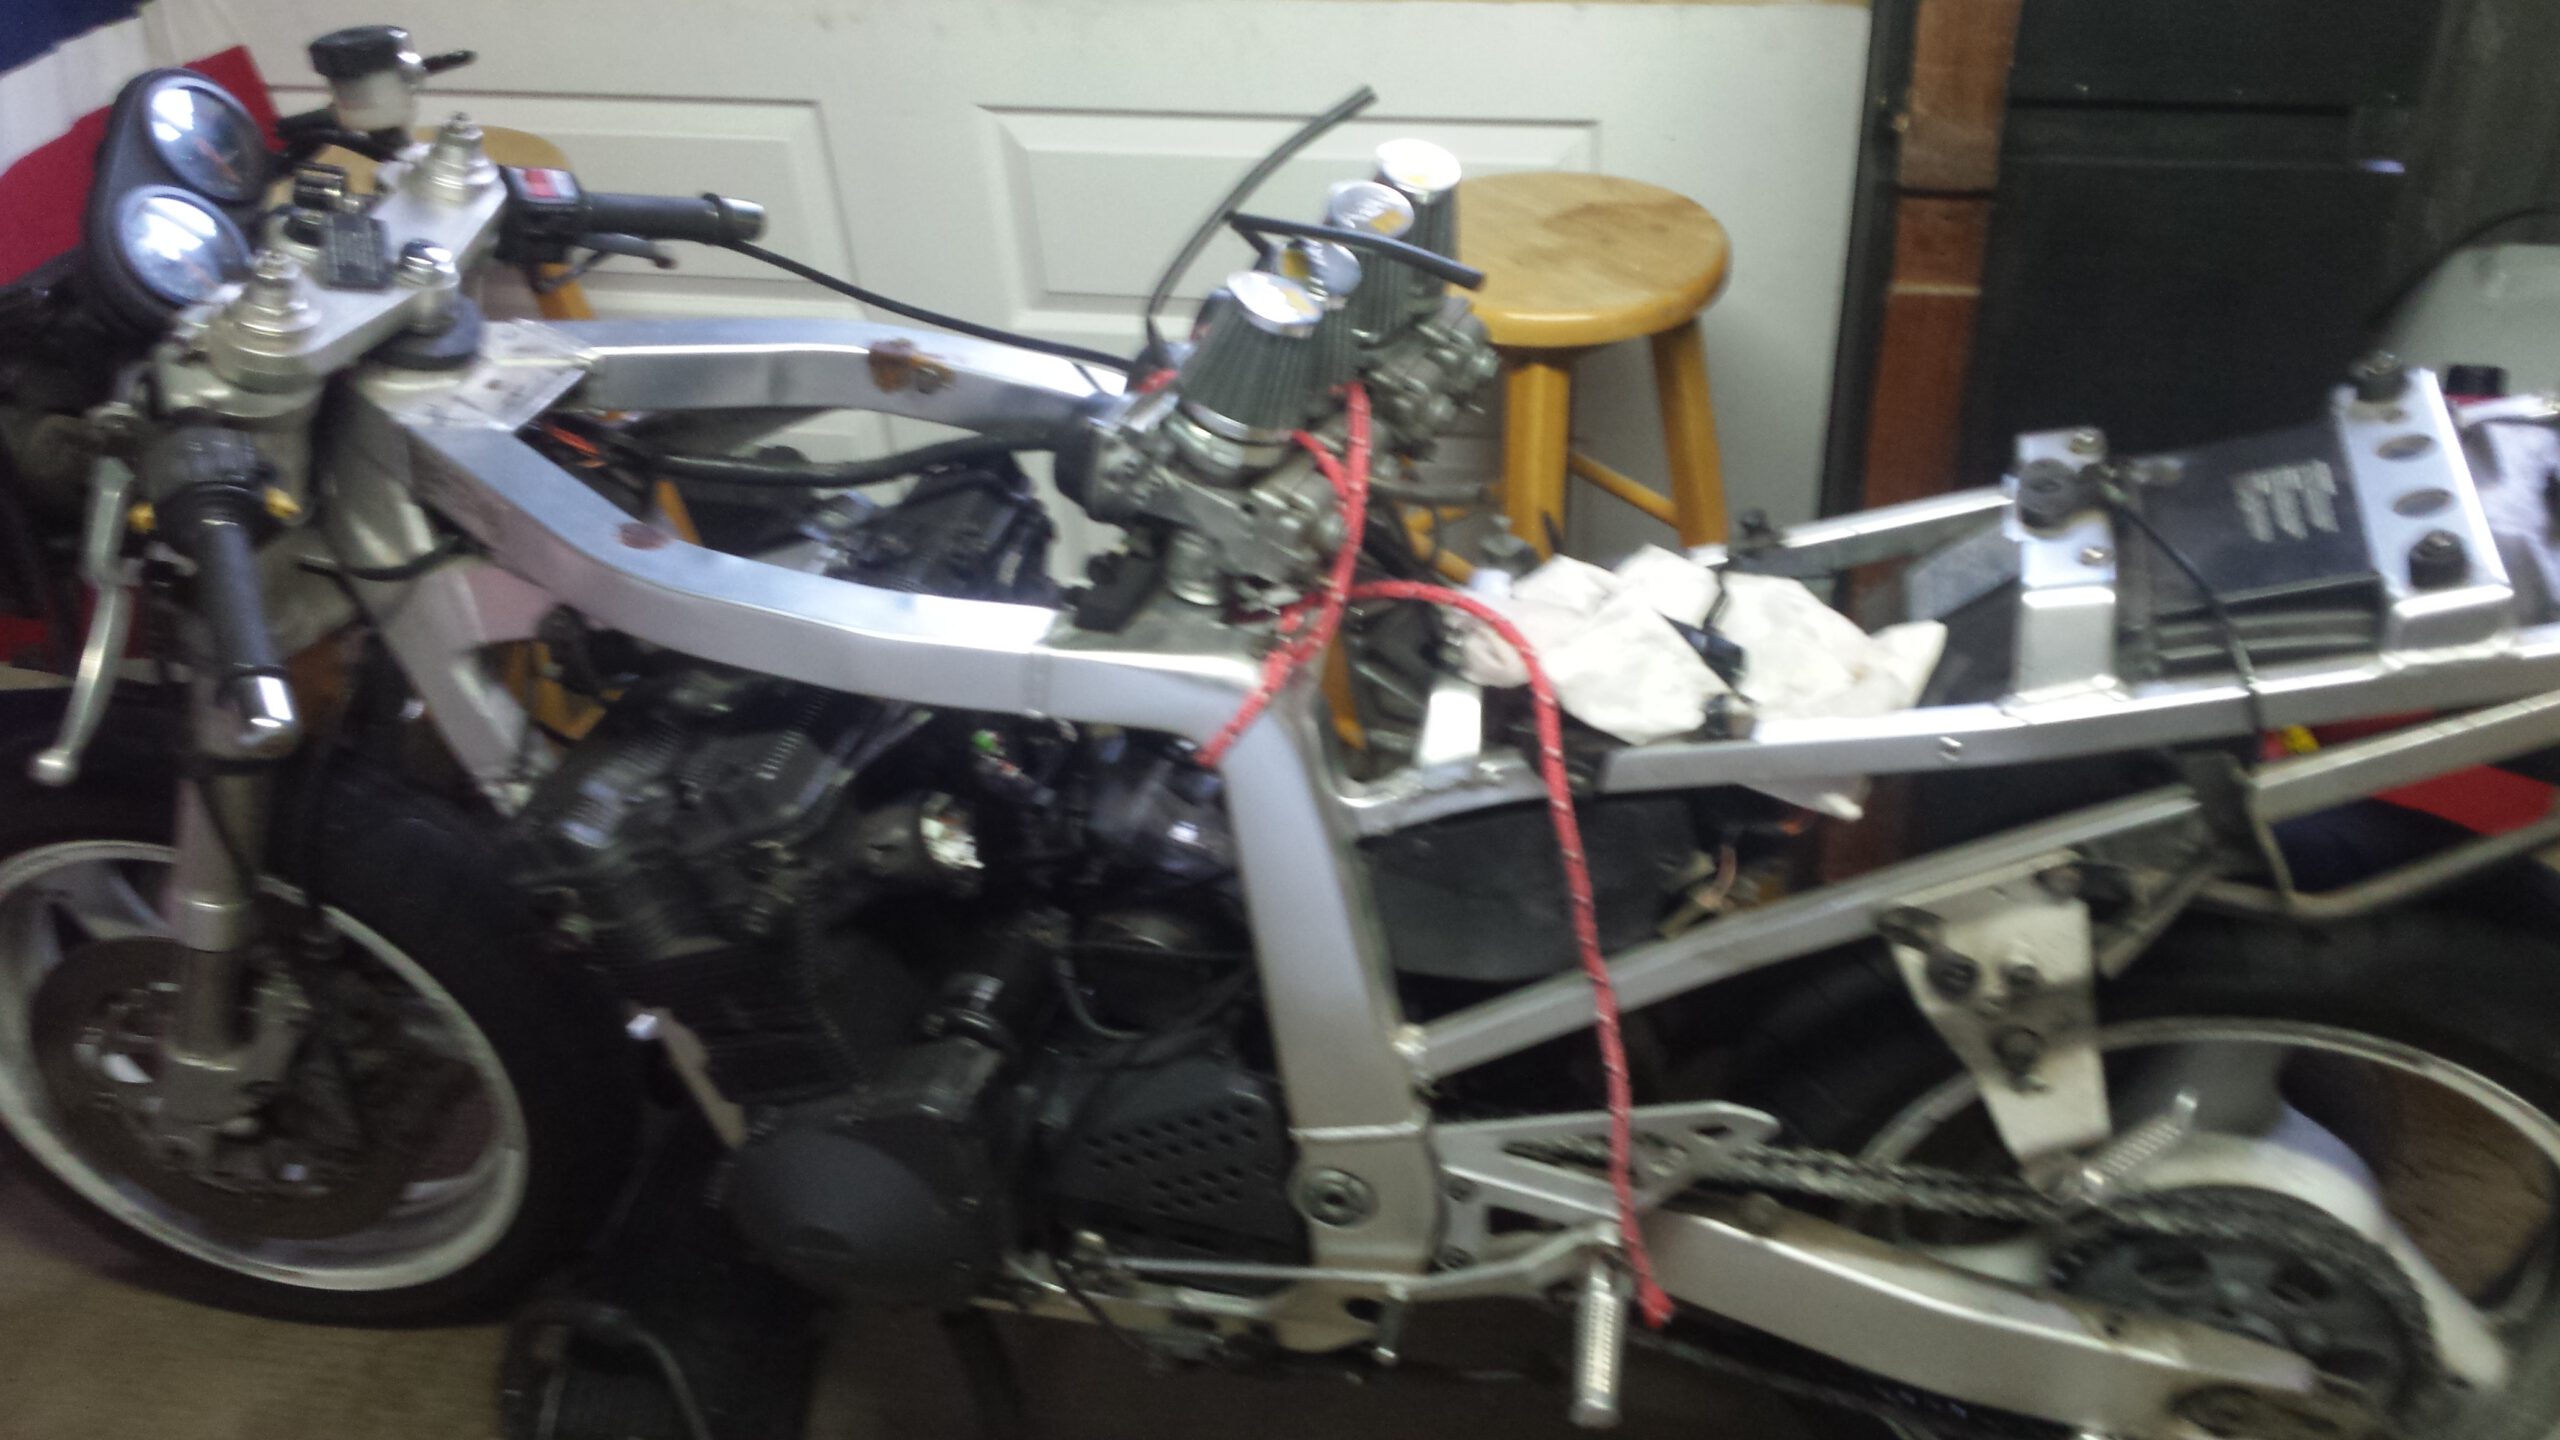
Click to enlarge
STRIP-DOWN / WORKSHOP RECORD
02 / WORK IT OUT
The manuals became the roadmap.
I had never undertaken a motorcycle rebuild on this scale. My dad happened to find the workshop manuals in a second-hand bookstore, and they became the reference for understanding, documenting and rebuilding the machine.
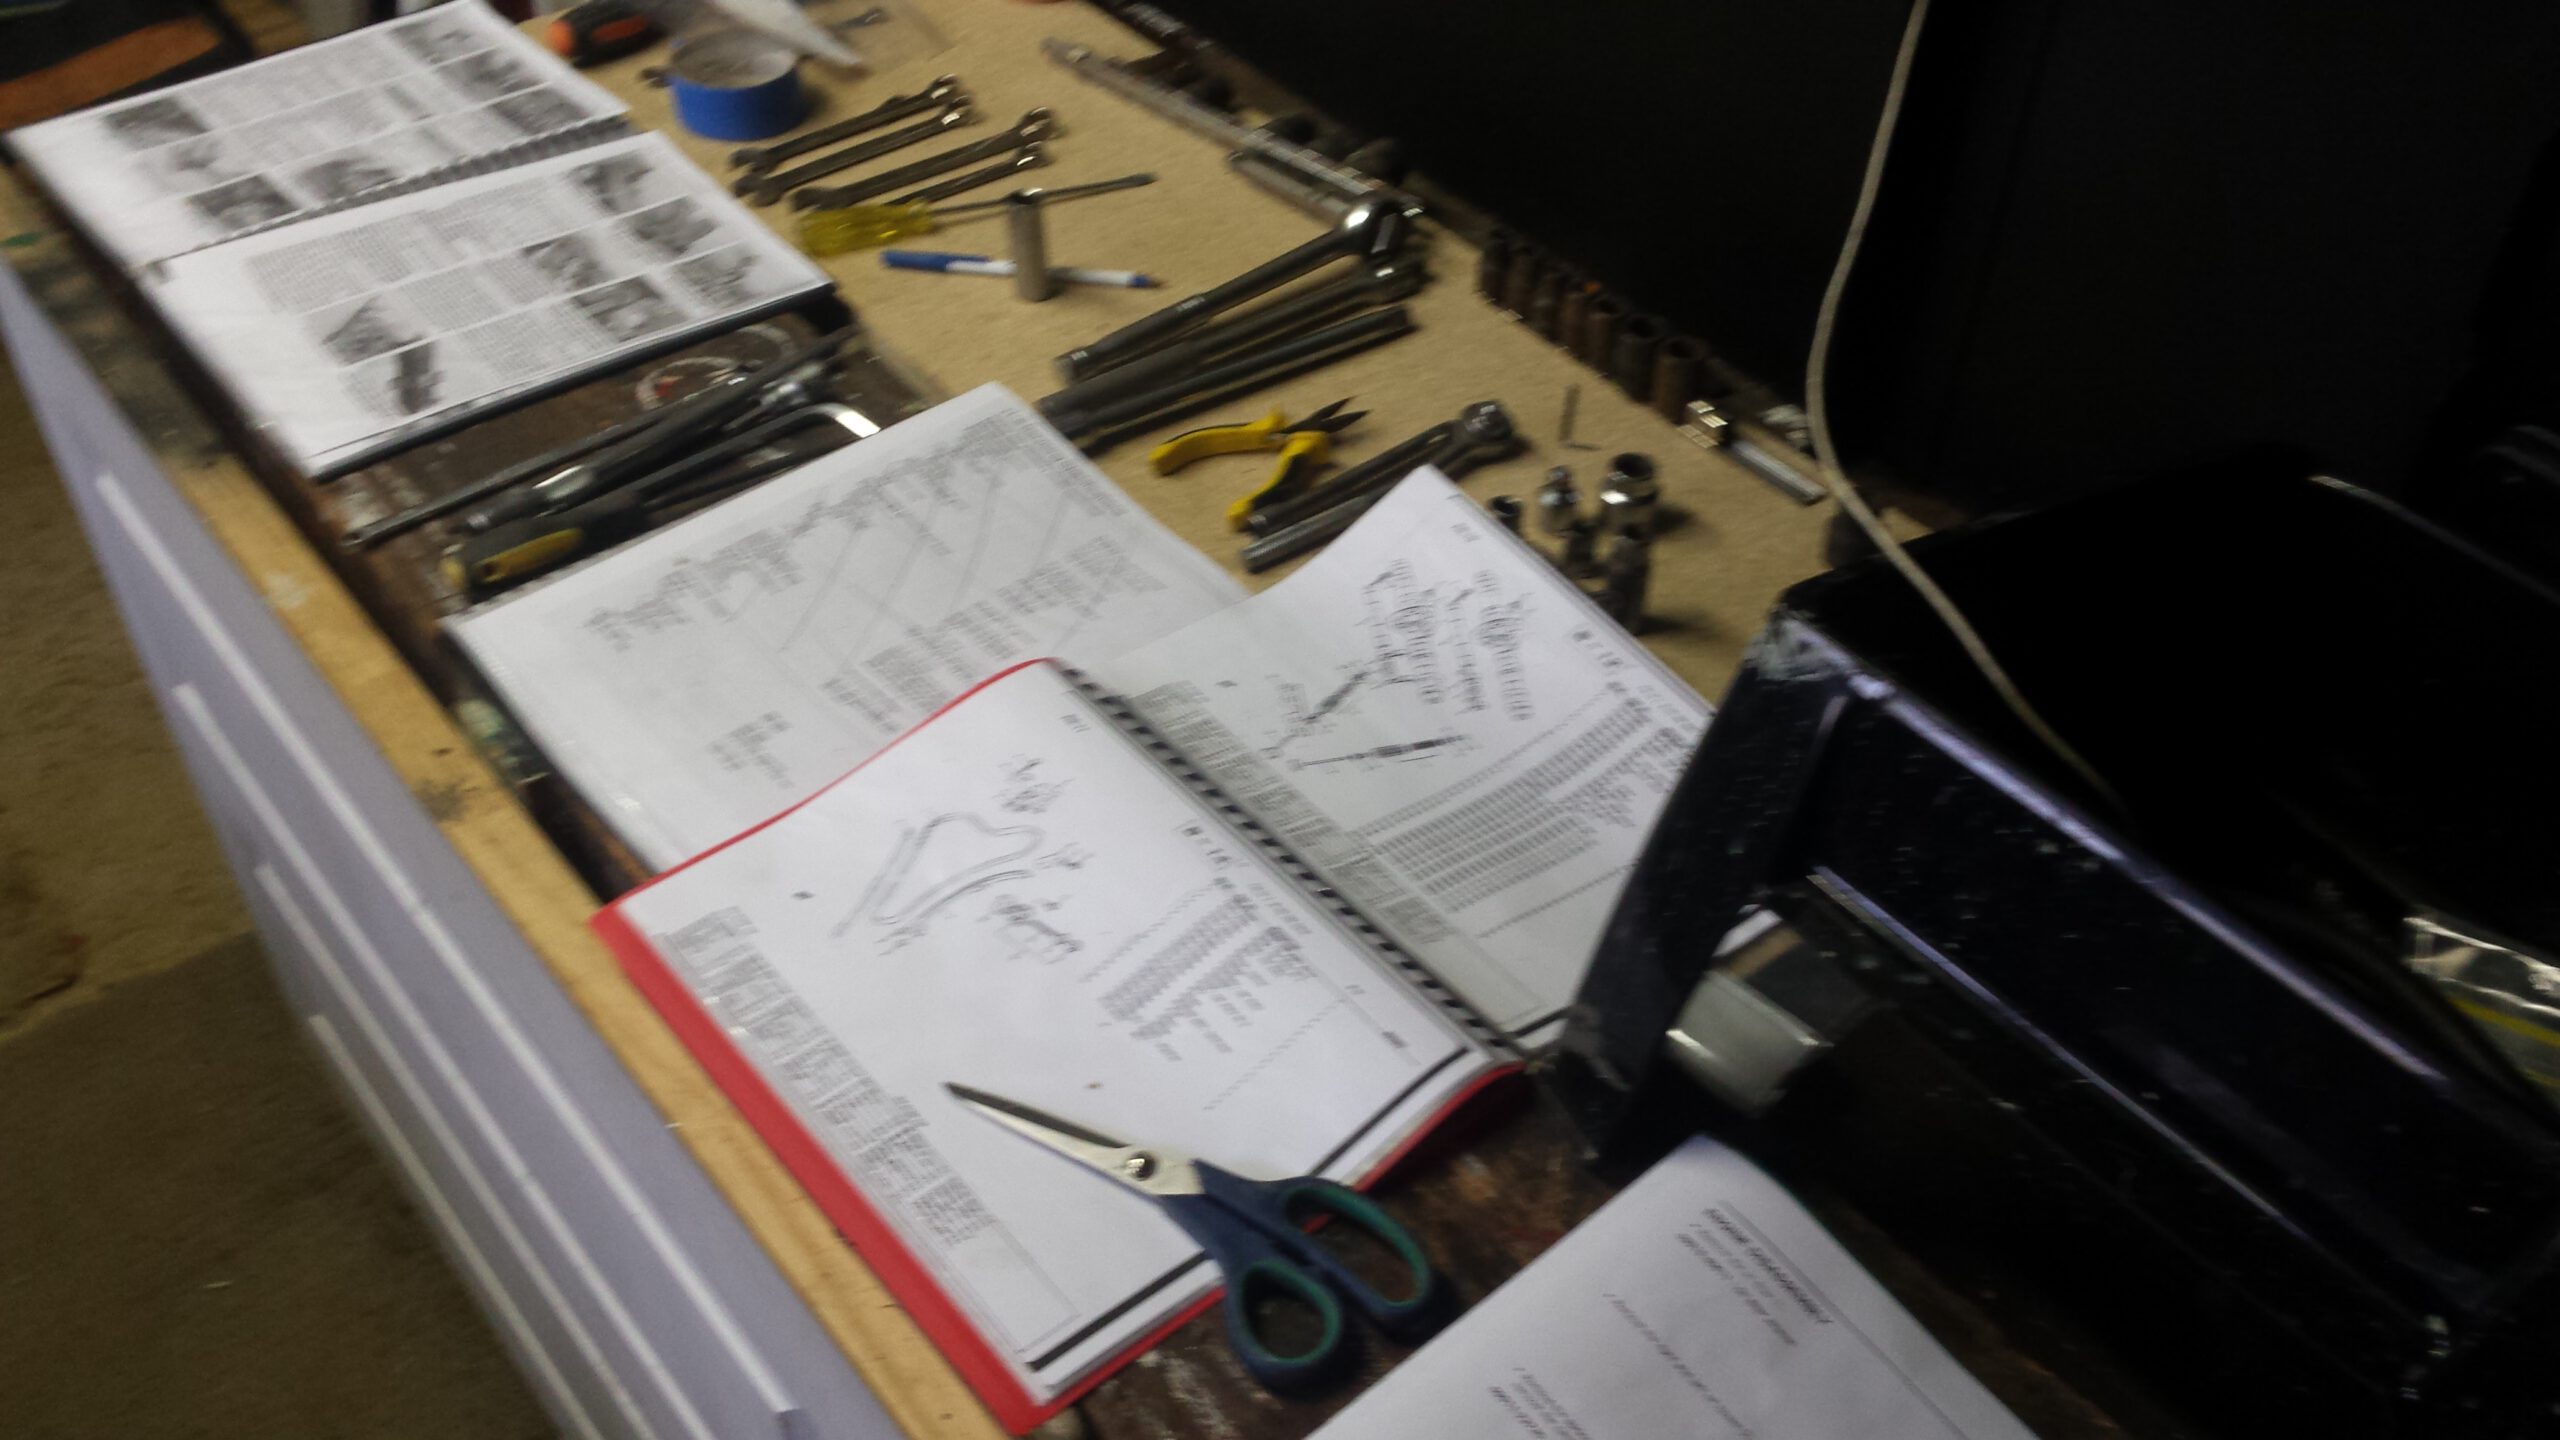
Click to enlarge
WORKSHOP MANUALS / EXPLODED DIAGRAMS / TOOLS
03 / INSIDE
Understand what you're looking at.
With the engine opened up, the workshop manuals provided the reference for identifying components, understanding their relationships and working methodically through disassembly and reassembly.
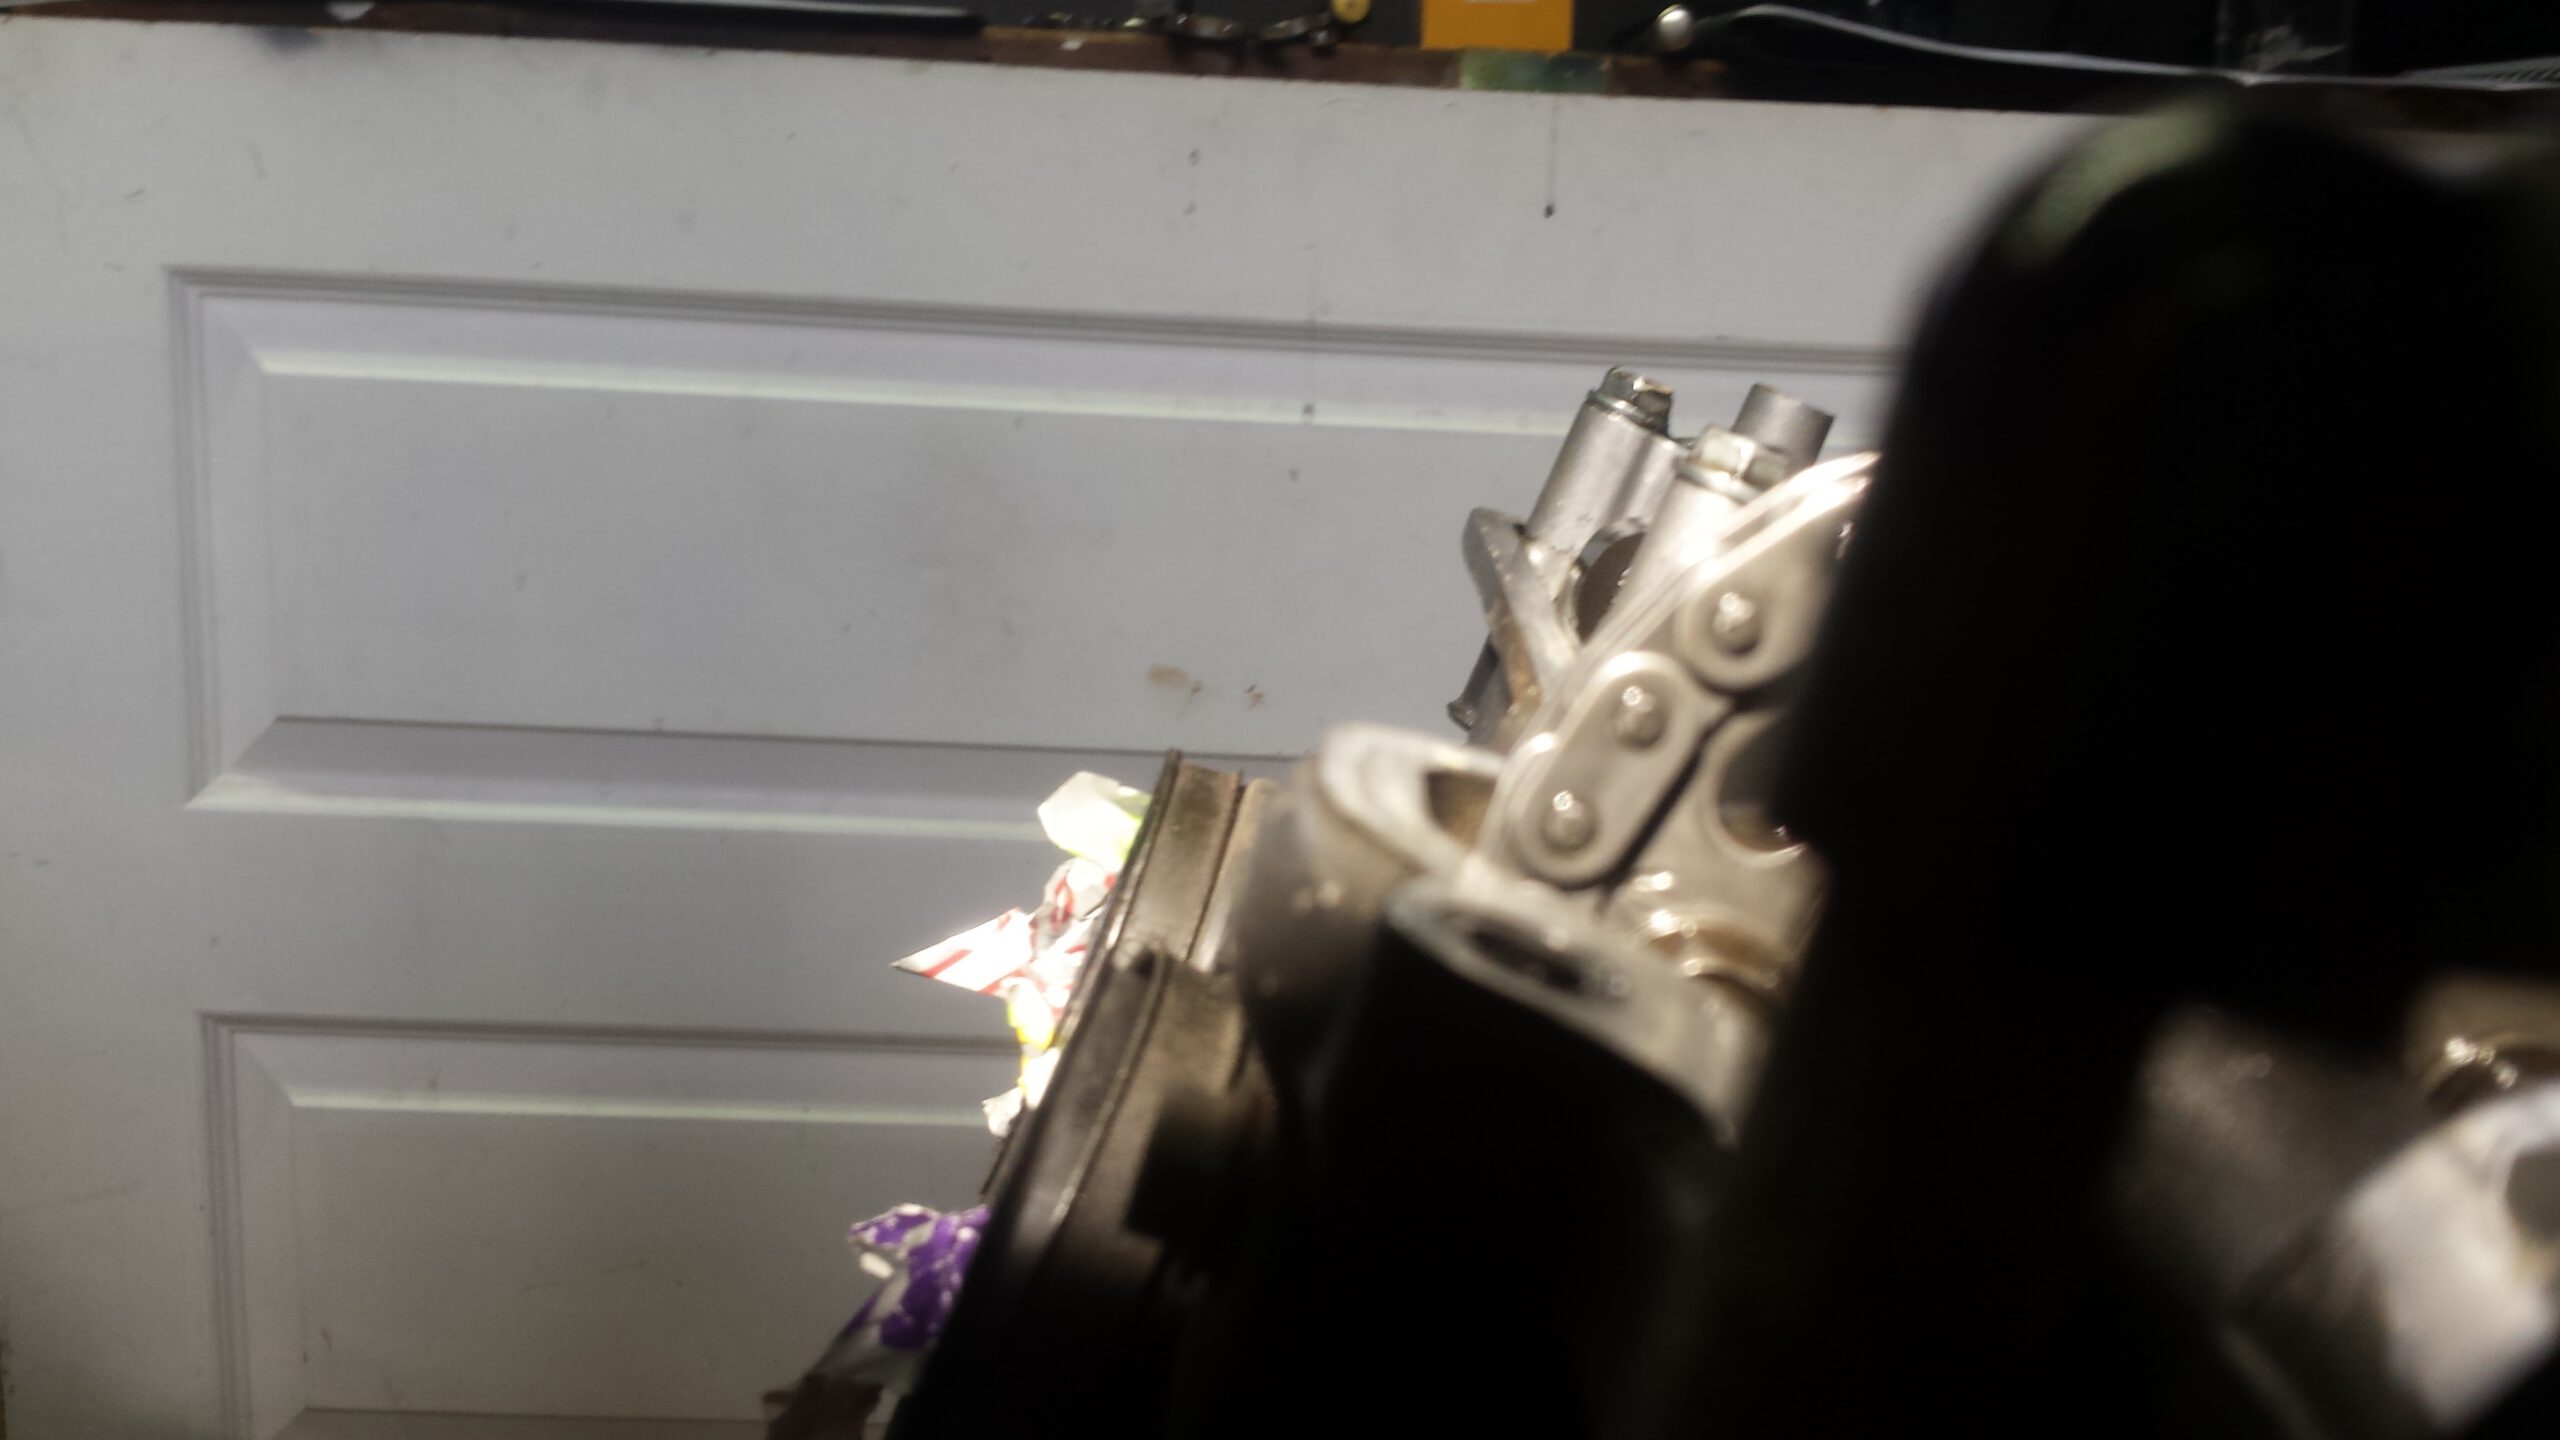
Click to enlarge
ENGINE OPEN / CAMS / TIMING / VALVE GEAR
04 / REASSEMBLY
Put it back together.
Reassembly reversed the process: components returned progressively to the frame as the motorcycle moved from individual parts back toward a complete machine.
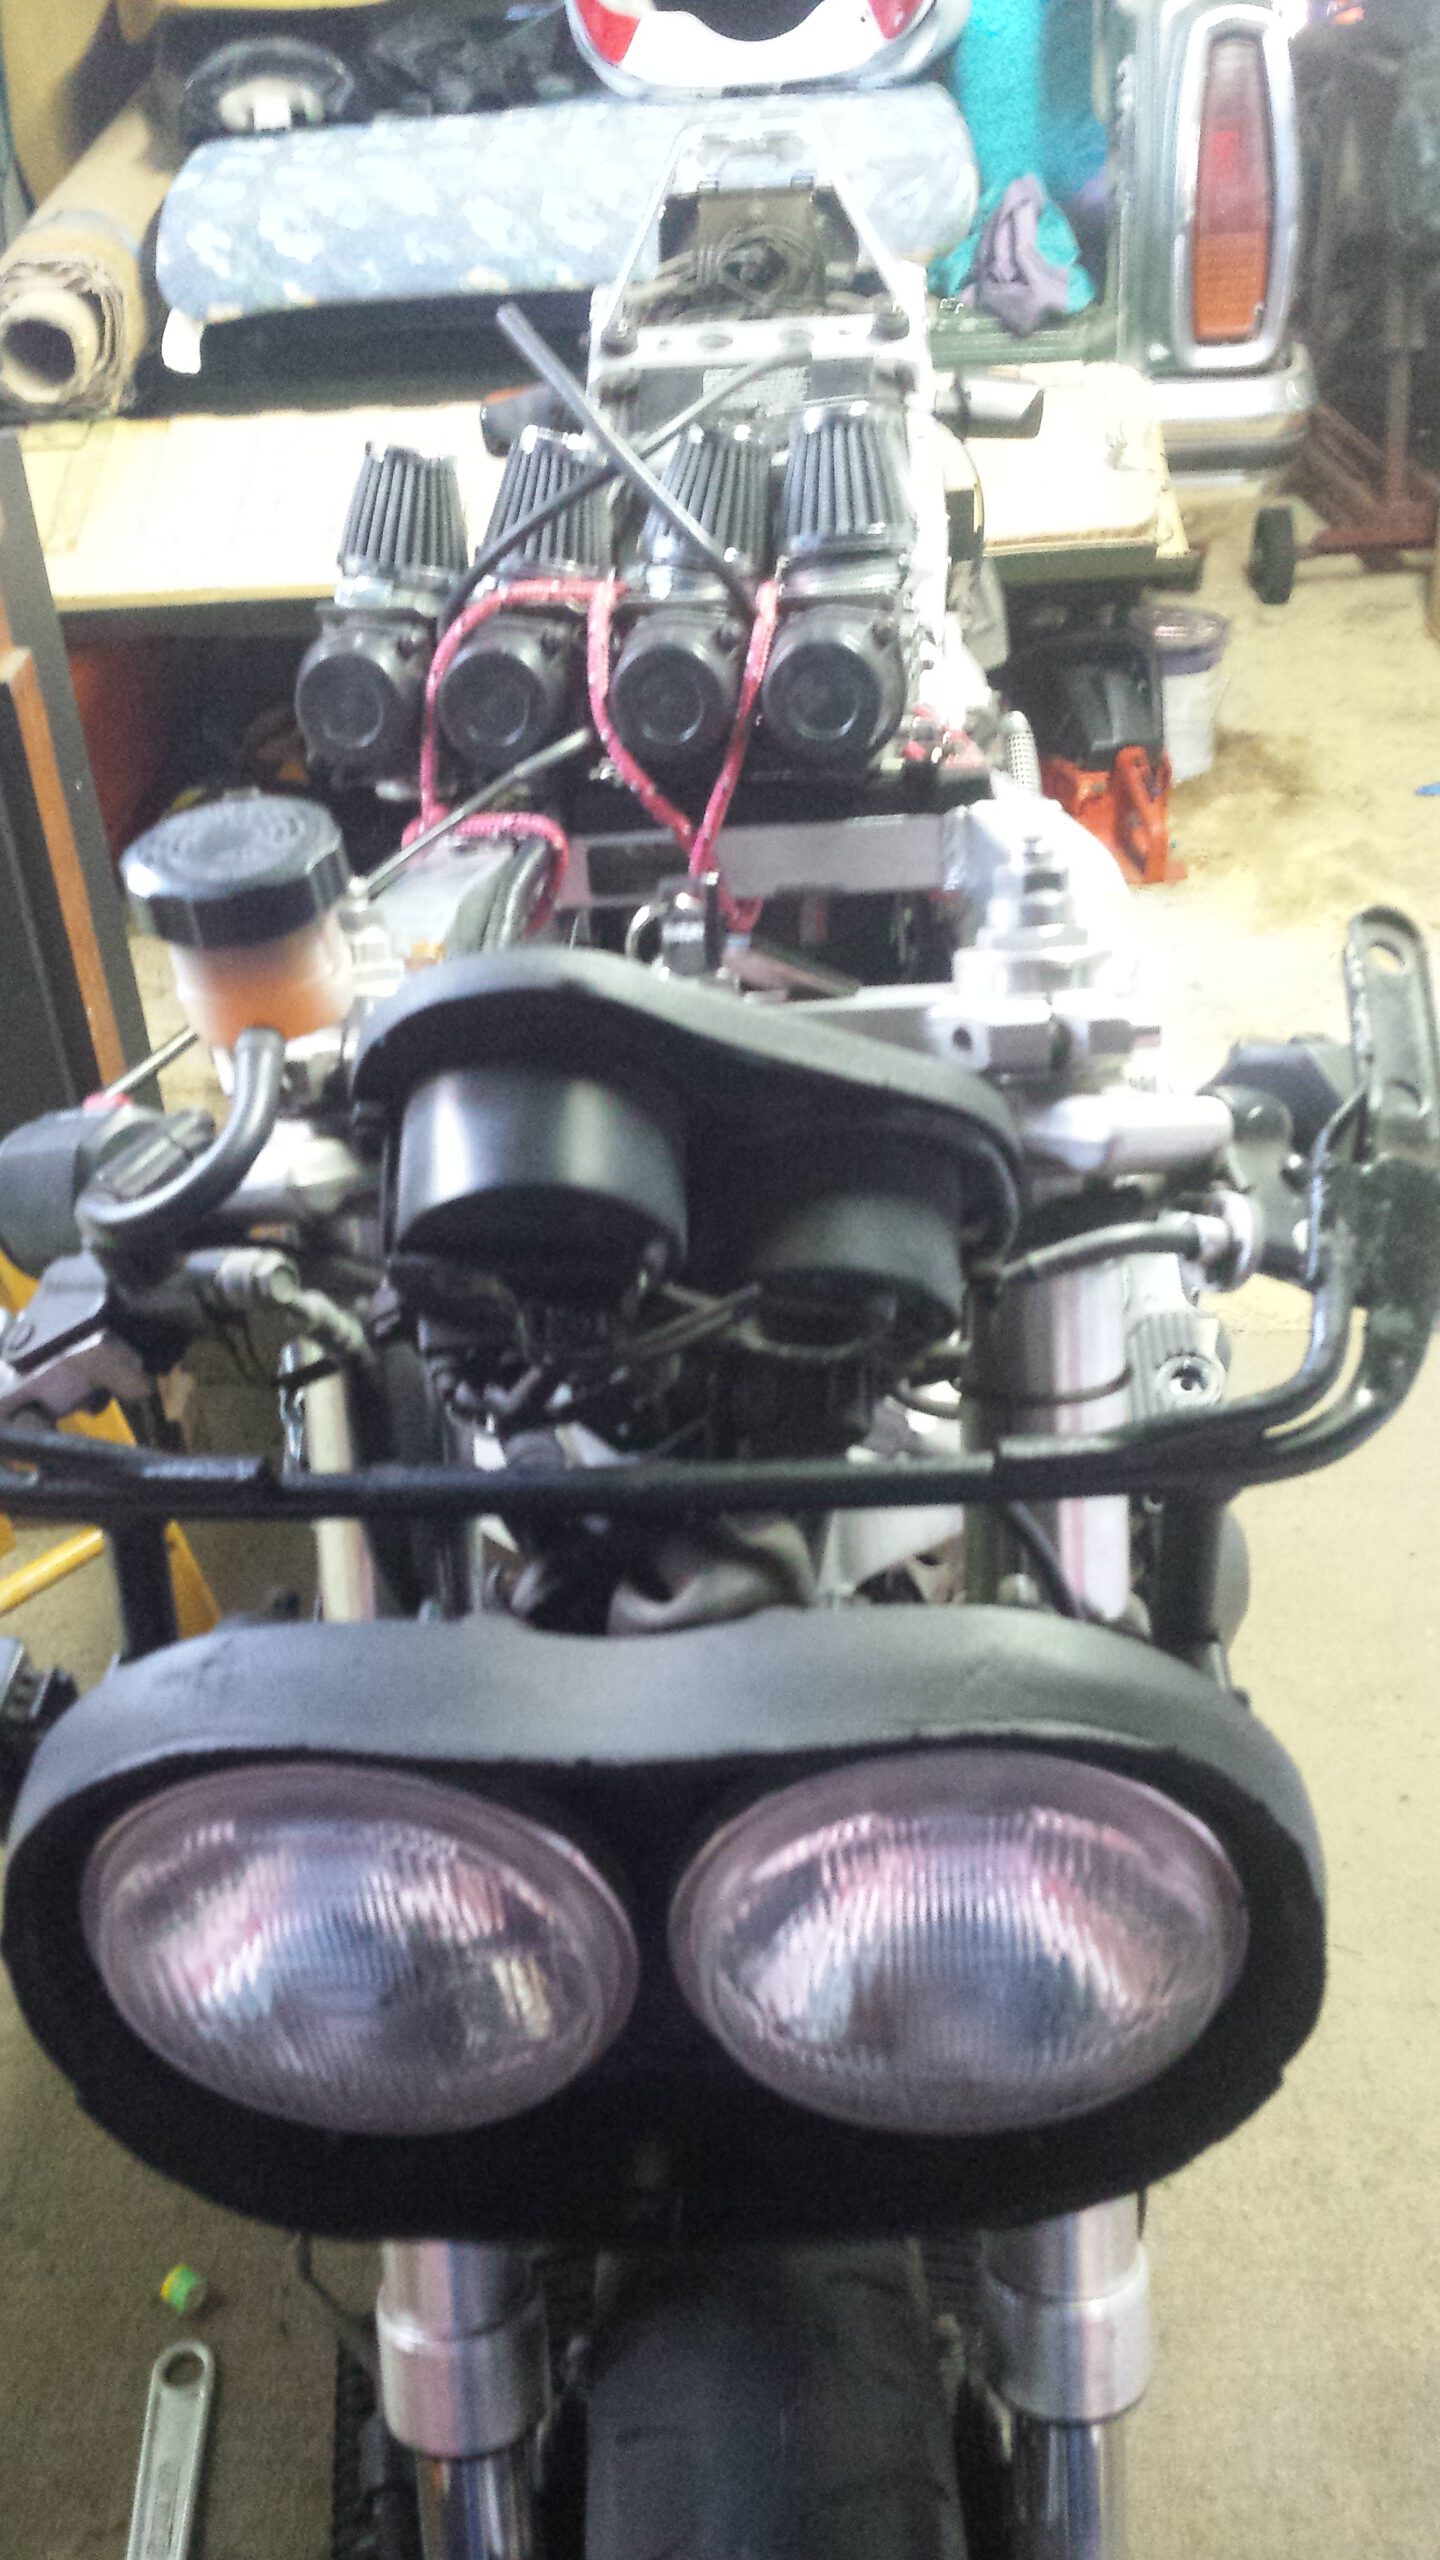
Click to enlarge
REASSEMBLY / WORKSHOP RECORD
05 / BACK TOGETHER
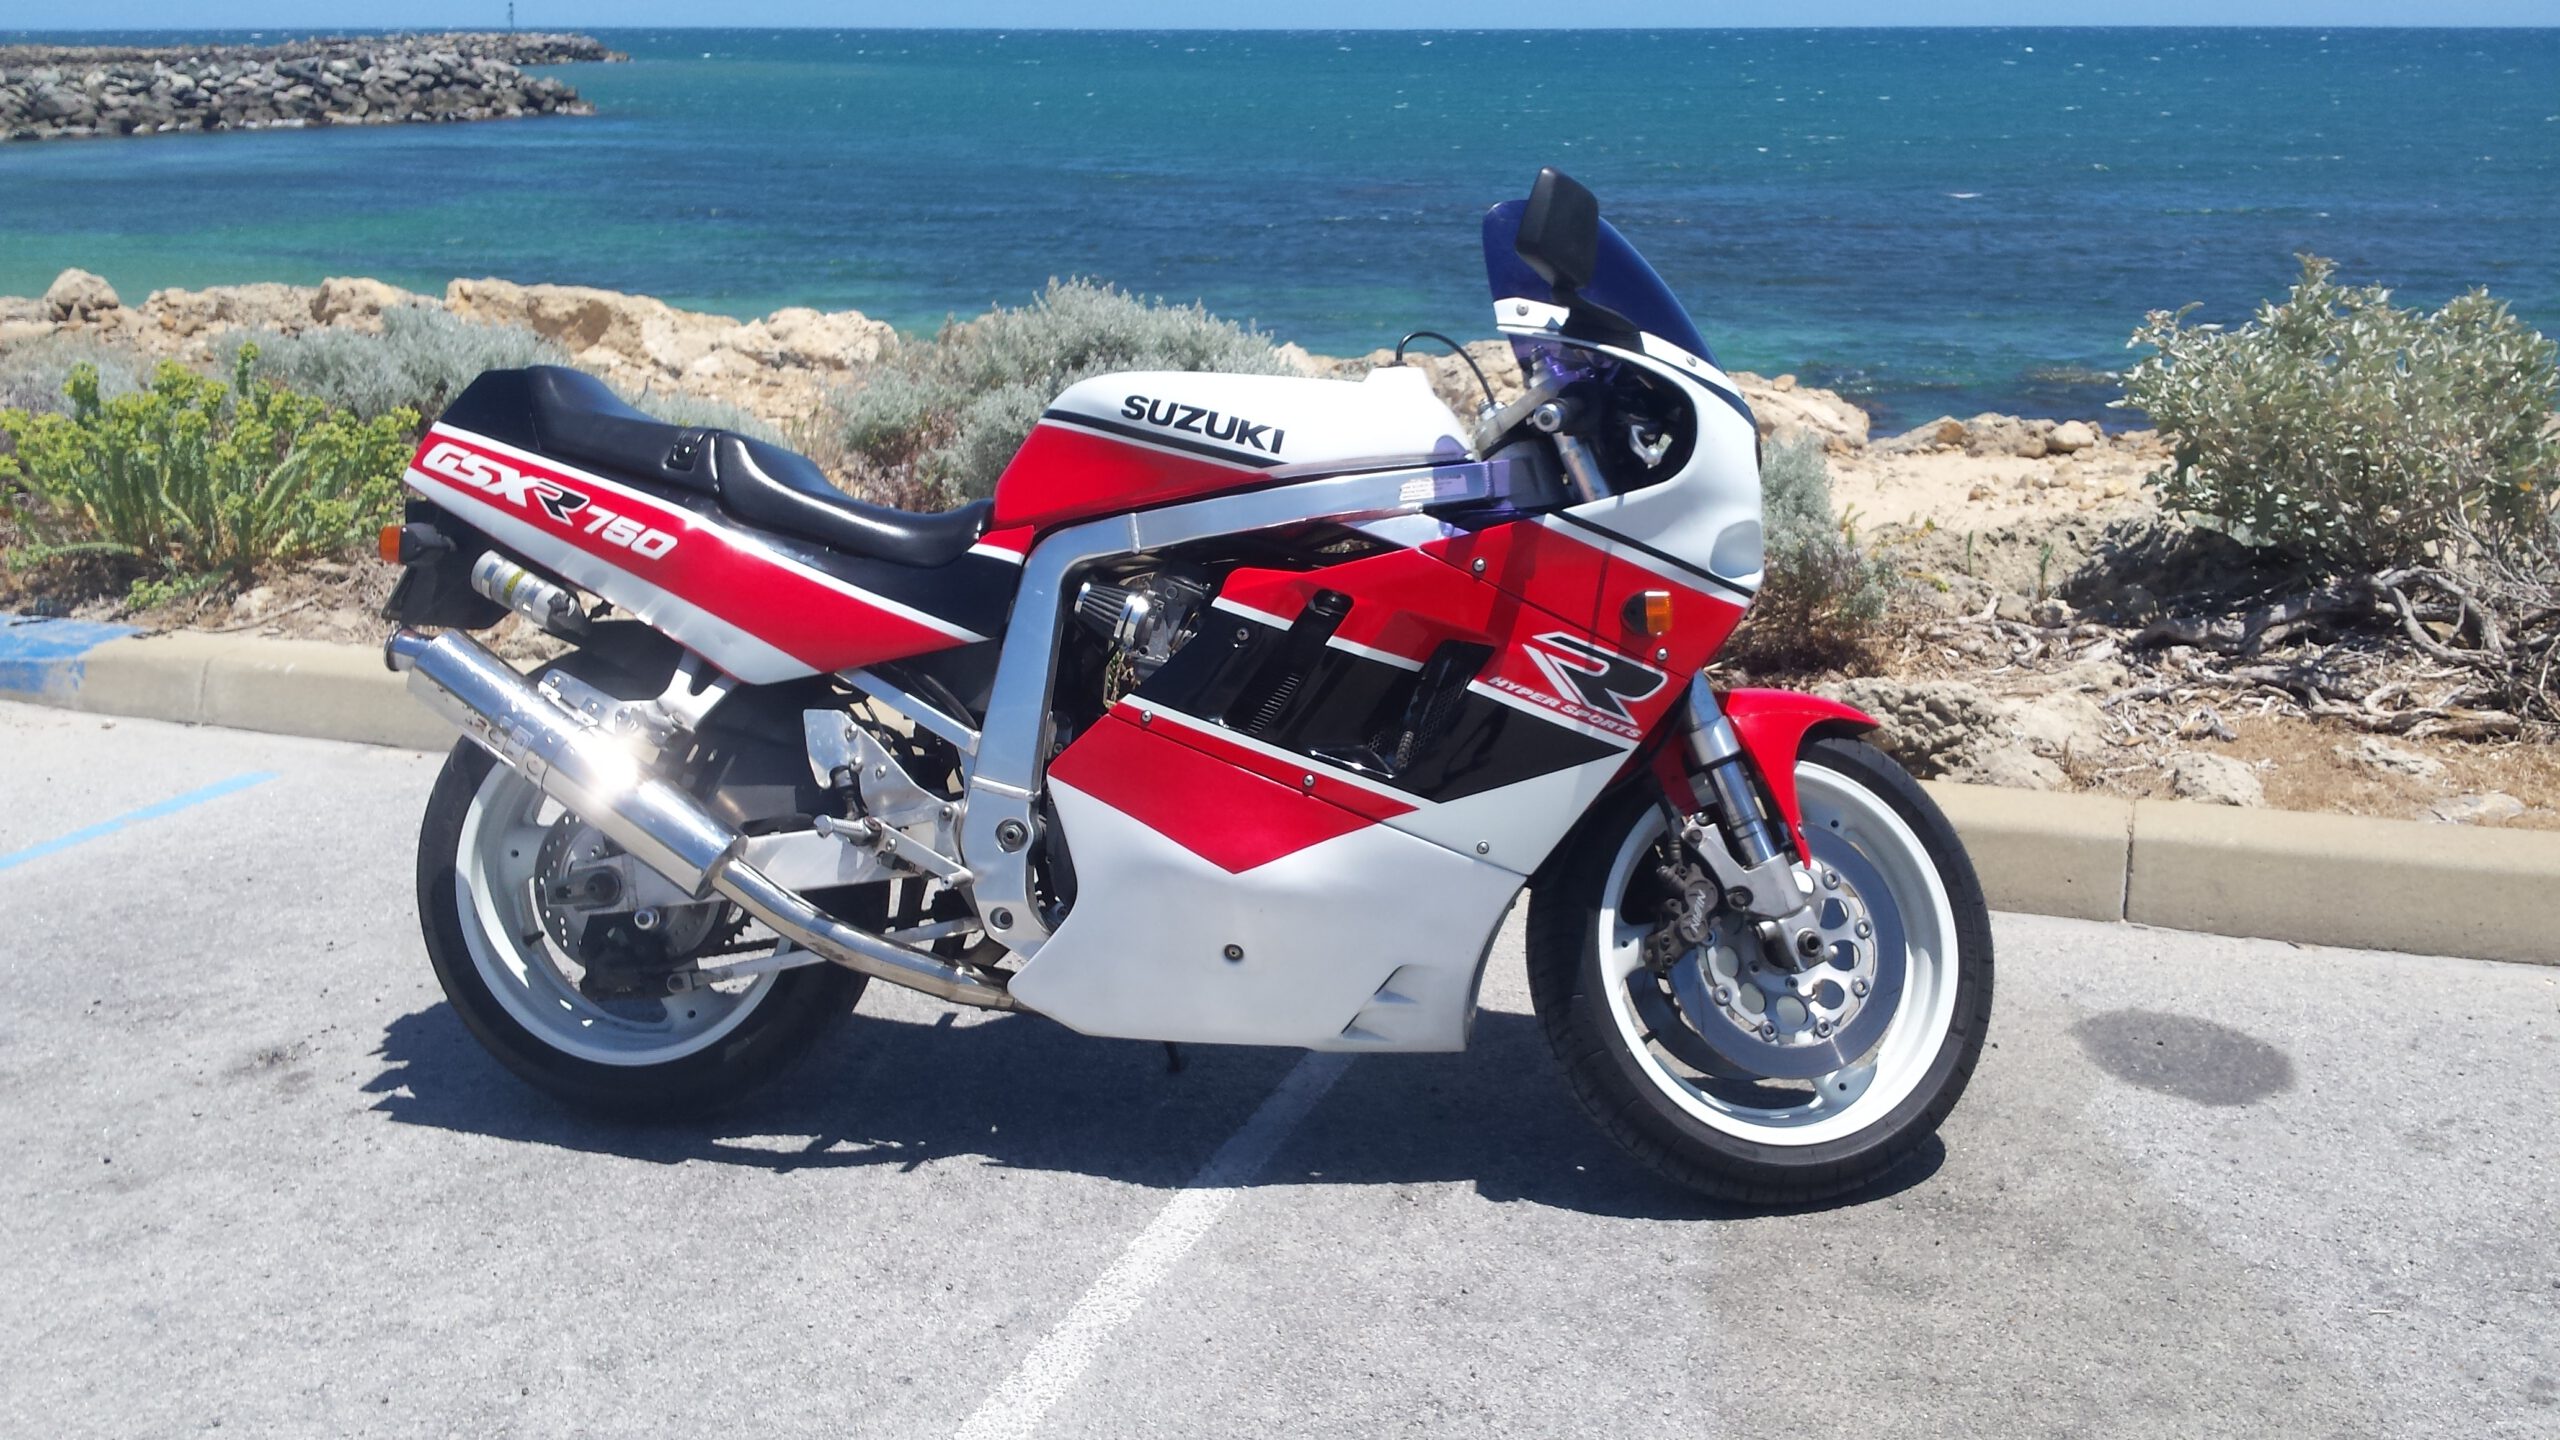
Back on the road.
What began as a first attempt at a complete motorcycle rebuild ended with the GSX-R back together, running and returned to the road.
Click to enlarge
COMPLETE / BACK ON THE ROAD
06 / DIGITAL + EMERGING
Building This Portfolio
Designing the site while developing a new way of working with AI, Elementor and MCP.
INTERFACE
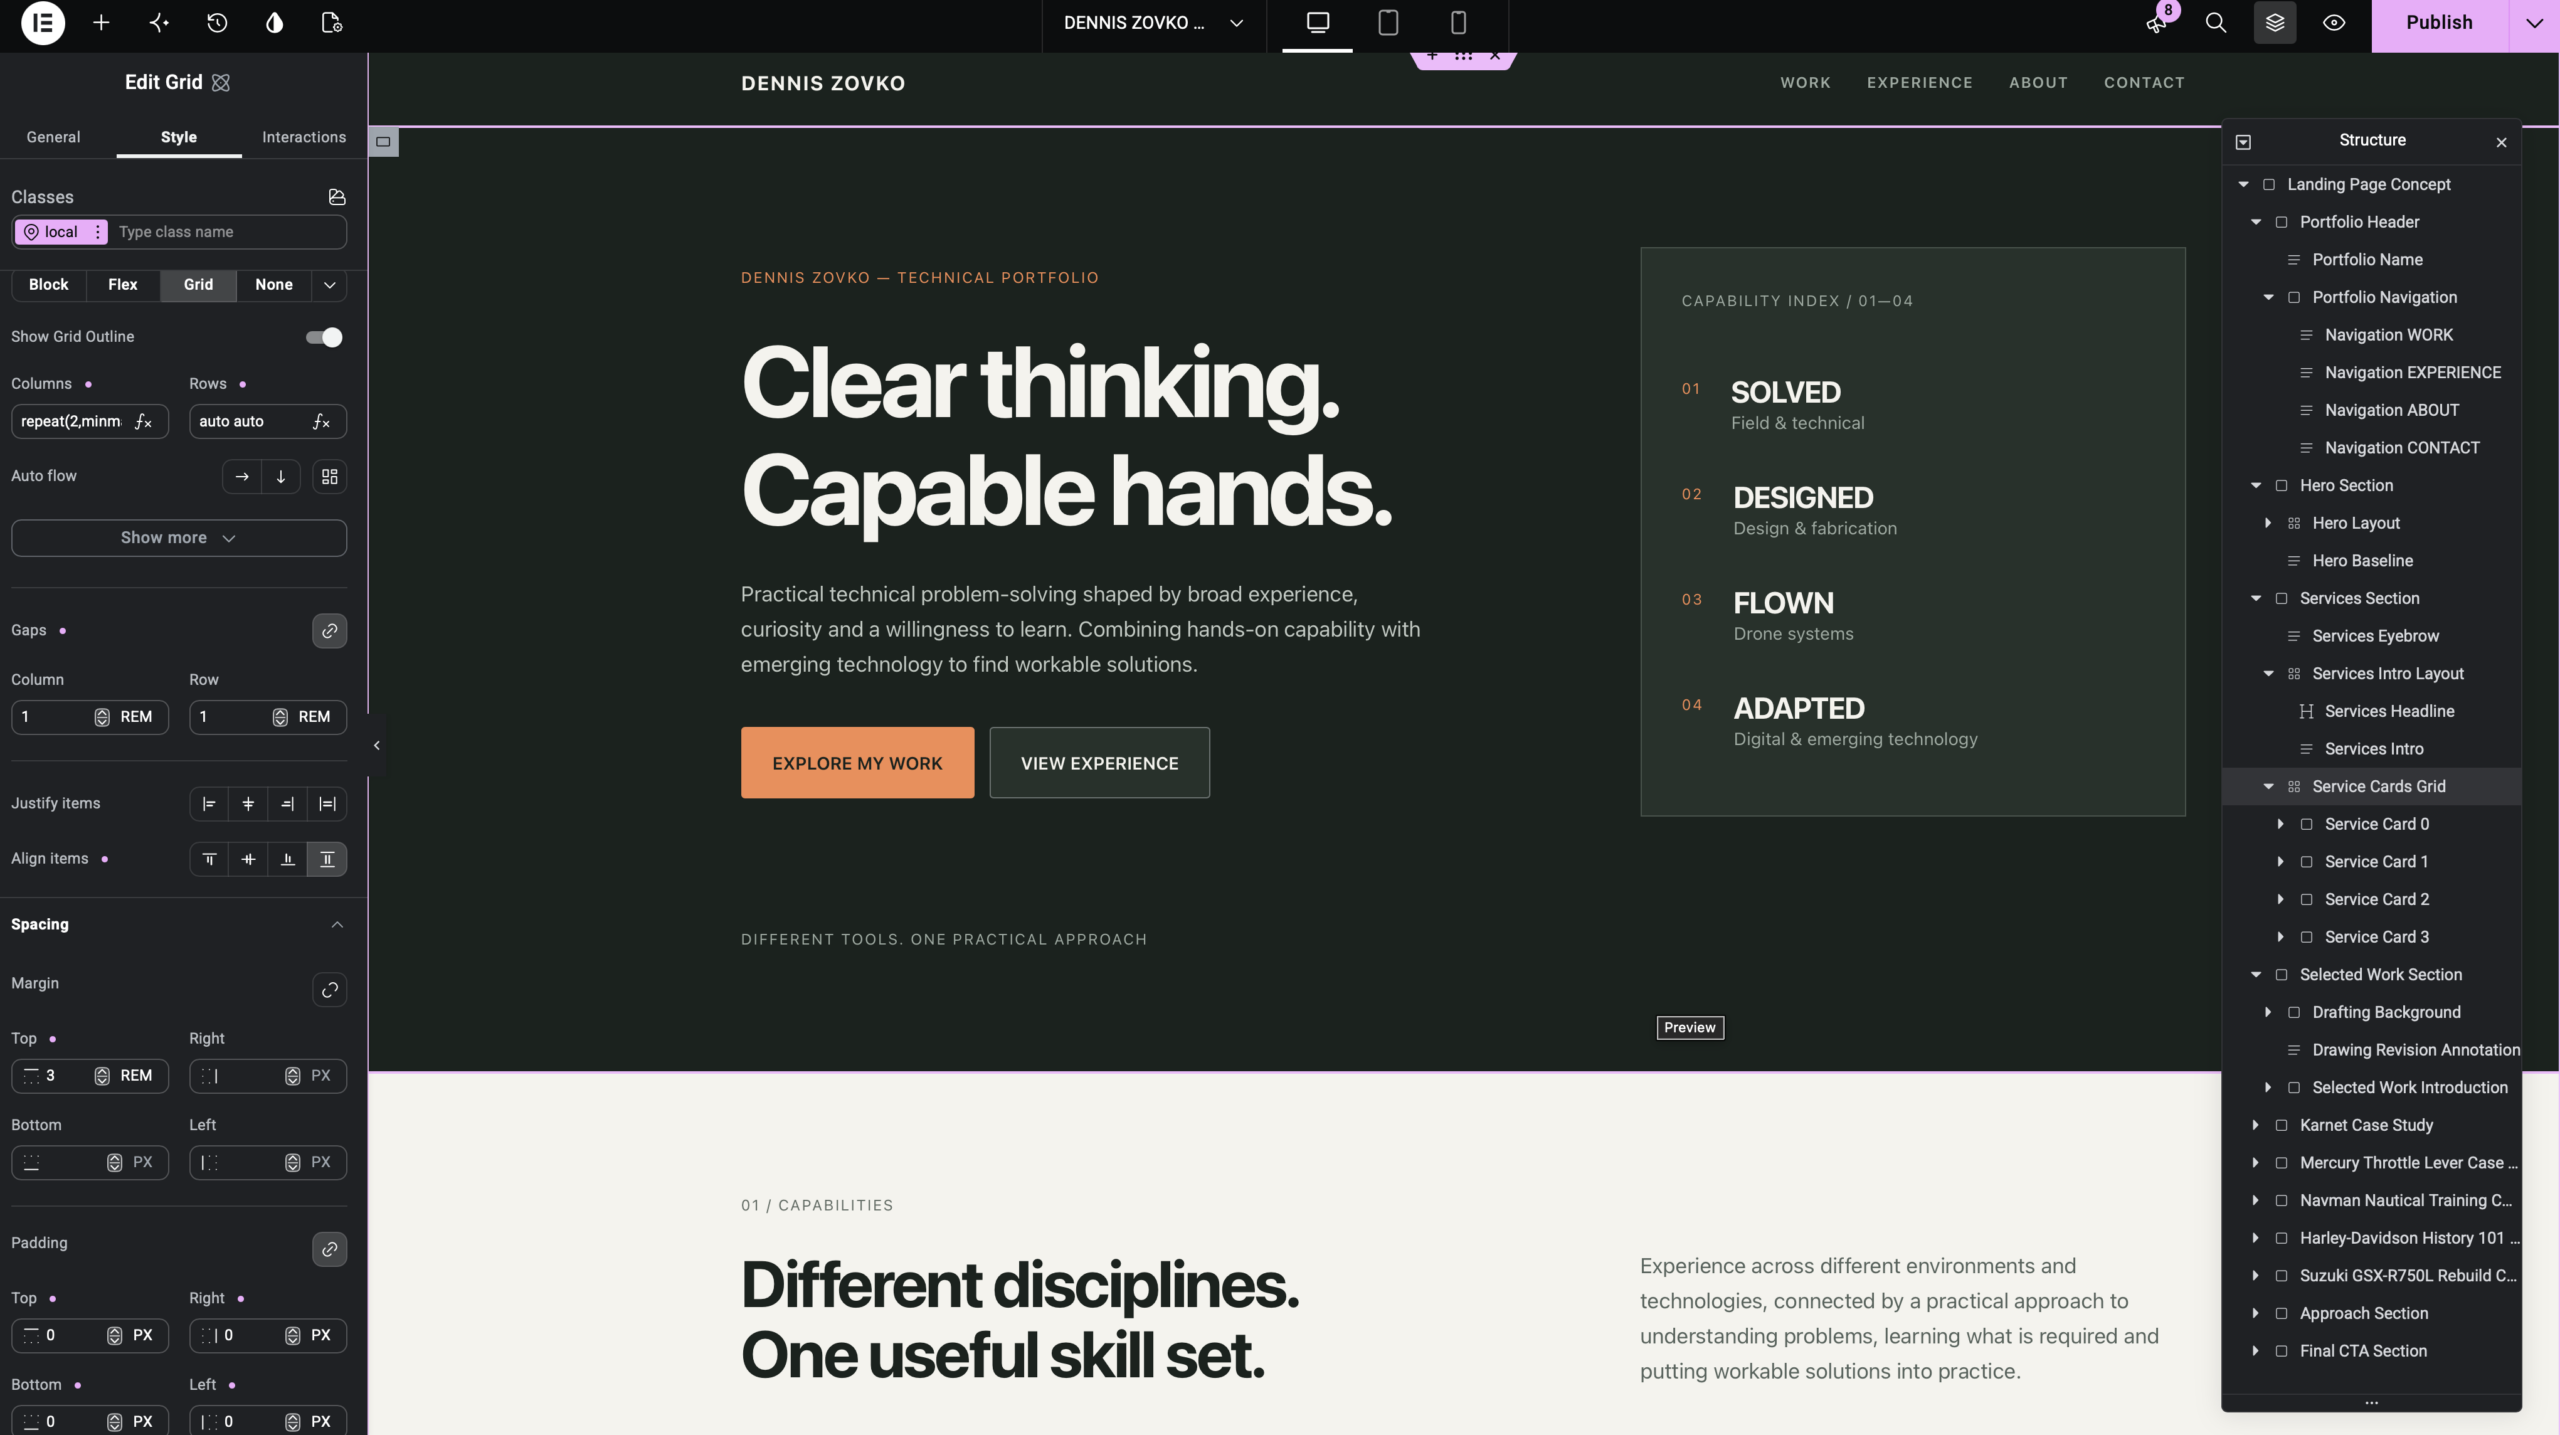
Design and structure in the same workspace.
The portfolio was developed directly in Elementor using Atomic elements, with visual design, responsive layout and page structure evolving together rather than being treated as separate stages.
Click to enlarge
ELEMENTOR / ATOMIC ELEMENTS / PAGE STRUCTURE
ORCHESTRATION
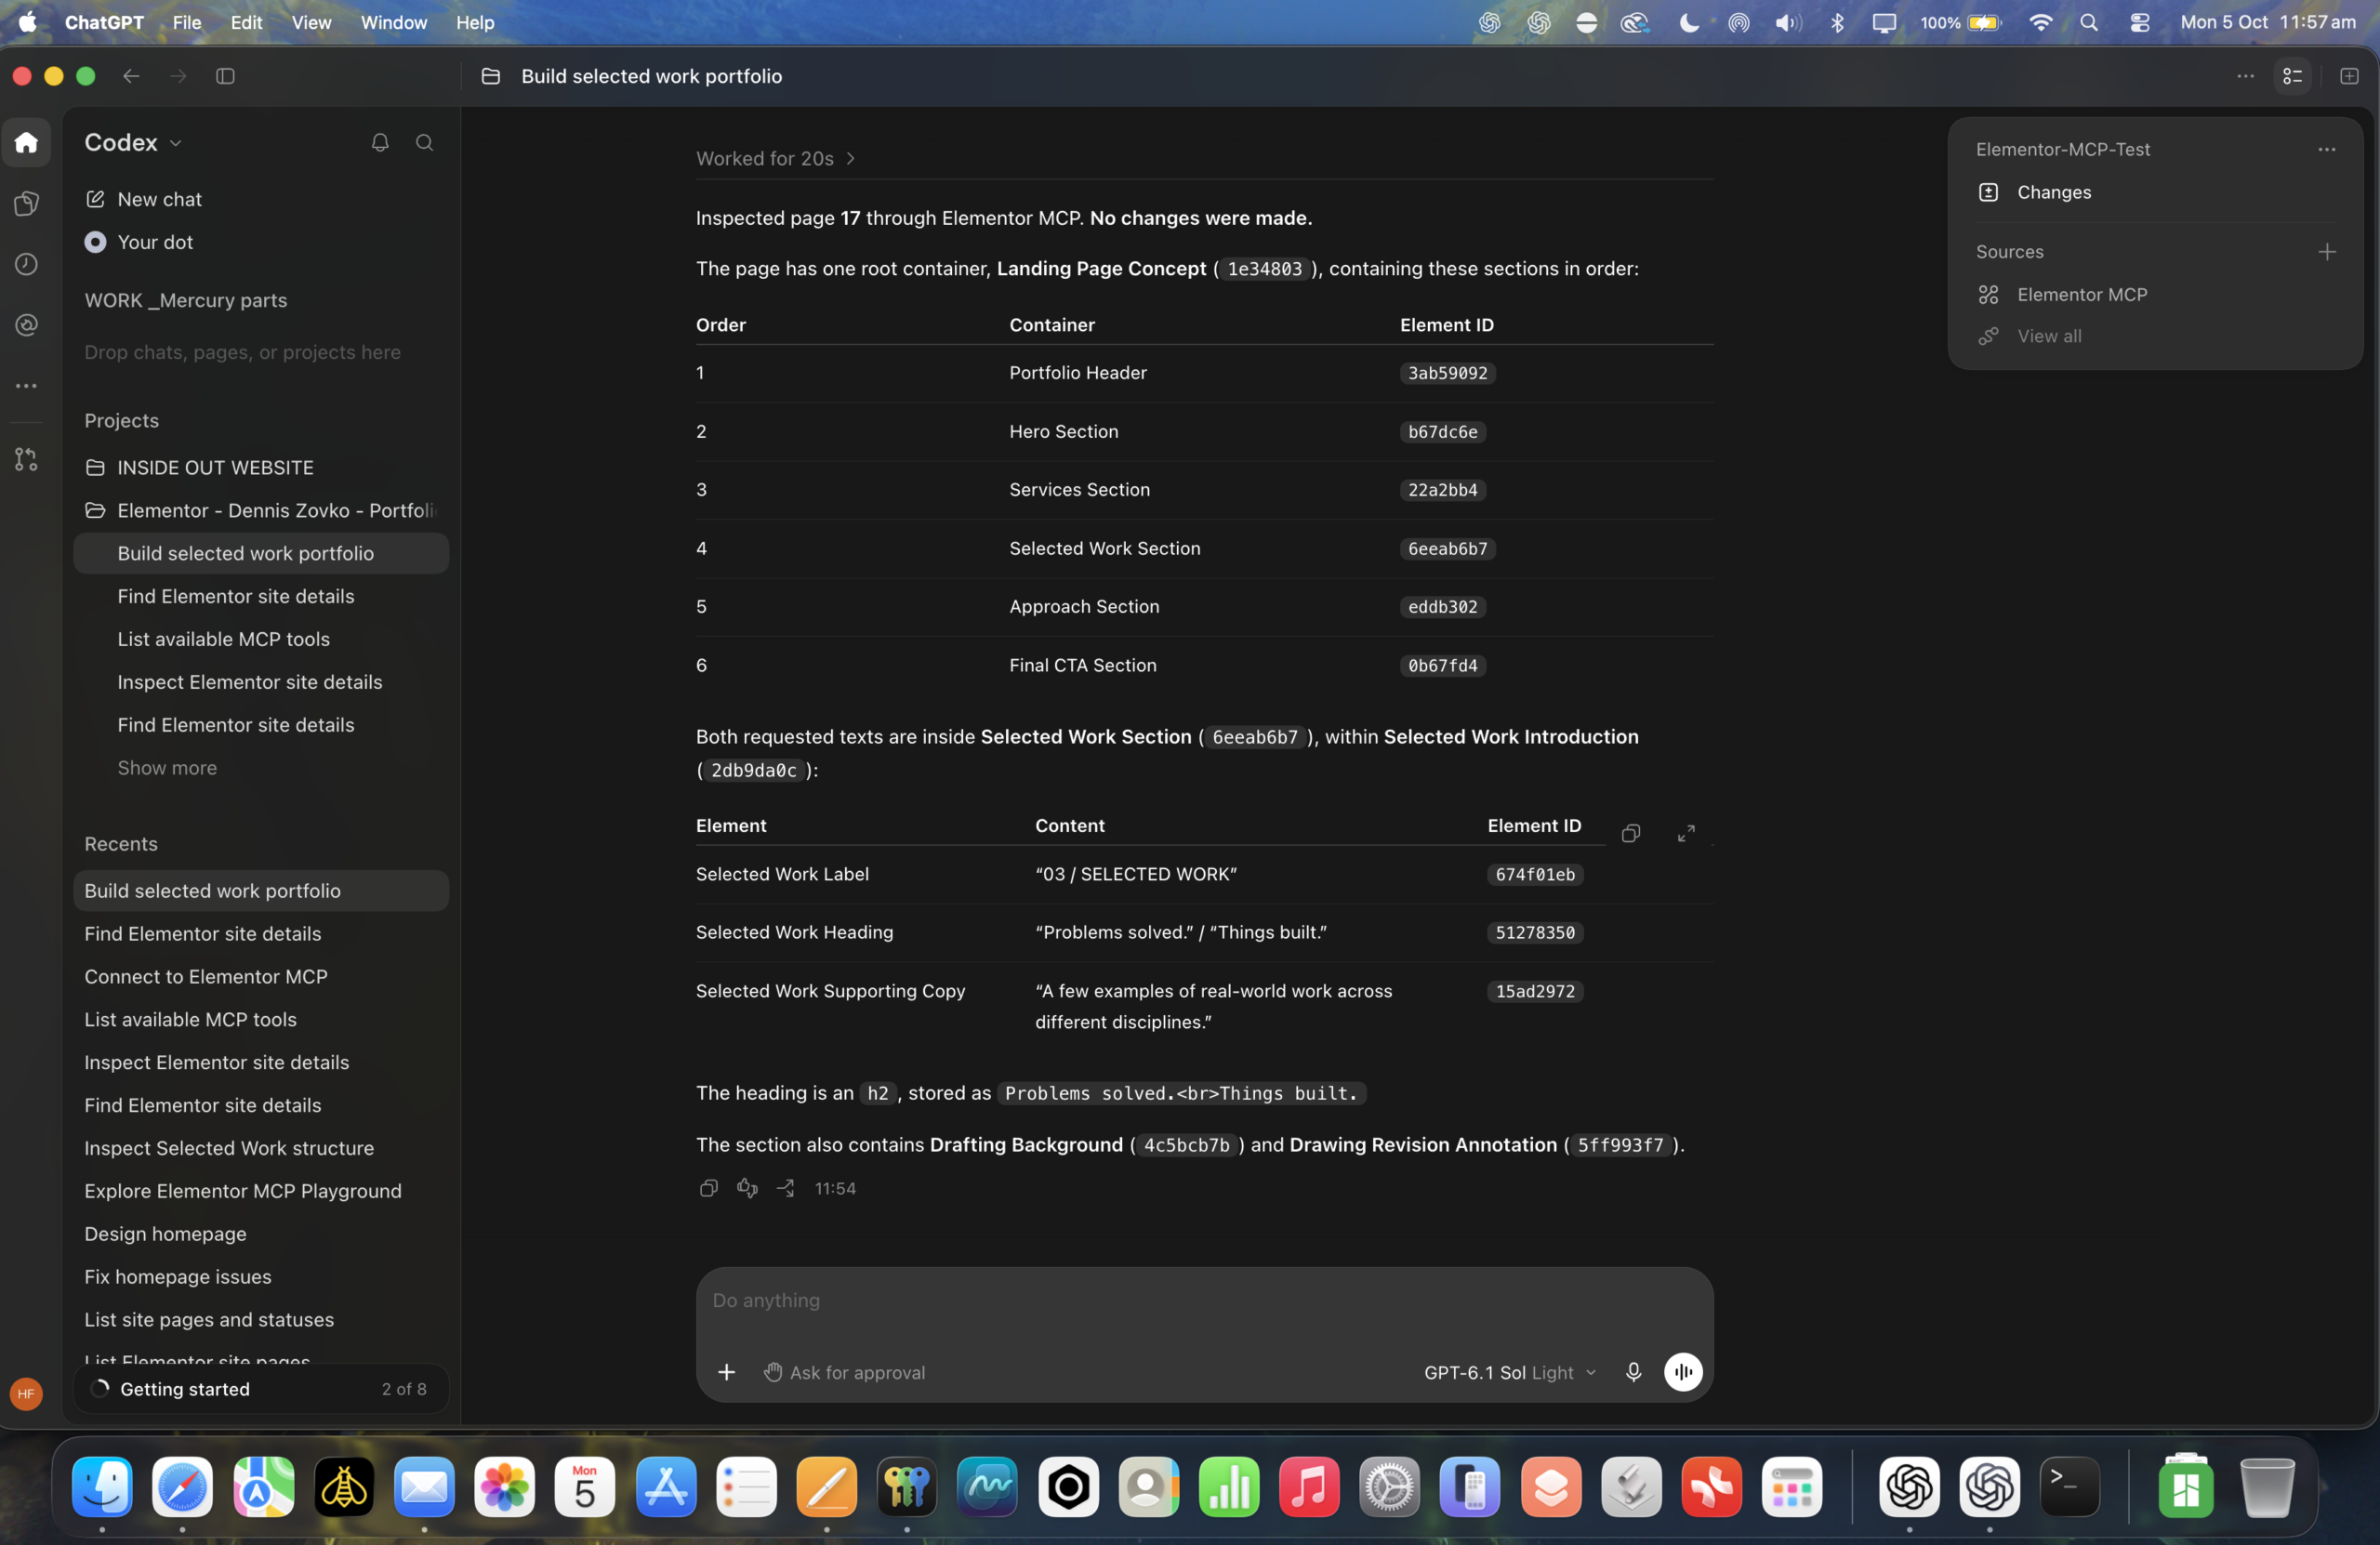
Working with the page through AI and MCP.
Codex and Elementor MCP were used to inspect the live page structure, identify individual elements and make controlled changes through natural-language instructions. Design judgement remained visual and iterative while the tools provided a new way to work directly with the underlying build.
Click to enlarge
CODEX / ELEMENTOR MCP / ELEMENT-LEVEL CONTROL
UNDER THE HOOD
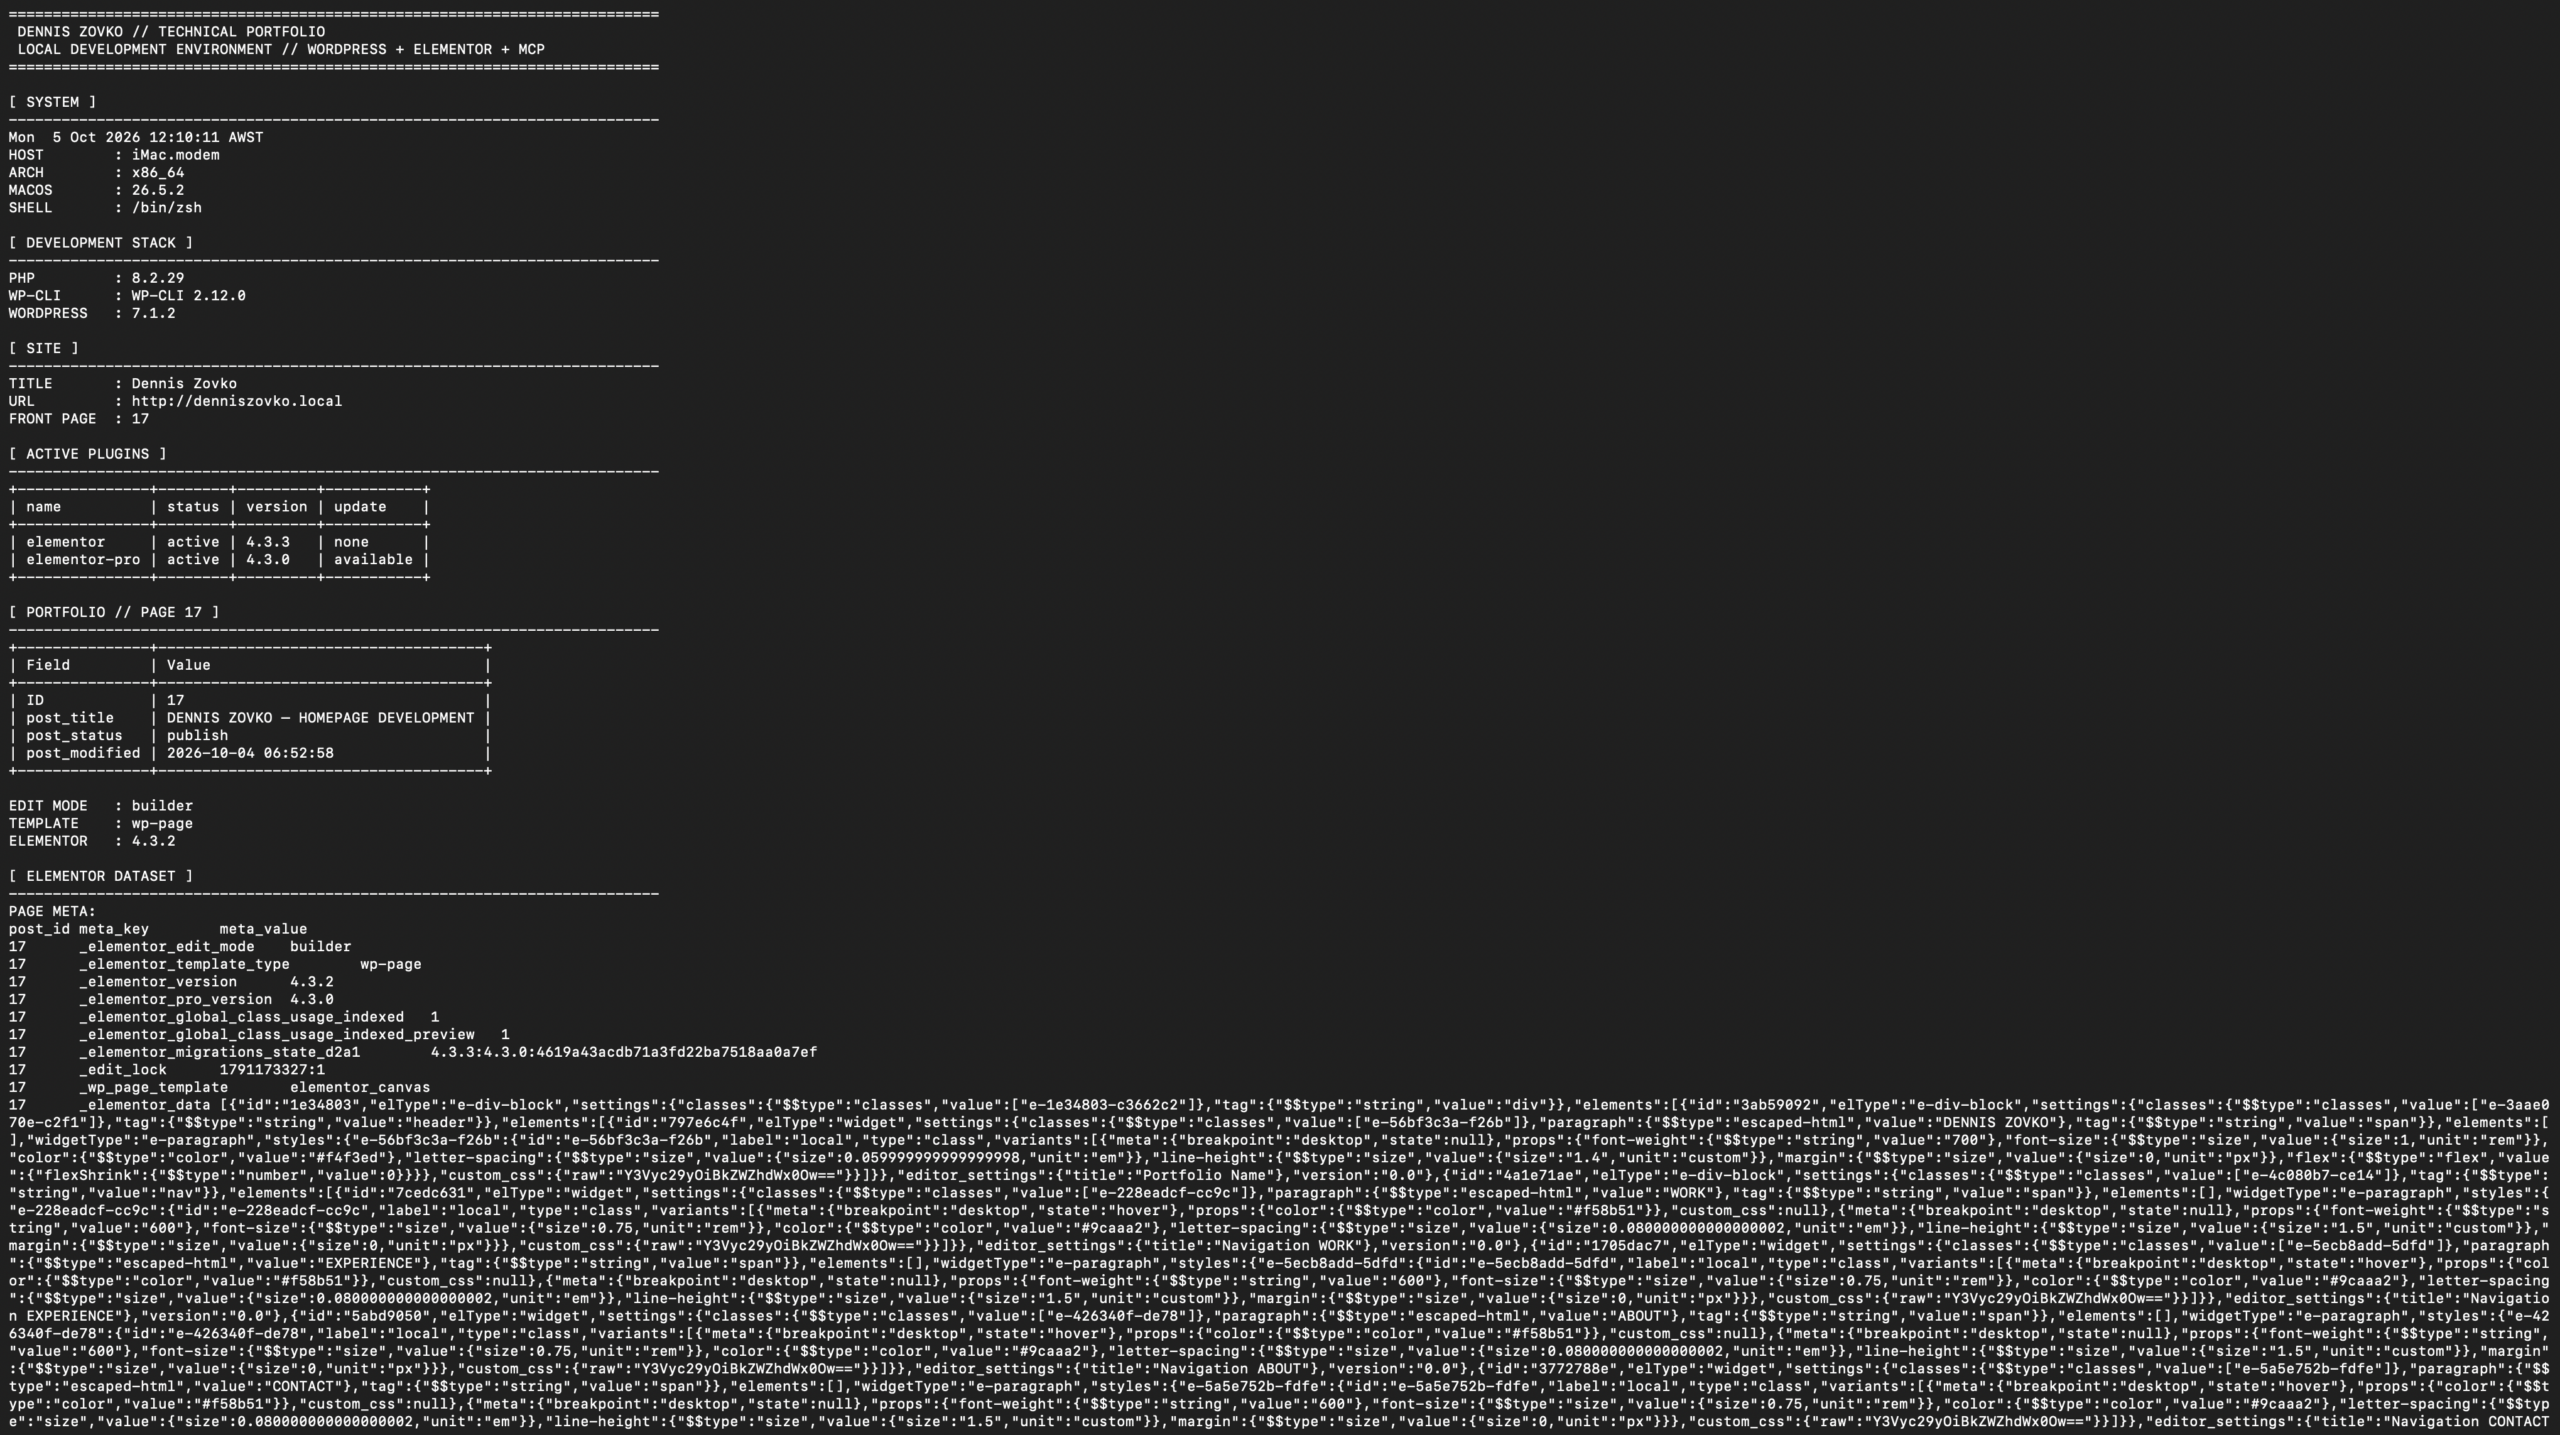
The interface is only one layer.
The local development environment provided access to WordPress, WP-CLI, Elementor data and the underlying page structure, making it possible to inspect what was happening beneath the visual editor when required.
Click to enlarge
LOCAL DEVELOPMENT / WORDPRESS / WP-CLI / ELEMENTOR DATA
RESULT
The site is the result.
This portfolio was designed, built and refined as part of the same process it documents — combining visual judgement, practical problem-solving and emerging tools to produce something real.
Click to enlarge
FINISHED PORTFOLIO / CAPABILITY SYSTEM
02 / HOW I WORK
Not every job
fits a category.
My experience hasn't followed a conventional career path. I've worked across technical installations, education, practical trades, fabrication and independent business.
What connects those experiences is an ability to enter unfamiliar environments, understand what needs to be achieved and develop a practical way forward.
I'm comfortable learning new systems, questioning established approaches and combining traditional skills with emerging technologies when they offer a better solution.
01
UNDERSTAND
Start with what needs to be achieved. Understand the problem, the environment and the constraints before deciding on a solution.
02
LEARN
Determine which tools, knowledge or technology the problem requires. Learn what is needed rather than being limited by a familiar way of doing things.
03
IMPLEMENT
Put the solution into practice, test it in the real world and adapt where necessary until it works as intended.
03 / LET’S TALK
Different experience.
Practical value.
My experience spans technical, practical and operational environments. I'm interested in opportunities where independent thinking, adaptability and practical problem-solving can make a useful contribution.
Whether it's technical fieldwork, project-based assignments or an unfamiliar challenge requiring a fresh approach, I'm always interested in a worthwhile conversation.
THE TOOLS MAY CHANGE.
THE APPROACH DOESN’T.